Methodology
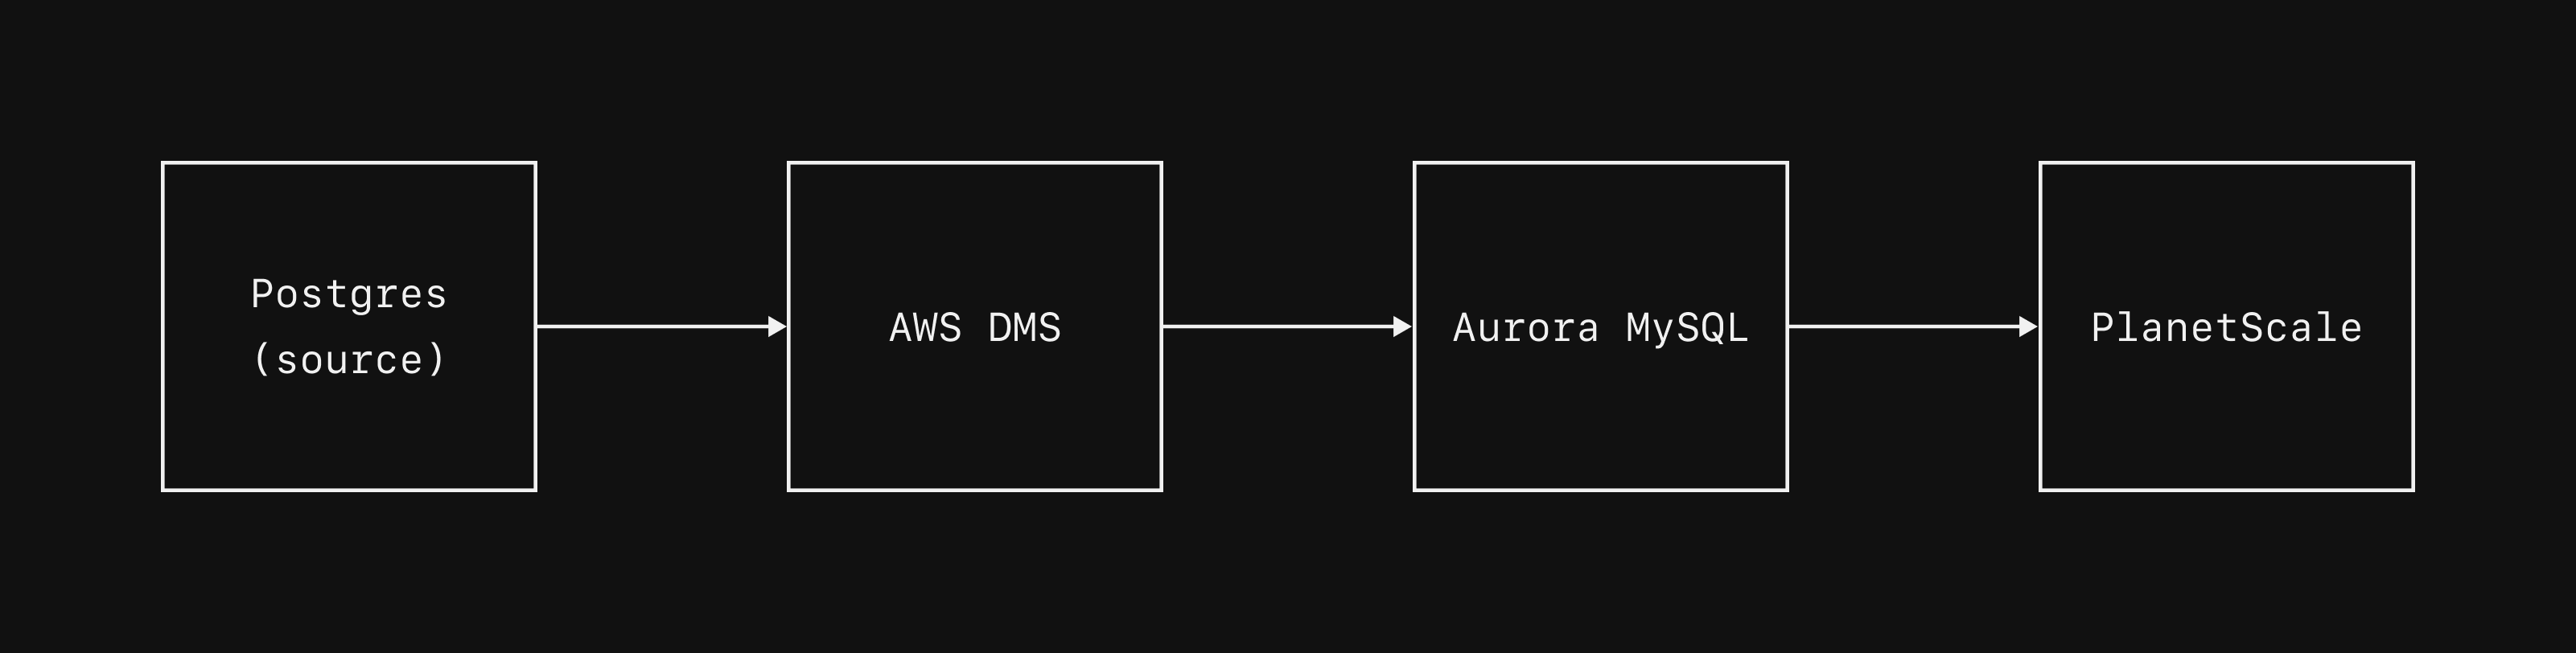
The scripts in this guide leverage AWS Database Migration Service to handle conversions between Postgres and MySQL types. It also creates a new Aurora MySQL database to use as a go-between for Postgres and PlanetScale. Even if you are migrating from a non-AWS Postgres provider, such as Neon or Supabase, you will still need an AWS account to perform the migration. When using this script, your data will take the following path:- Data flows from your Postgres source into DMS
- DMS does necessary type conversions and copies the data into the Aurora MySQL database
- Using the PlanetScale import tool, your data will flow from Aurora MySQL into your destination PlanetScale database
- After the initial copy, changes will continue to flow form Postgres, to Aurora MySQL, to PlanetScale so that your data stays in sync, even if the migration takes several hours or days.
Prerequisites
- An AWS account
- An empty PlanetScale database as the target
- The AWS CLI
Importing a database
1. Prepare Postgres for migration
Before beginning a migration to PlanetScale, you should ensure the following flags are set on your Postgres database.
Given the variety of Postgres options and versions, there may be additional flags that you will need to adjust to make the import work.
If you encounter errors when using the script below, it may be caused by other Postgres options not shown here.
You can either update your Postgres configuration based on the error you see, or contact support for additional assistance.
2. Create an EC2 instance
These scripts are designed to be run from an EC2 instance on the same account that you will authenticate into. Create one, and then log in to the instance. Ensure that both Postgres and MySQL are installed:3. Install the AWS CLI
The migration scripts we provide rely on AWS Database Migration Service. To use the scripts, you will need to download and install the AWS CLI. You will also need to authenticate into the AWS account that you would like to run the migration from. This step is necessary, even if you are importing from a non-AWS Postgres provider. Go ahead and download and install the AWS CLI on the EC2 instance you created in the last step. For example, on Ubuntu, you would run:4. Authenticate into AWS
After installing the CLI, you must authenticate into the AWS account that you intend to run the import scripts in. There are several ways to authenticate. You can find instructions in the AWS documentation. We recommend you authenticate with short-term credentials. The authenticated account will need permissions to both create and modify DMS resources, RDS / Aurora databases, security groups, and parameter groups5. Prepare the import
Check out the migration-scripts repository, and navigate to thepostgres-mysql-planetscale directory.
- Creates a DMS source using the Postgres credentials you provide
- Creates a new Aurora MySQL database and sets it as the target for the DMS import
- Creates a DMS import instance (a server to handle the migration)
- Sets up rules for how to handle the migration
prepare.sh script.
You will need to provide this with a unique identifier for this import, as well as the connection credentials for the source Postgres database.
If you are importing from Supabase, the scripts will not work with a transaction pooler or session pooler connection.
You must use a direct connection over ipv4.
In order to use this, you must be on the pro plan or greater, and pay for the ipv4 connection upgrade.
After doing so, use the direct connection credentials and host when using
import.sh.If you are importing from Neon, You must use --tls mode when importing from Neon.
This sets SSL_MODE="require" on the connection, a necessity for Neon.PGtoPSImport01.
The variables prefixed with PG_ are for the Postgres source.
Running the script like this will give you occasional log messages indicating which phase of the import process it is at.
If you want full debug mode, including each command the script executes, add the --debug flag:
If your database is on a PlanetScale cloud or managed plan, you will need to manually provide your IP addresses.
For this, use
--ips "manual" and then give the script a comma-separated list of IPs as instructed by the script.6. Copy your schema
We have configured these scripts so that they do not automatically copy the schema from Postgres to MySQL. This is intentional, as DMS sometimes does not make good choices for how to convert Postgres types to MySQL. Therefore, we leave it up to you to copy the schema before we begin the migration viaimport.sh.
There are several ways you can do this, but one option is to use pg_dump to get your schema, convert to MySQL types / syntax, the apply it to the MySQL target.
First, you’d run a pg_dump command:
schema.sql.
Remove all excessive lines from the dump, and update all column types to use ones supported by MySQL.
Finally, apply this schema to a new database in the MySQL target created by the prepare.sh script:
7. Migration from Postgres to Aurora MySQL
Next, we need to runstart.sh.
This initiates the migration between the Postgres source and the Aurora MySQL target.
To start, just run:
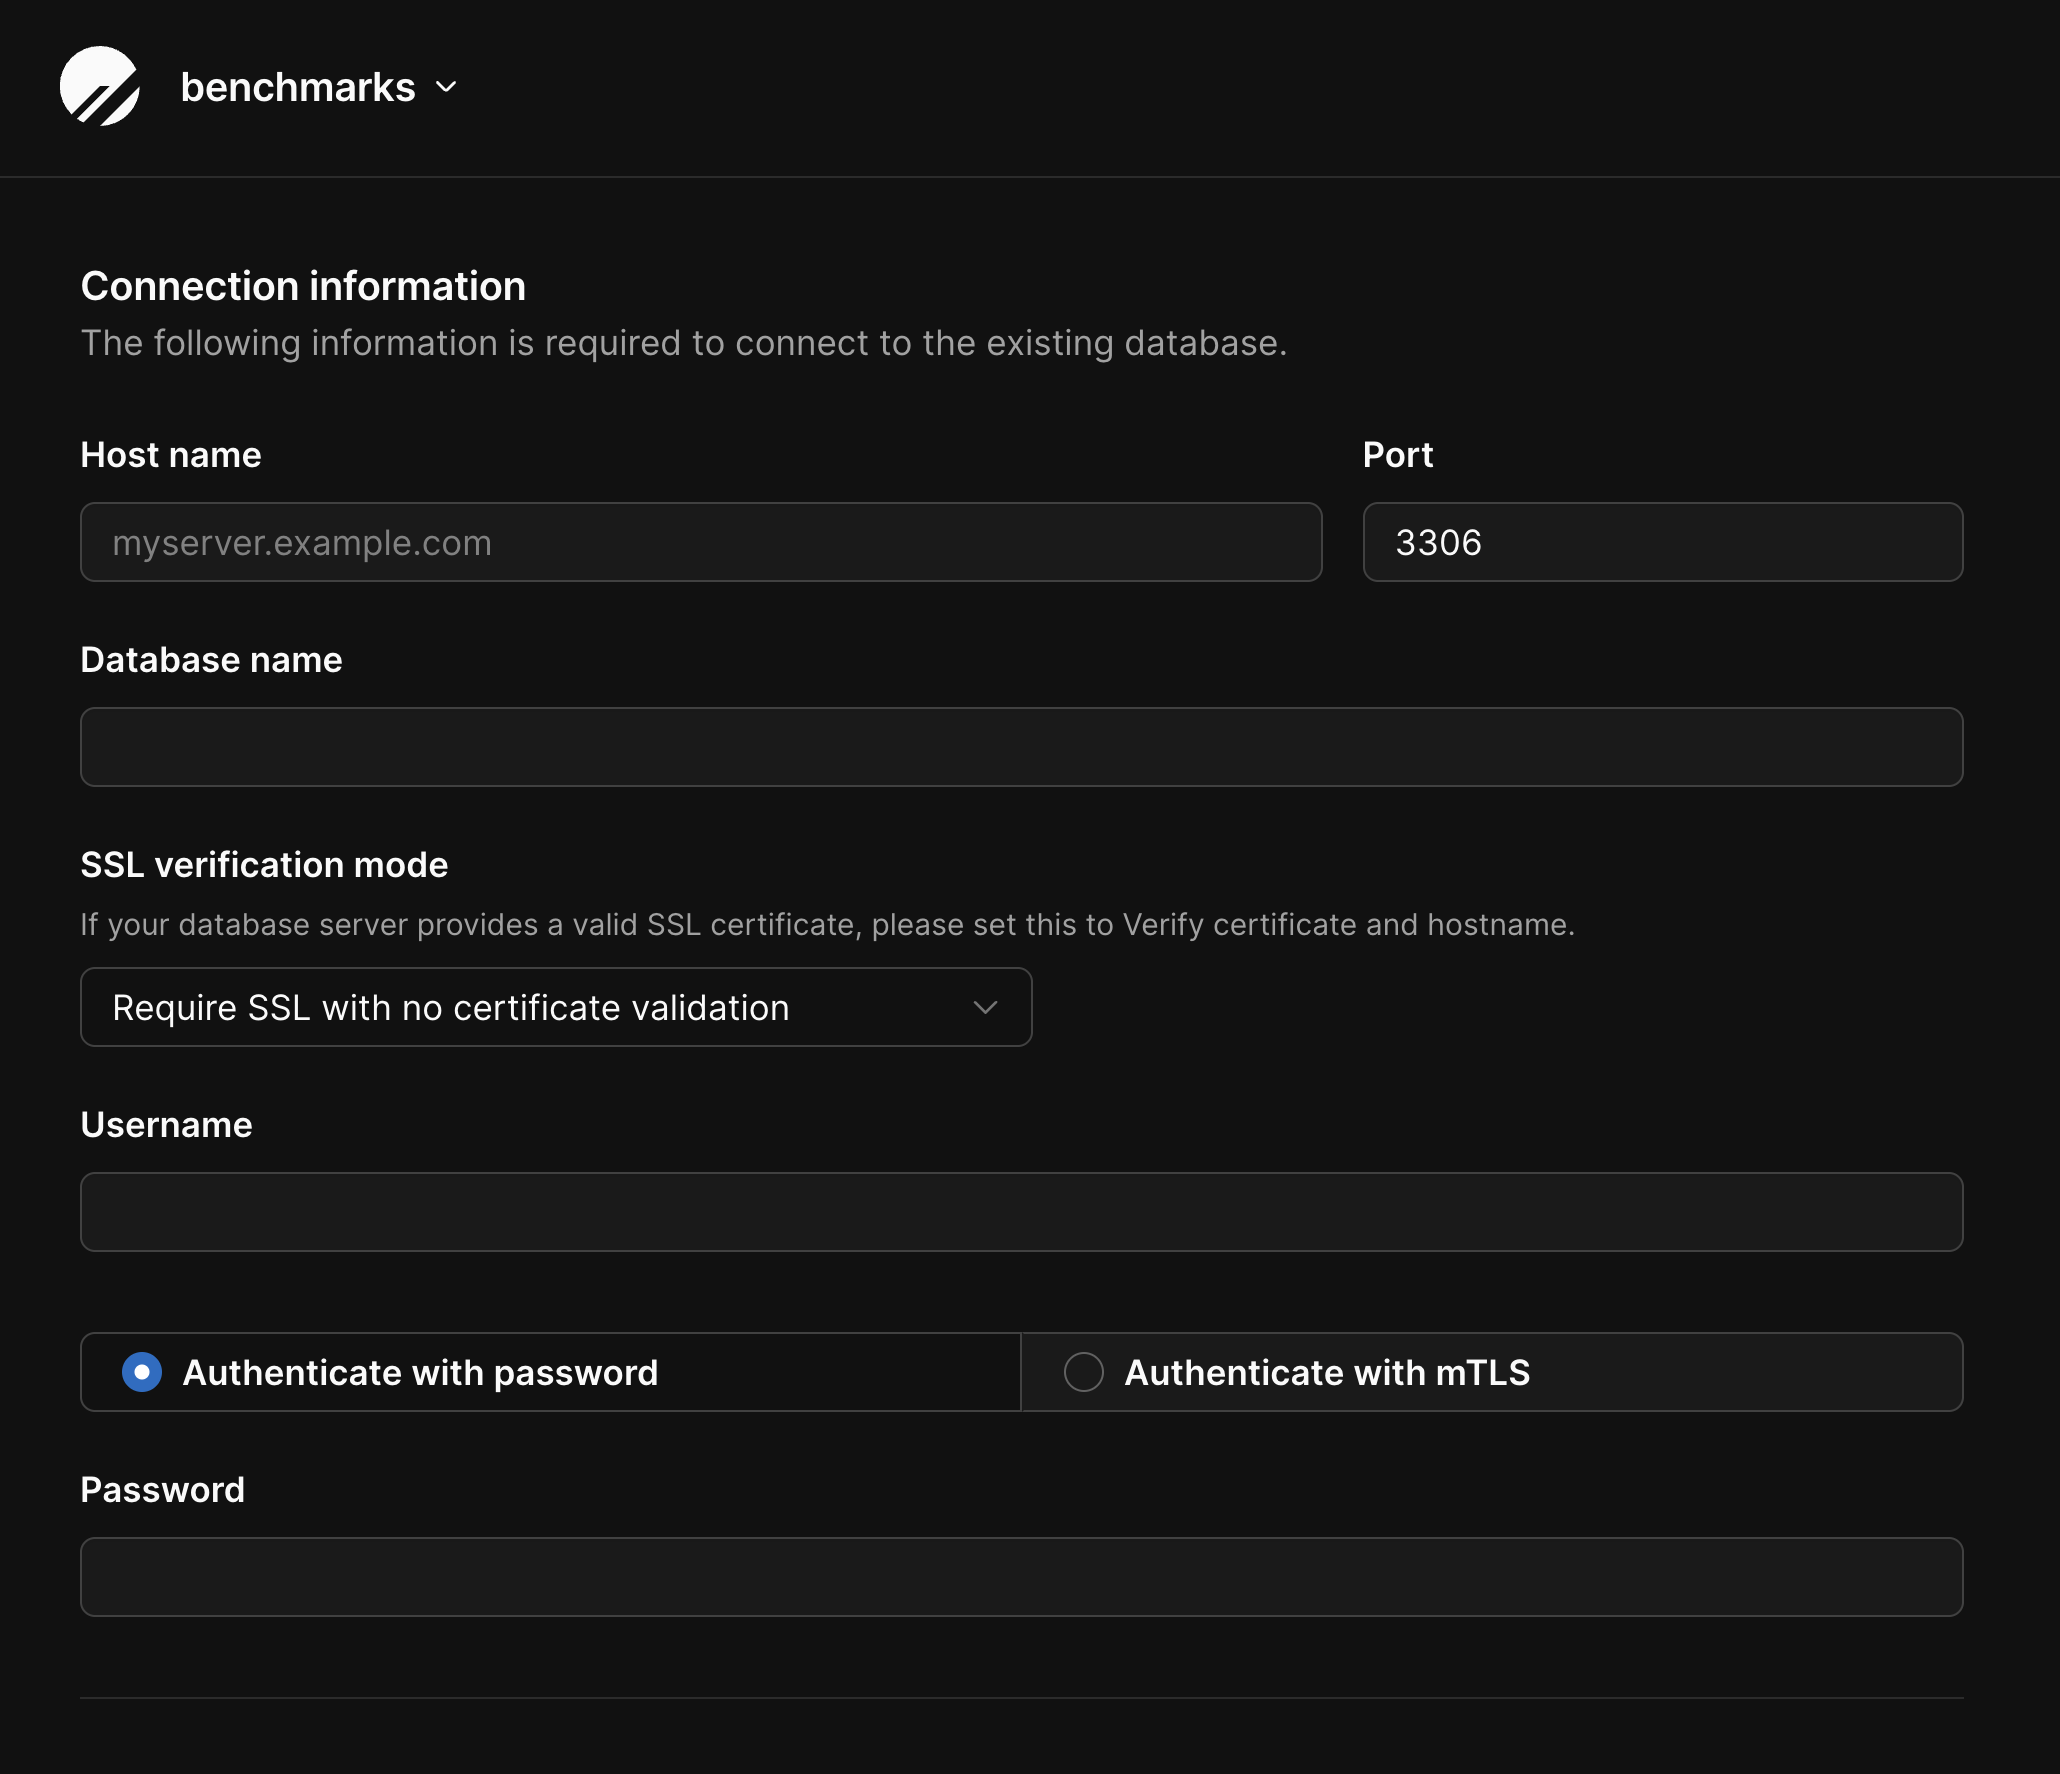
8. The PlanetScale import tool
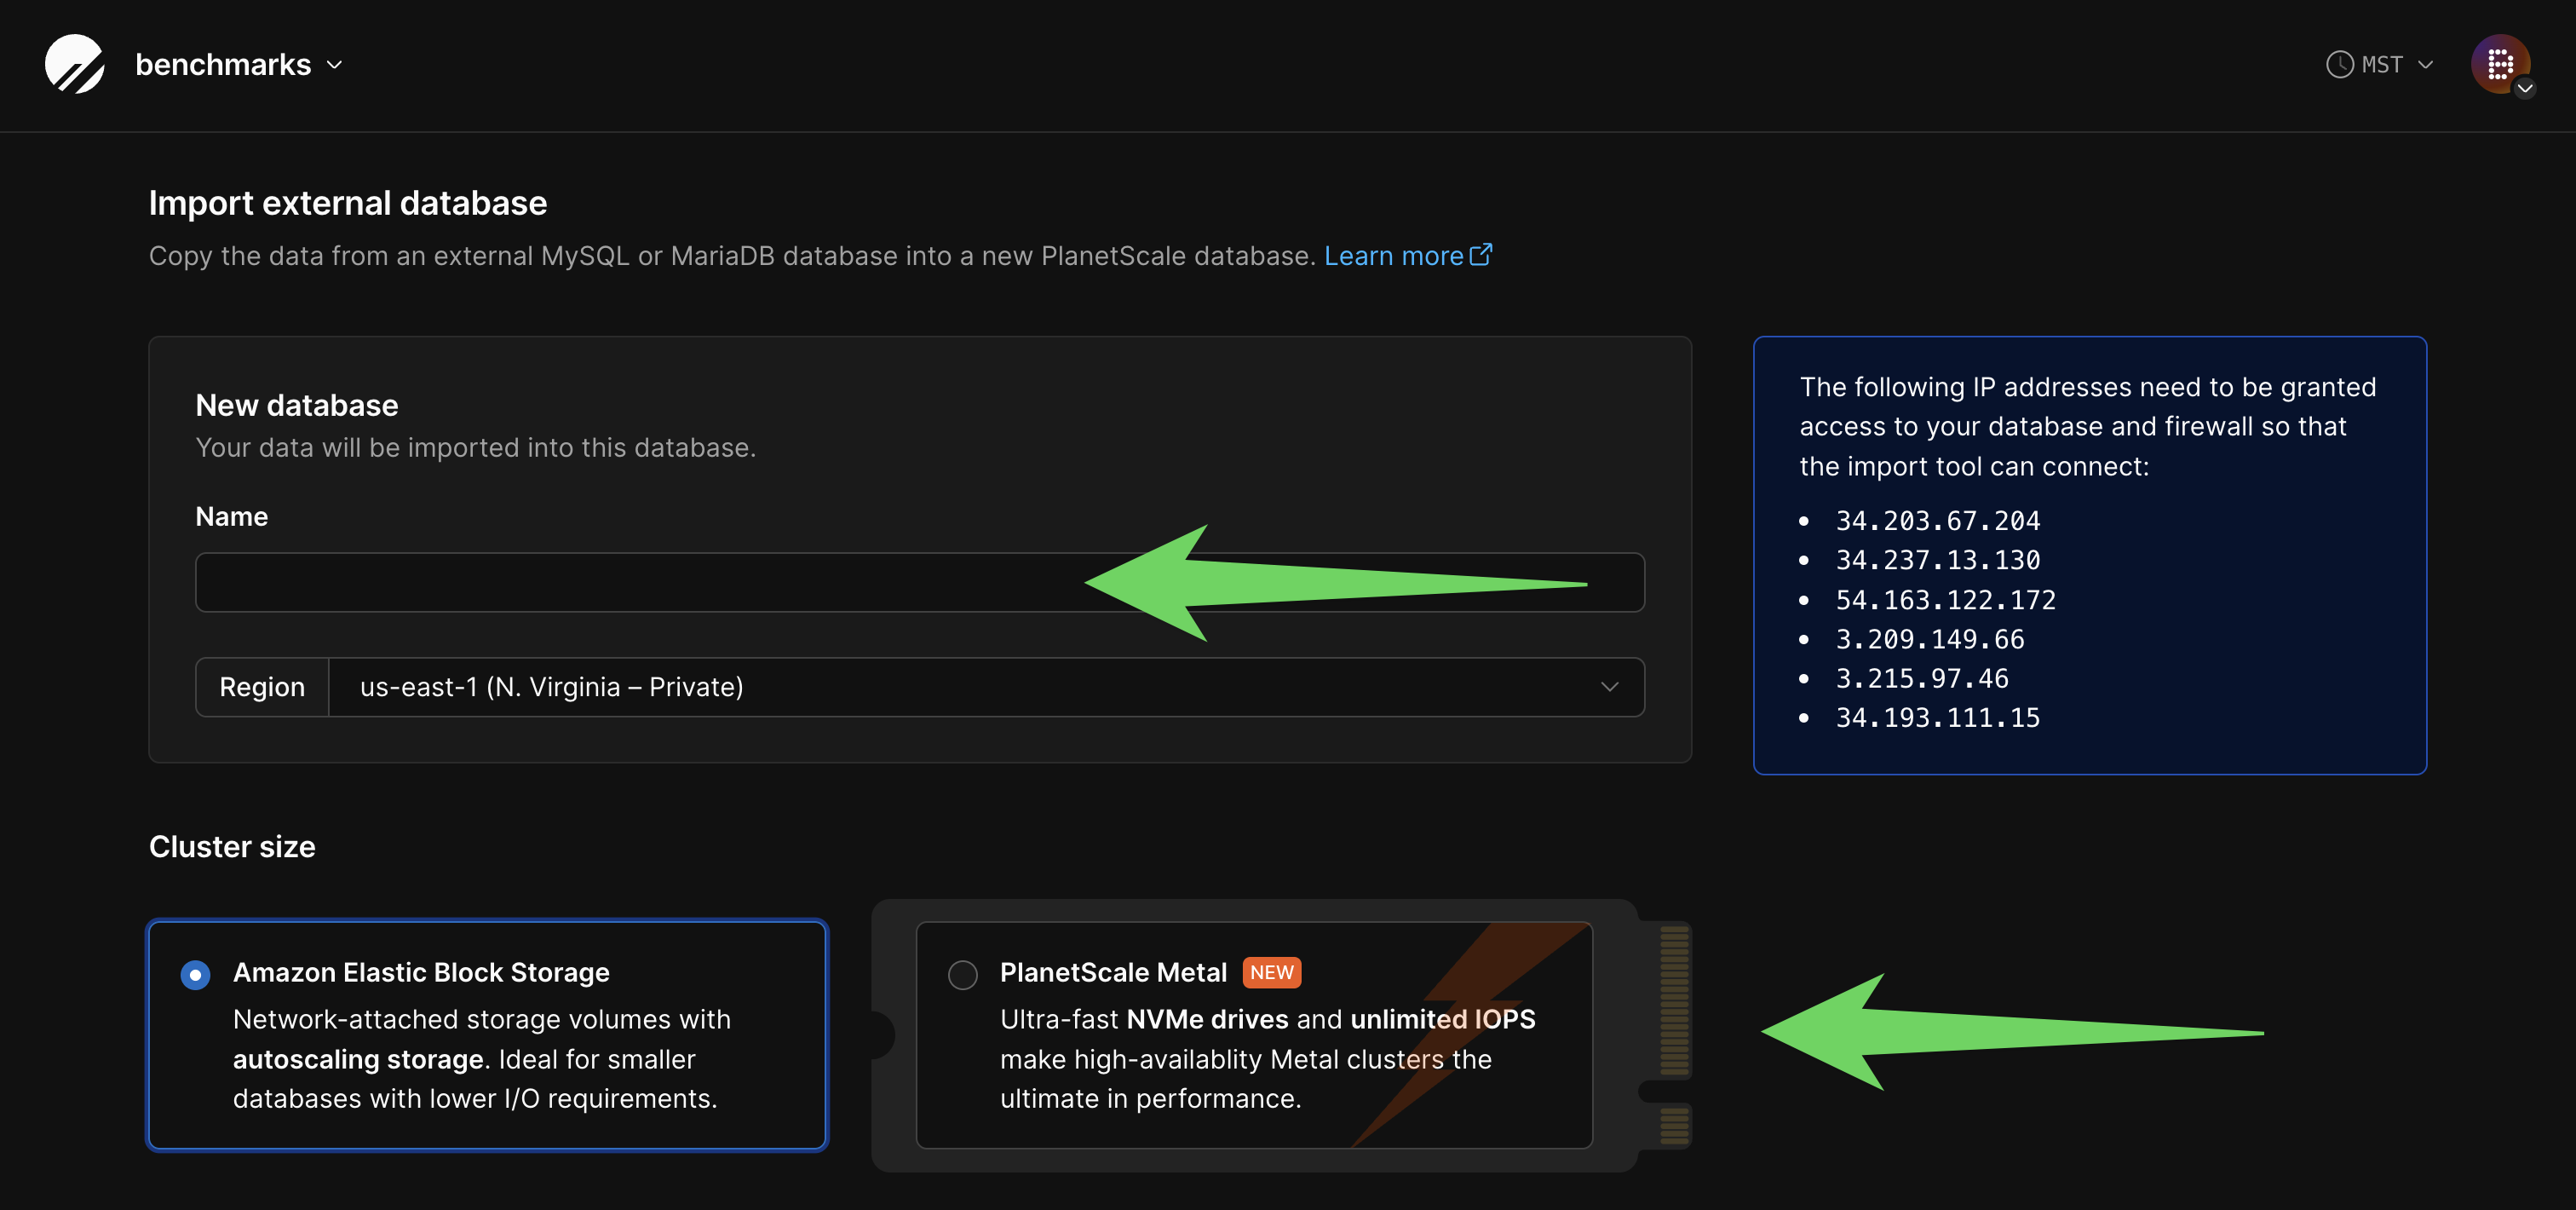
To get your data into PlanetScale, we will use the import tool to migrate the data from the Aurora MySQL instance created in the previous steps into PlanetScale. Log into PlanetScale, select your organization, click “New database”, and then “Import database.”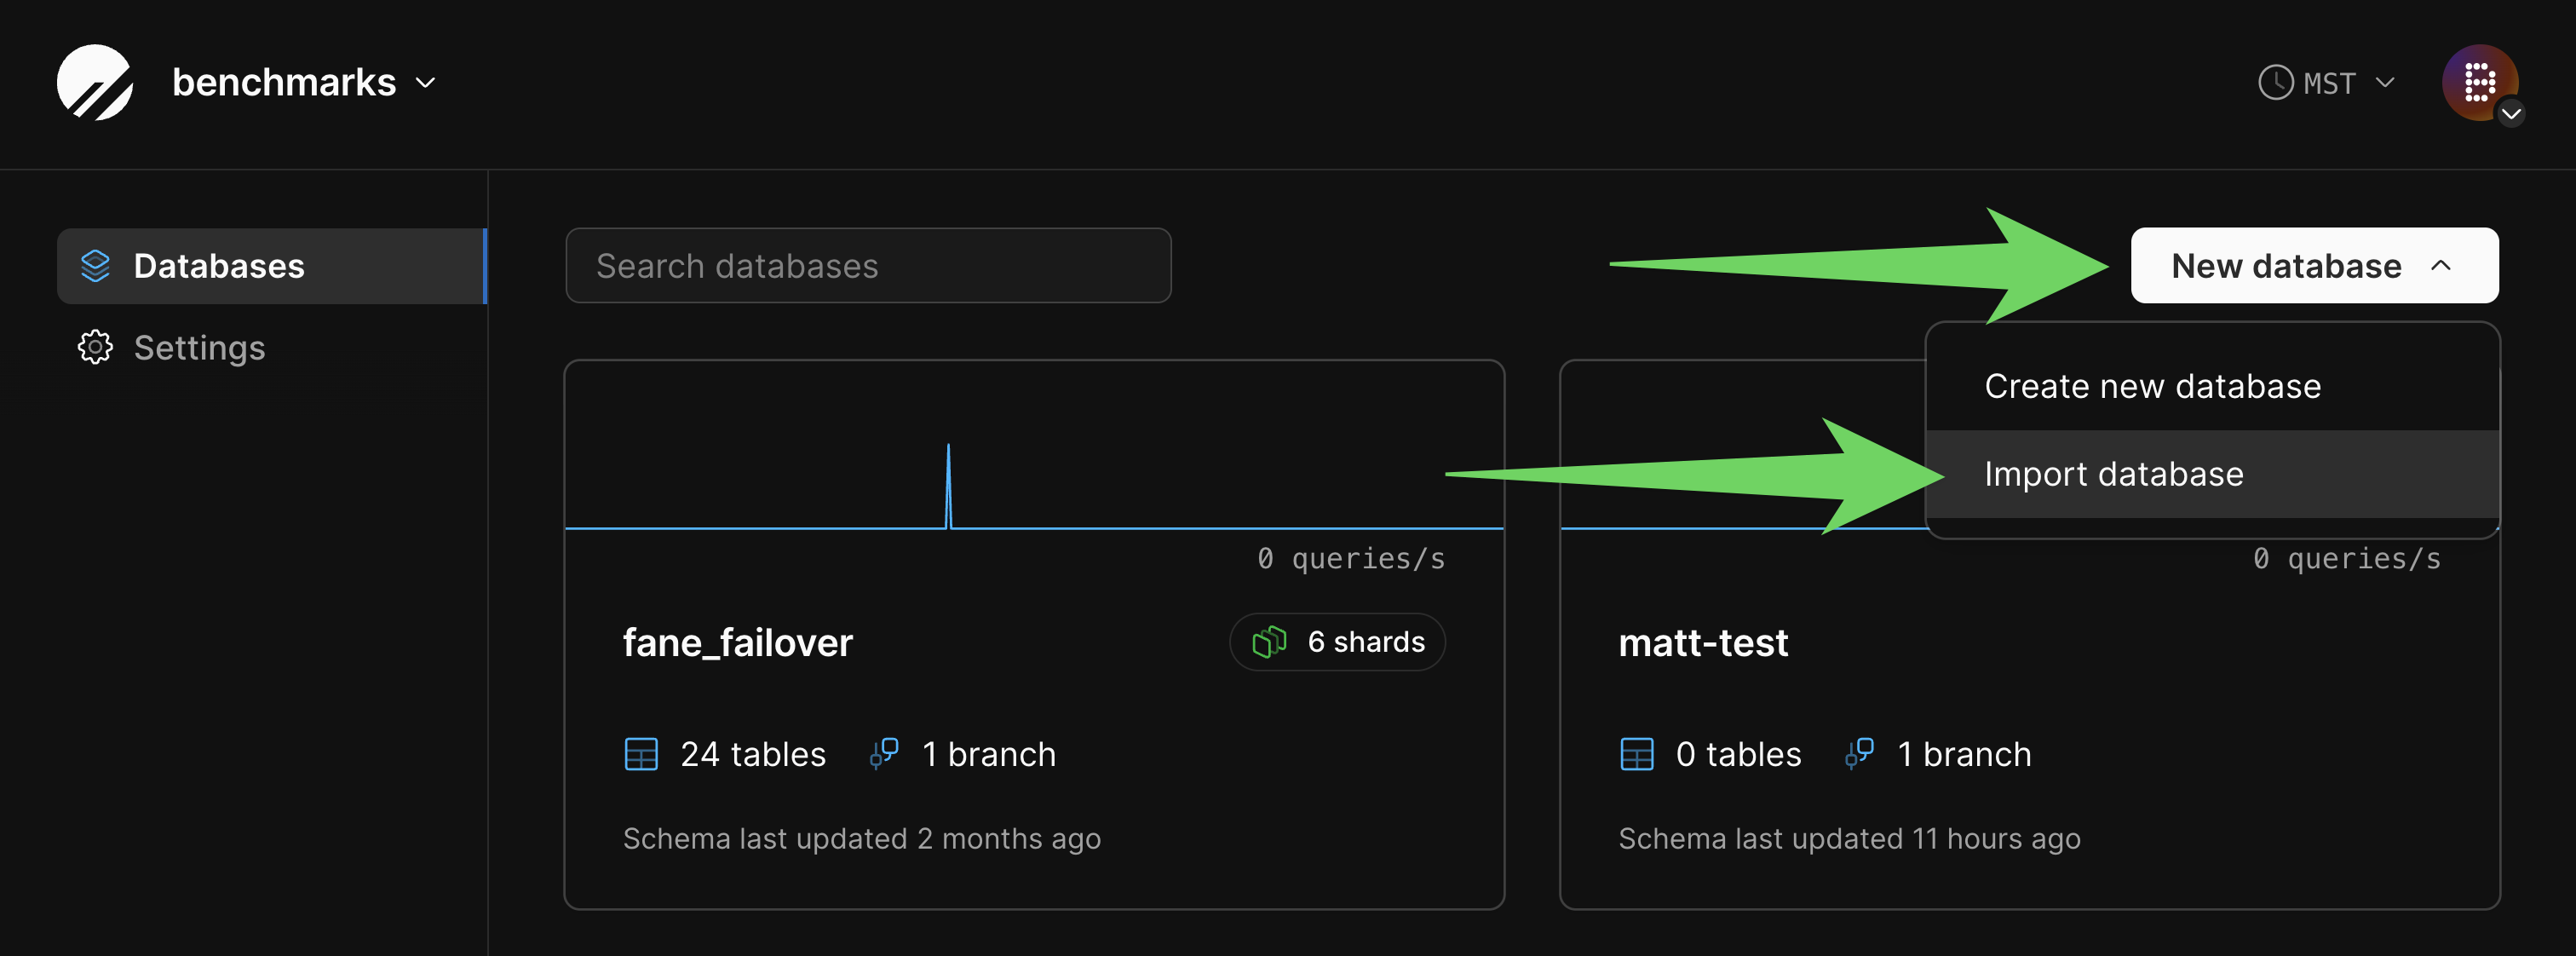
migration_user.
9. Complete the import
This full import flow not only copies data, but does continuous replication of traffic from Postgres, to DMS, to Aurora MySQL, and finally to PlanetScale. Replication between these continues until you stop the DMS task usingcleanup.sh and complete the PlanetScale import flow.
It is up to you to determine how you want to cut over your application to use PlanetScale as your primary database instead of the old Postgres source.
Before doing this, you should ensure all of your queries and/or your ORM are updated to work properly with PlanetScale.
We also recommend doing some performance testing, and adding indexes if you encounter slow queries.
10. Clean up import
After you have switched all of your traffic over to PlanetScale and are comfortable wrapping up the import, you can clean up the resources that the script created. This includes the DMS migration instance, the Aurora database, and the DMS source / targets. To clean up the resources, you can run:Resolving errors
We have designed these scripts to run as generally as possible and have tested them on a variety of platforms. Even so, you may encounter errors for a variety of reasons. In some cases, theaws command that fails will produce a useful error message in the script output, which you can take action on as needed.
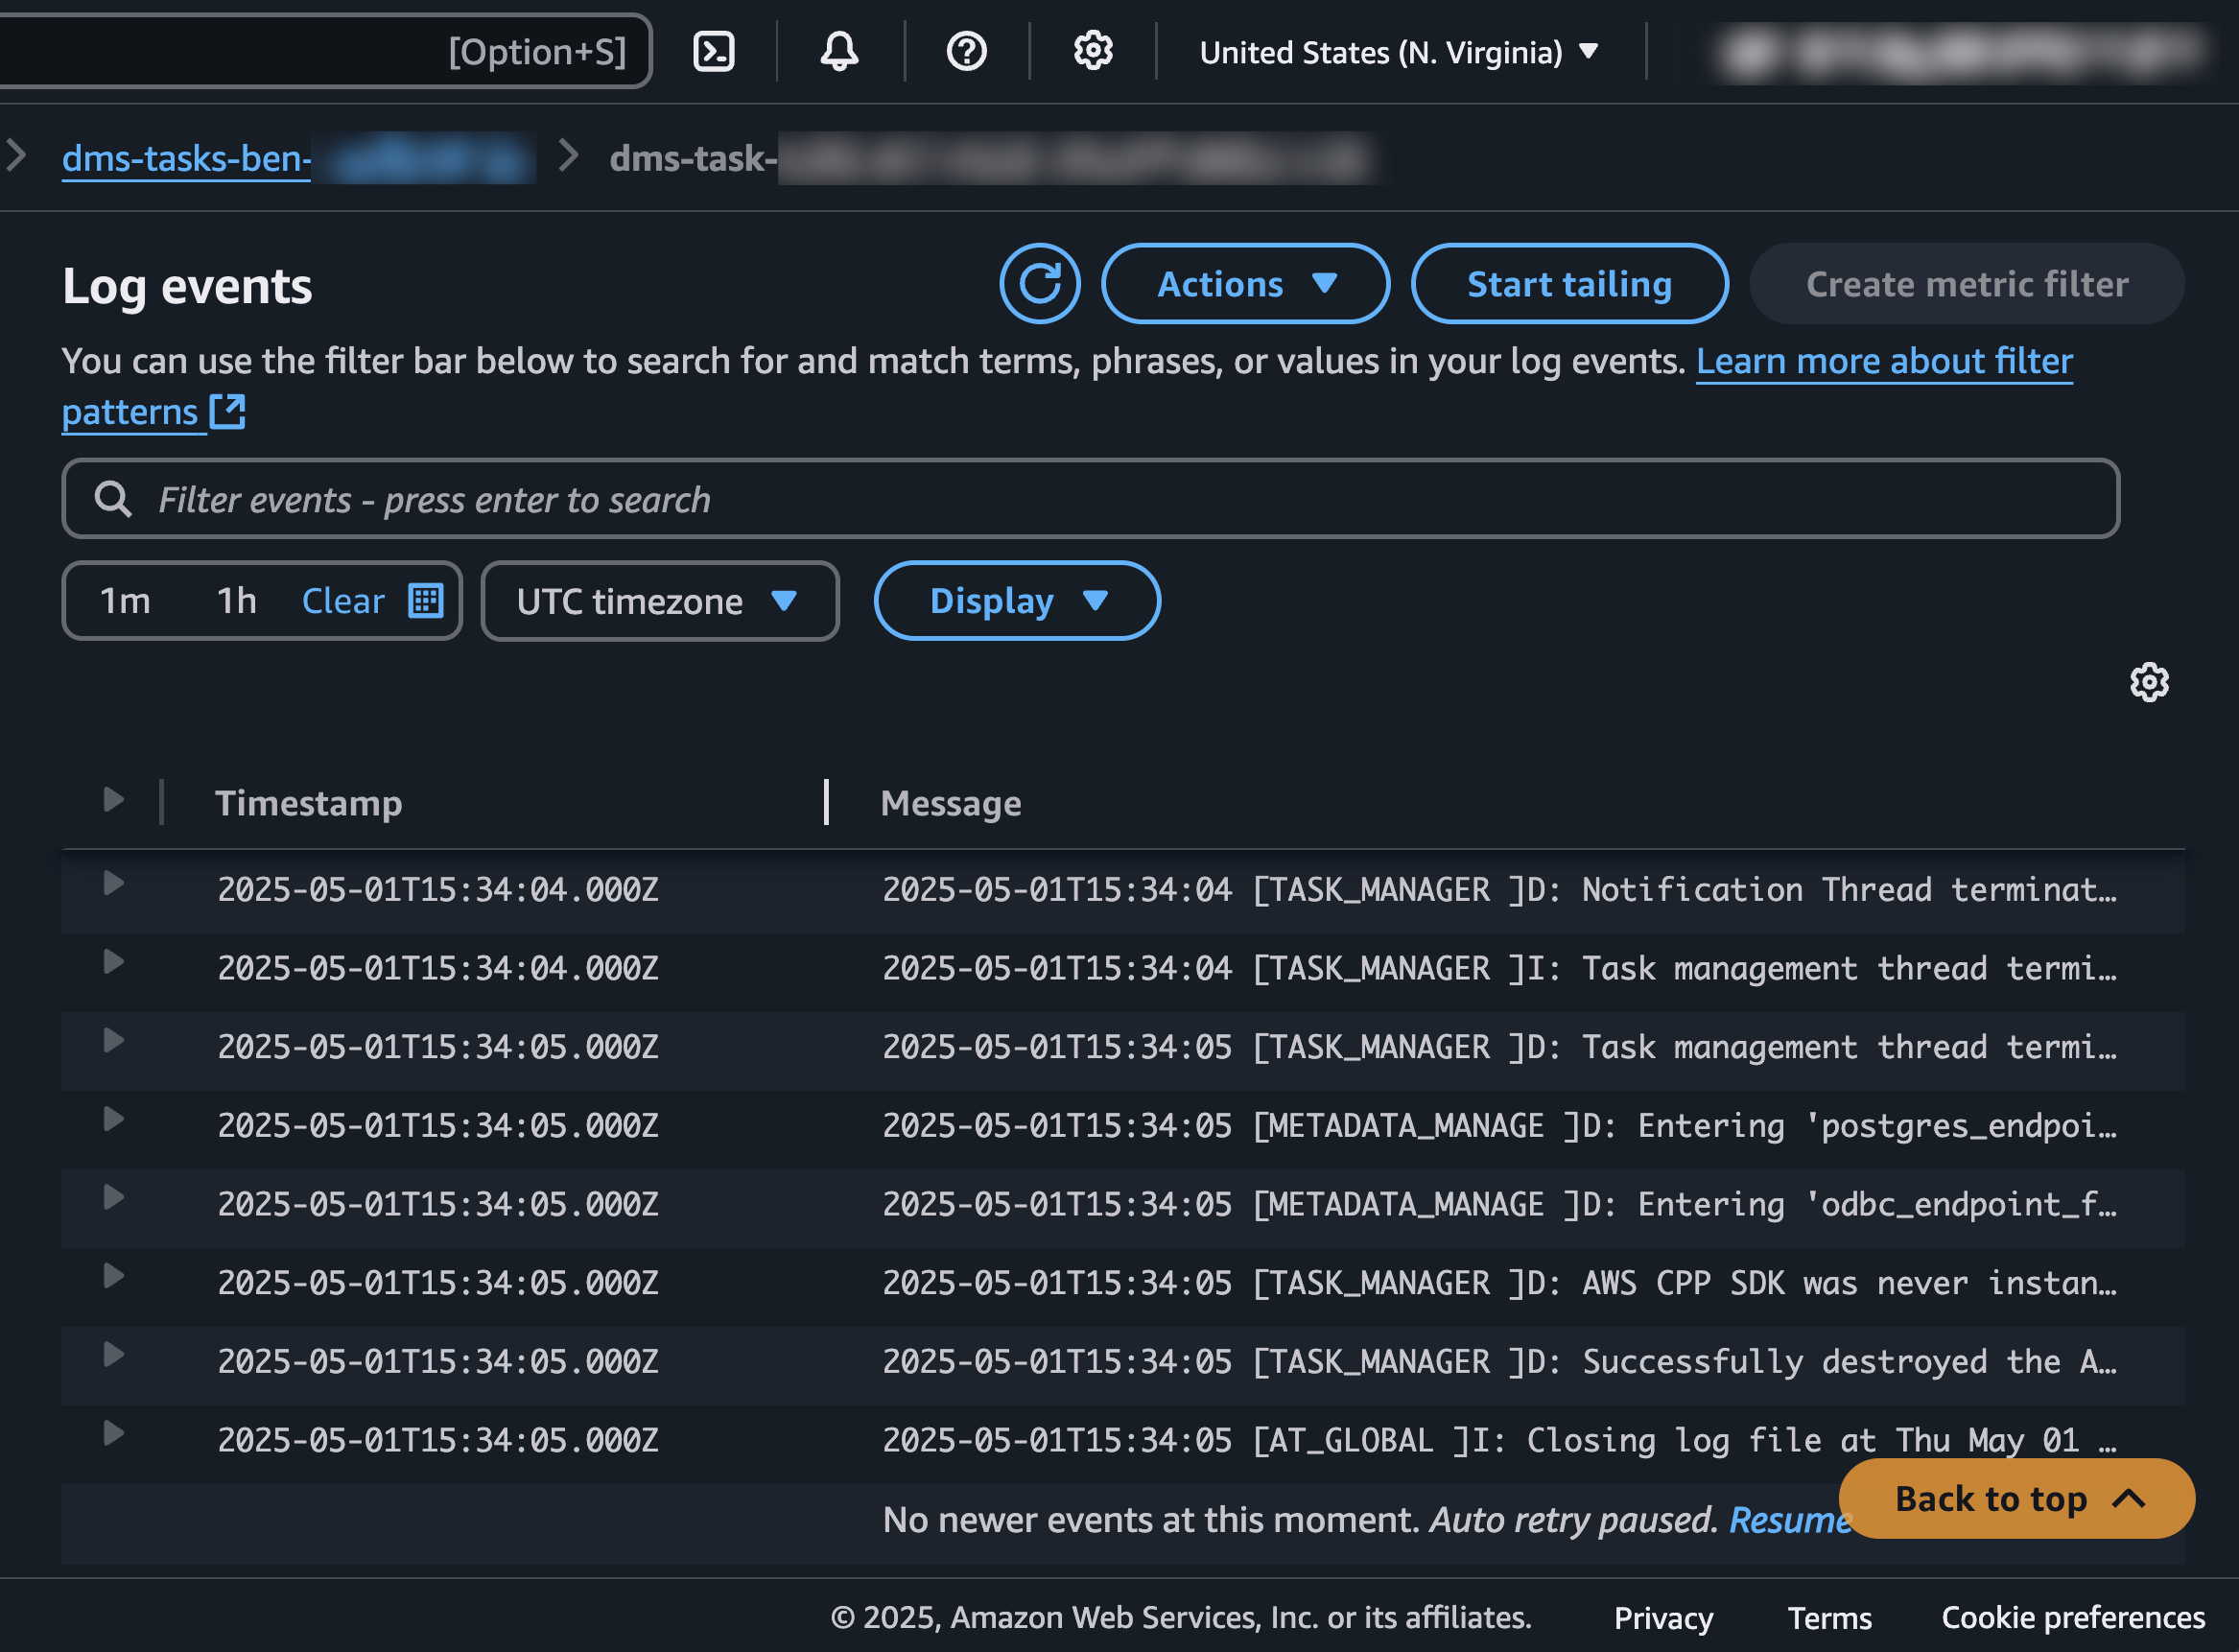
If the script is able to set up all of the resources without error but the import is not working, we recommend you take a look at the migration task logs.
You can view and search through these in the AWS web console.
Log in to the web console, and go to the AWS DMS service page.
In the sidebar, click on “Database migration tasks.”