Introduction
In this article, we’ll walk through migrating a MySQL database from DigitalOcean to PlanetScale using the Import tool.This guide assumes you are using MySQL on DigitalOcean. Other database systems available through DigitalOcean will not work with the PlanetScale import tool.
Prerequisites
Before you can start migrating your database, you’ll also need to collect the following information from your DigitalOcean cluster:- The admin username and password
- The database host
- The port
- Database name
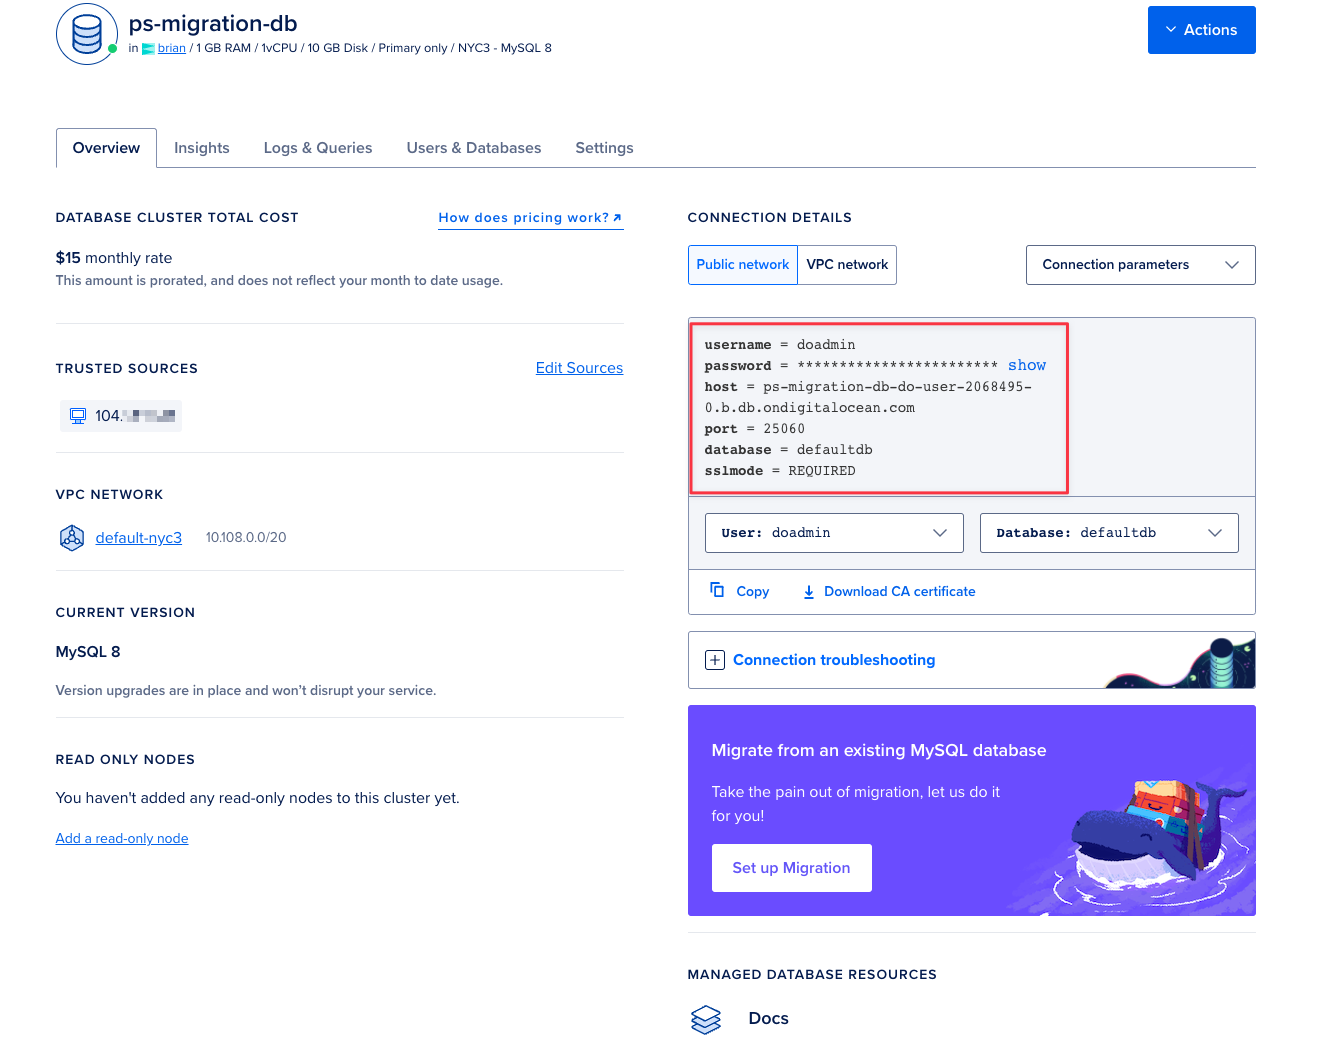
defaultdb.
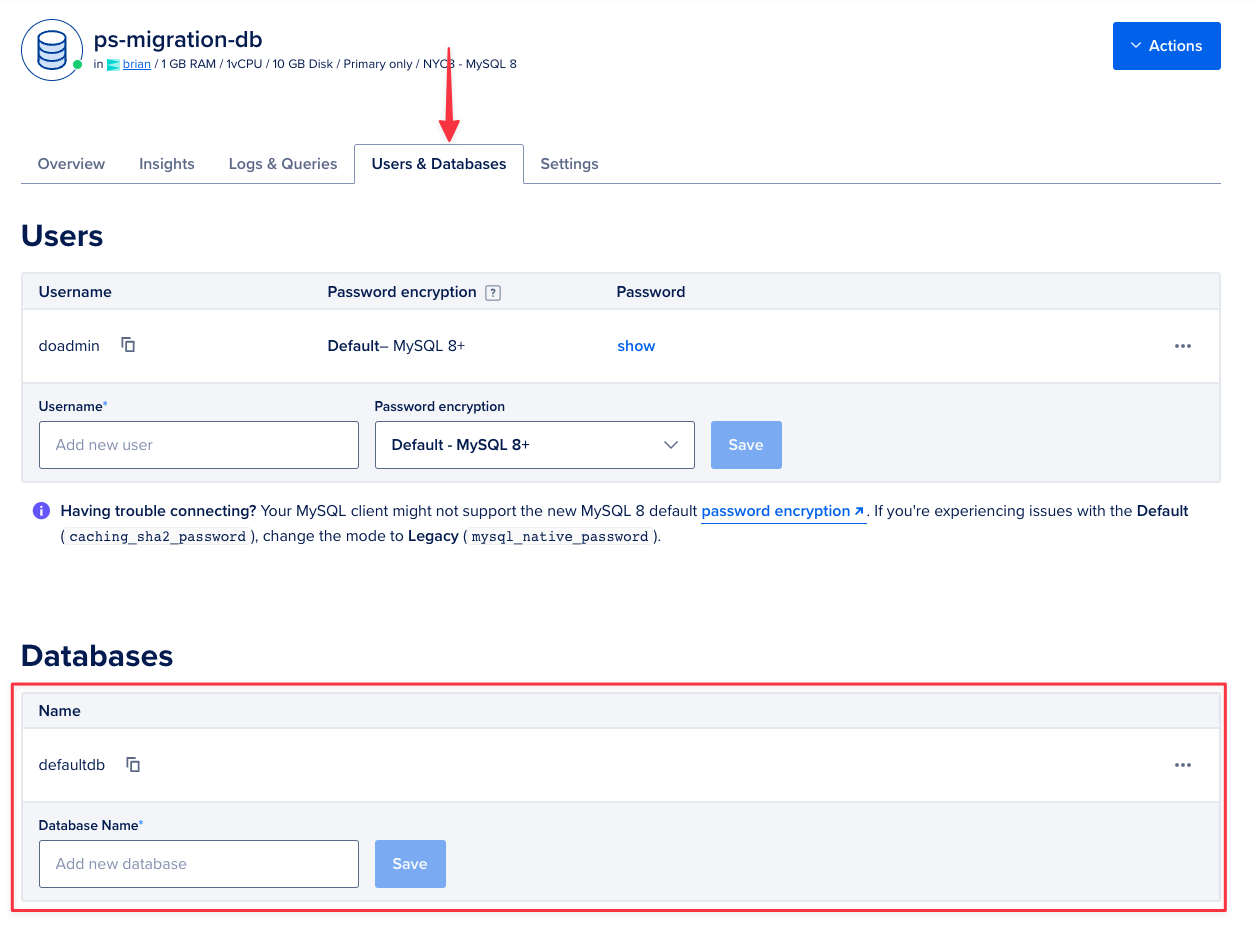
If you don’t know the admin password, you can create a new set of credentials using the information on the Import
tool user permissions page to create an account that can be used to
import your database.
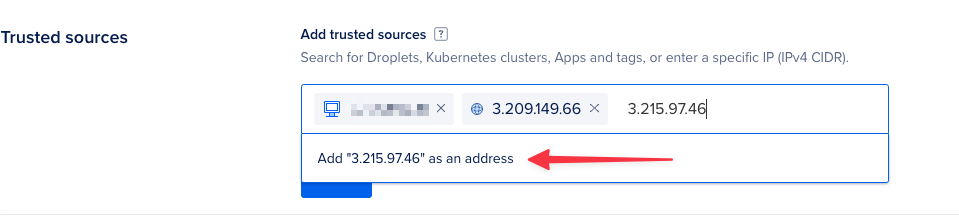
Update trusted sources
In order for PlanetScale to connect to your DigitalOcean database, you must allow network traffic into the database by adding the necessary IP addresses to the trusted sources list in DigitalOcean. The specific IP addresses you will need to allow depend on the region you plan to host your PlanetScale database. Check the Import tool public IP addresses page to determine the IP addresses to allow before continuing. This guide will use the AWS us-east-1 (North Virginia) region so we’ll allow the following addresses: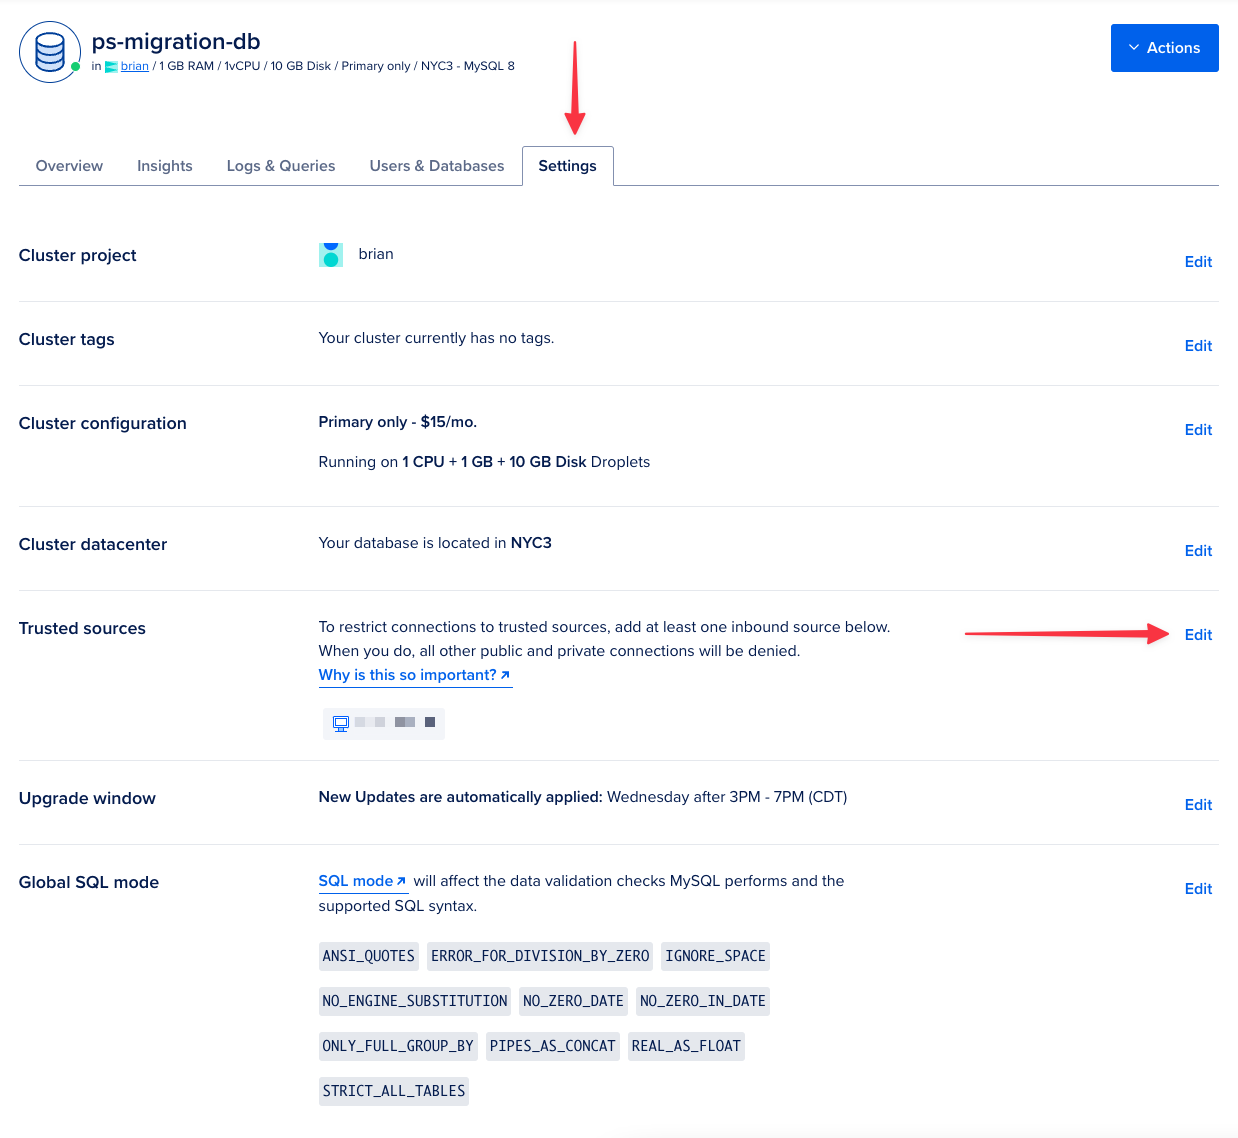
Disable ANSI_QUOTES setting
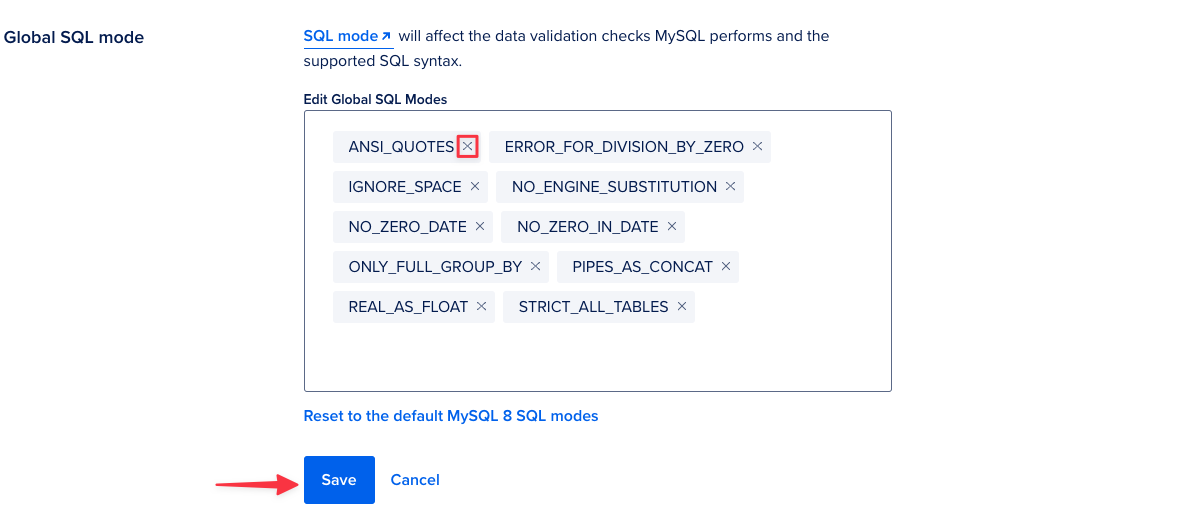
The default settings for MySQL databases on DigitalOcean is to haveANSI_QUOTES enabled in the global MySQL settings, which is not supported by PlanetScale. To remove this setting, navigate to the “Settings” tab of your cluster and locate the section titled Global SQL mode. Click “Edit” in that section to change the configuration settings.
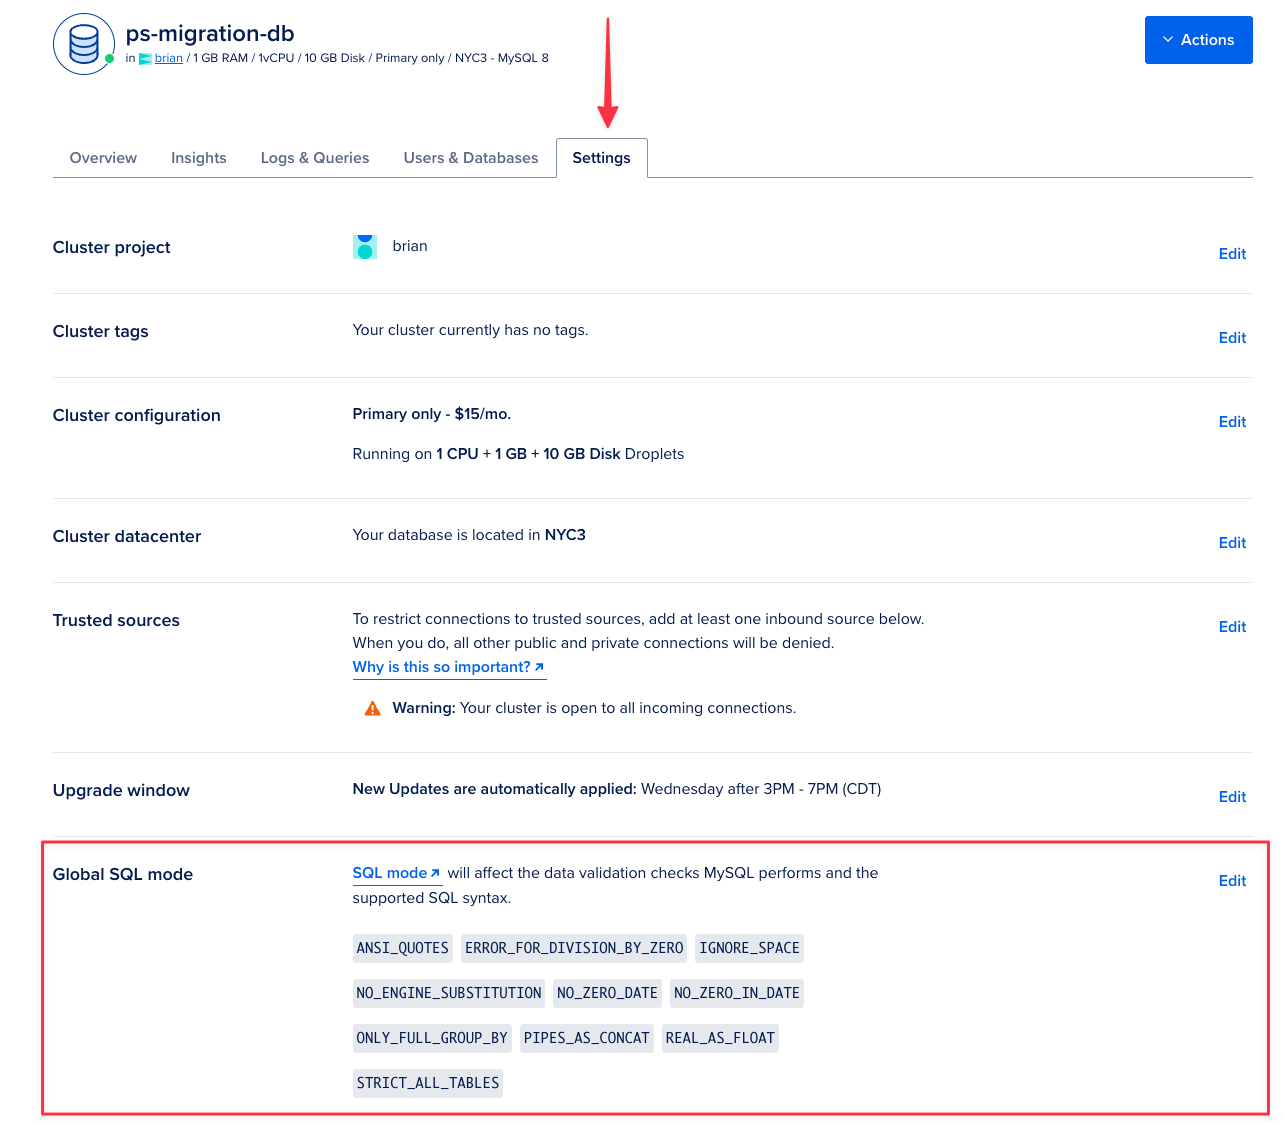
ANSI_QUOTES setting, click the “x” next to the tag and click “Save.” The change should apply immediately.
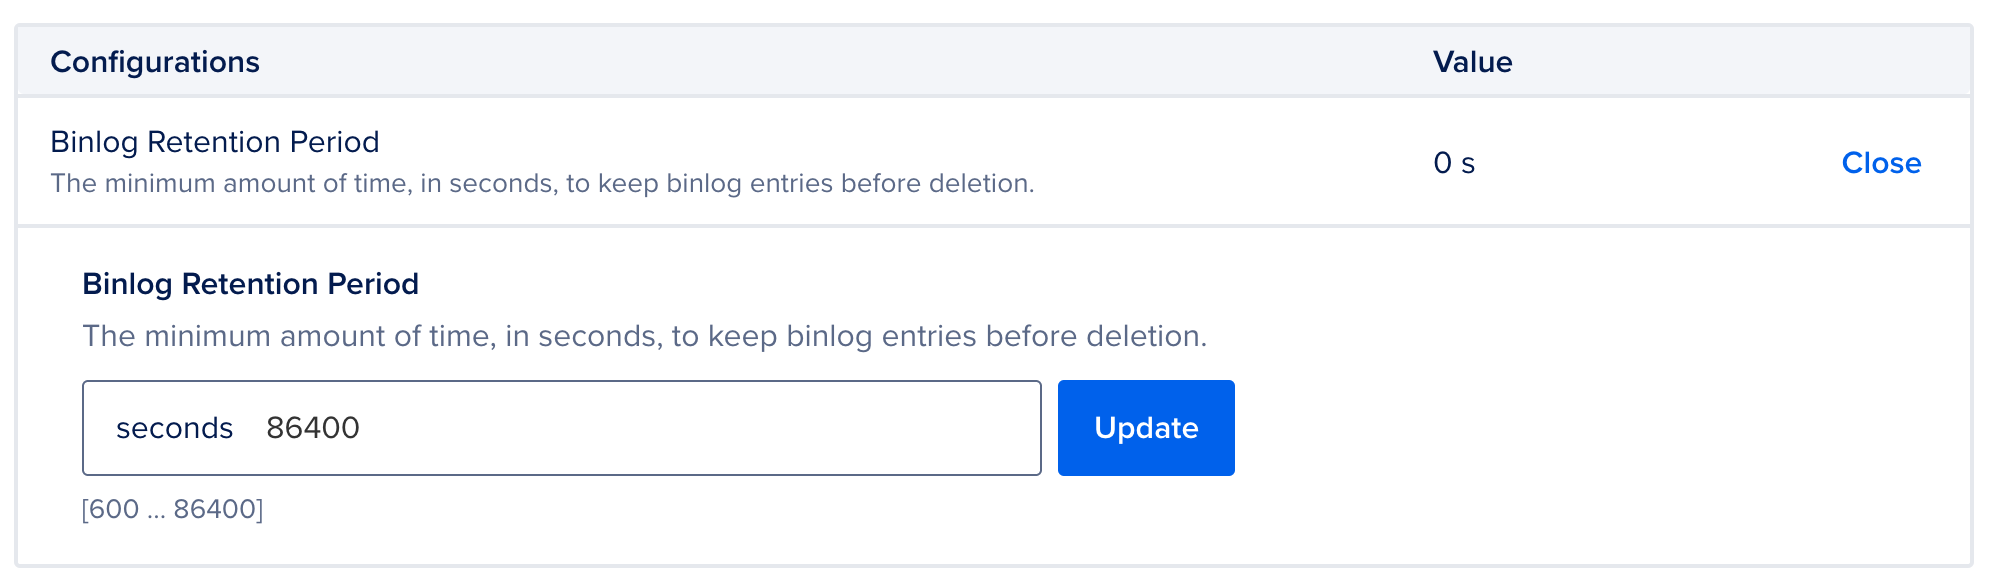
Set the Binlog Retention Period
The binary log related MySQL server variables required for PlanetScale’s importer are already set to acceptable values by default on Digital Ocean managed MySQL servers but there’s one more variable to check on the “Settings” tab of your existing cluster. Scroll down to “Advanced configurations” and ensure the “Binlog Retention Period” is set to the maximum value of86400 seconds.
Importing your database
Now that your DigitalOcean database is configured and ready, follow the Database Imports guide to complete your import. When filling out the connection form in the import workflow, use the following information:- Host name - Your DigitalOcean database host (from Prerequisites)
- Port - Your port (typically 25060 for DigitalOcean)
- Database name - The exact database name to import (e.g.,
defaultdb) - Username - Your admin username
- Password - Your admin password
- SSL verification mode - Select based on your DigitalOcean SSL configuration
- Creating your PlanetScale database
- Connecting to your DigitalOcean database
- Validating your configuration
- Selecting tables to import
- Monitoring the import progress
- Switching traffic and completing the import