Want to create and pay for your database from Cloudflare without adding billing to PlanetScale? See Create PlanetScale databases from Cloudflare.
Already created a PlanetScale Vitess database? Jump straight to integration instructions.
- Creating a new Vitess database
- Cluster configuration options
- Connecting to your database
Prerequisites
Before you begin, make sure you have a PlanetScale account. After you create an account, you’ll be prompted to create a new organization, which is essentially a container for your databases, settings, and members. After creating your organization, it’s important to understand the relationship between databases, branches, and clusters.- Database: Your overall project (e.g., “my-ecommerce-app”)
- Branch: Isolated database deployments that provide you with separate environments for development and testing, as well as restoring from backups - learn more about branching
- Cluster: The underlying compute and storage infrastructure that powers each branch
Create a new database
- Dashboard
- CLI
Step 1: Navigate to database creation
1
Log in to your PlanetScale dashboard
2
Select your organization from the dropdown
3
Click “New database” button or navigate to
/newStep 2: Choose database engine
1
On the database creation form, you’ll see two engine options:
- Vitess (MySQL-compatible)
- Postgres (PostgreSQL-compatible)
2
Select Vitess to create a MySQL-compatible database
Step 3: Configure your database cluster
1
Database name: Enter a unique name for your database
Your database name can contain lowercase, alphanumeric characters, or underscores. We allow dashes, but don’t recommend them, as they may need to be escaped in some instances.
2
Region: Choose the primary region where your database will be hosted. For the lowest latency, select a region near you or your application’s hosting location.
3
Cluster configuration: Select your preferred cluster and storage size for your database.
Step 4: Create the database cluster
1
Review your configuration settings
2
Click “Create database” to provision your Vitess database
3
Your database will be created with a
main branch by defaultWhat happens during creation
When you create a Vitess database cluster, PlanetScale automatically:- Provisions a Vitess cluster in your selected region
- Creates the initial
mainbranch - Sets up monitoring and metrics collection
- Configures backup and high availability settings
Integrate with Cloudflare Workers
Don’t have a Workers project yet? Create a Workers project from the MySQL Hyperdrive template.Terminal
Step 1: Create a Hyperdrive connection
You can automatically create a connection from the PlanetScale dashboard when creating a new role, or use one of the methods below.- Dashboard
- CLI
1
Log into the Cloudflare dashboard and navigate to “Compute & AI” > “Workers & Pages”. You should see your Worker in the list.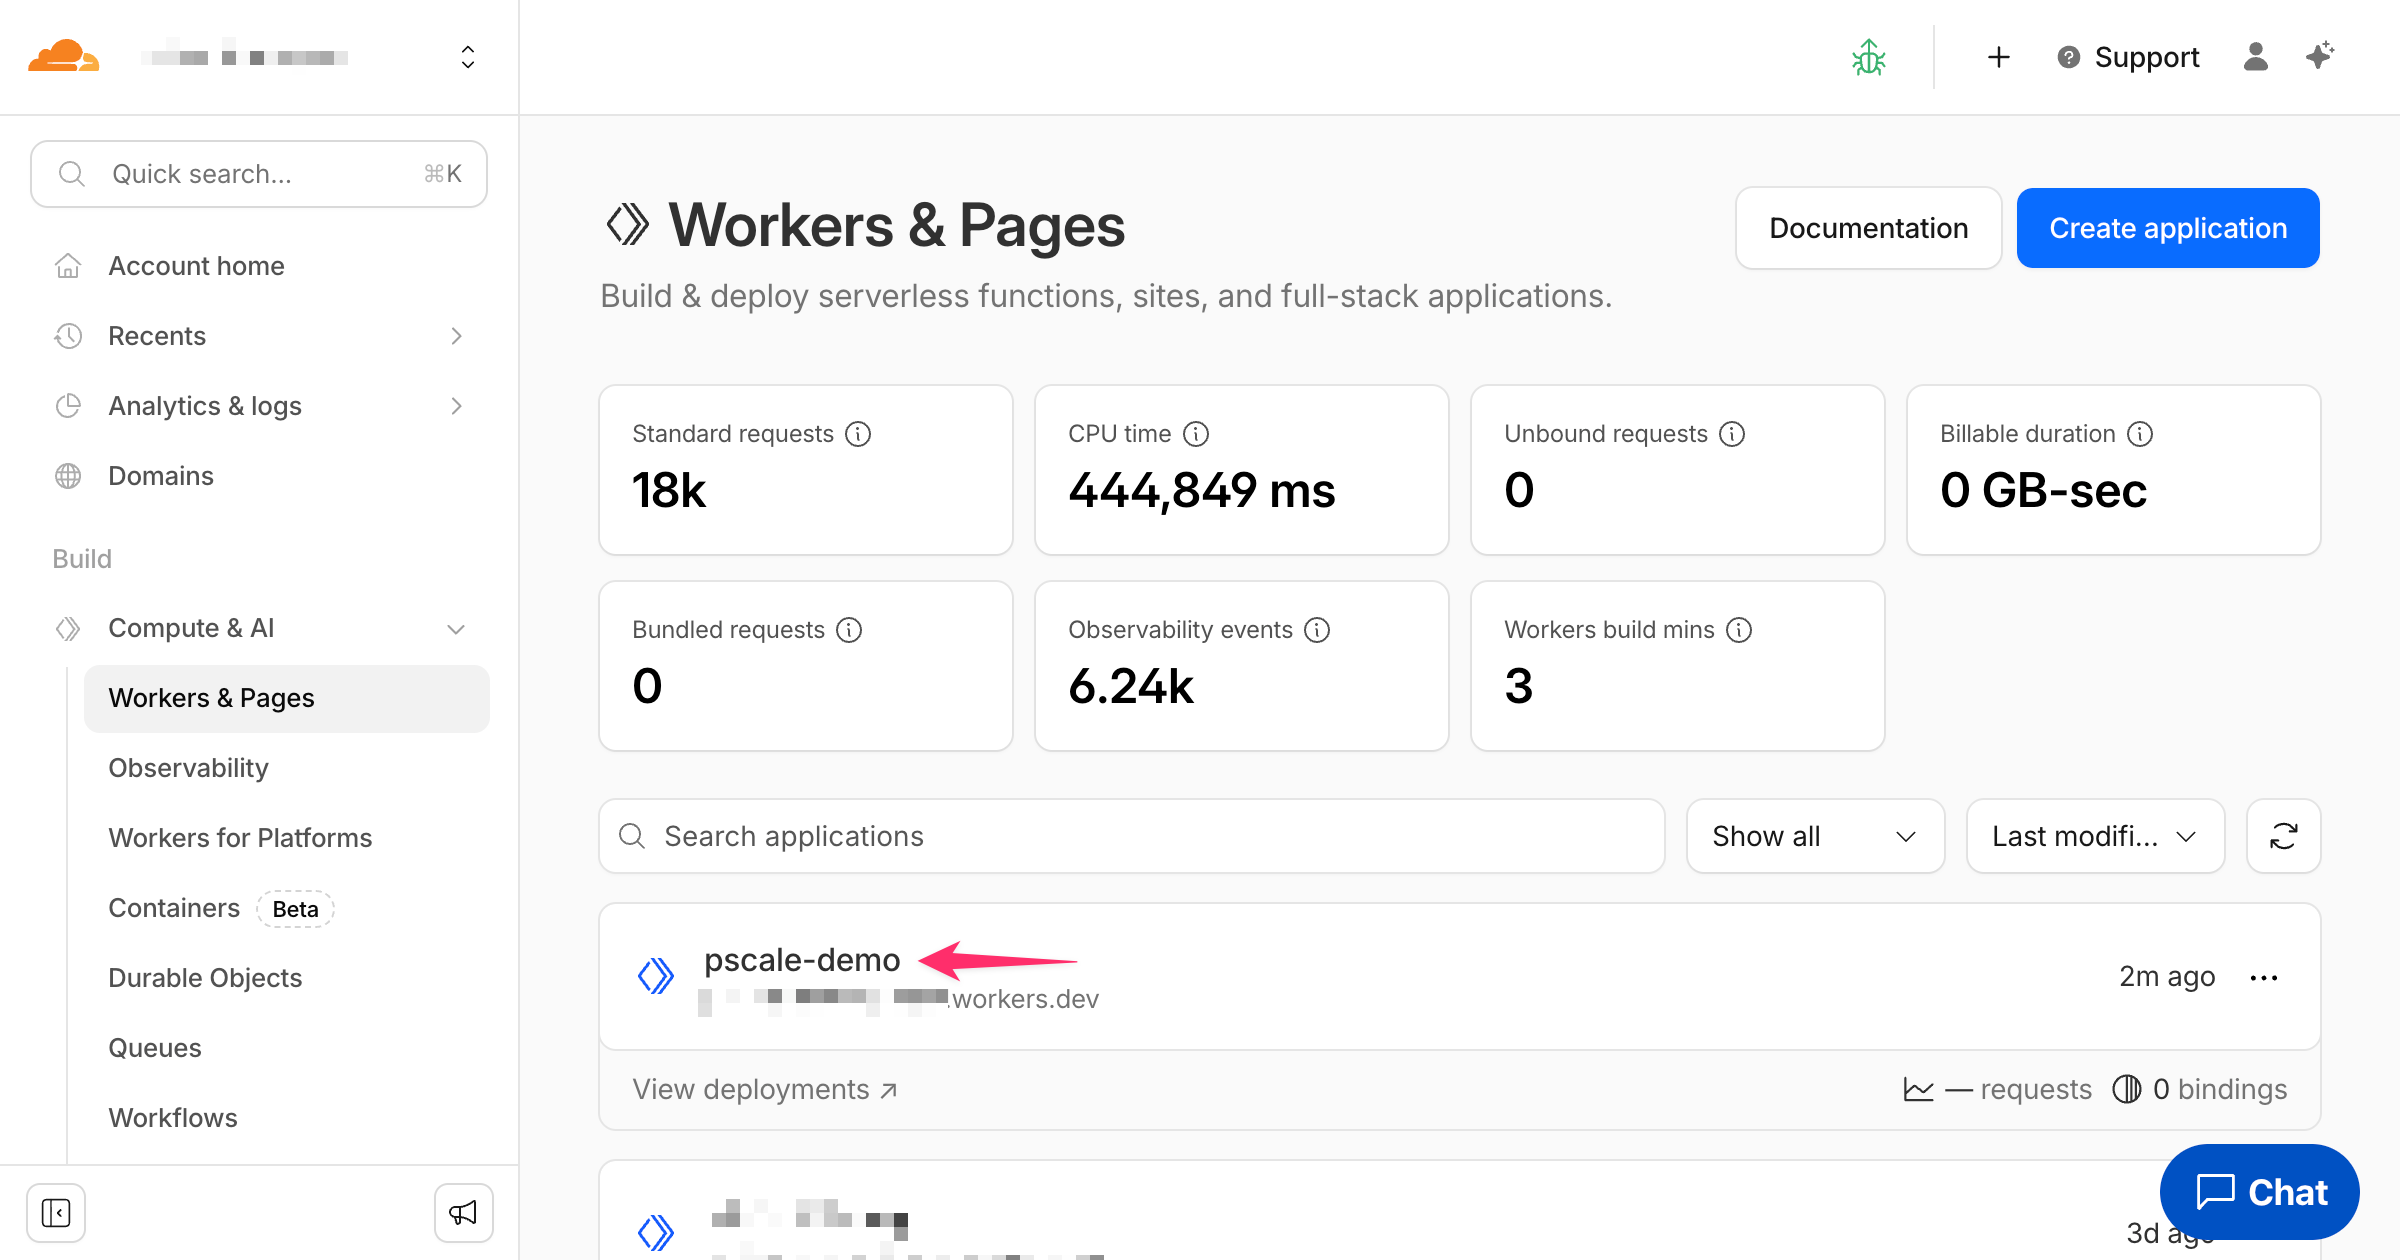
2
Select the “Storage & databases” tab, then “Hyperdrive”, and finally “Create configuration” in the top right corner.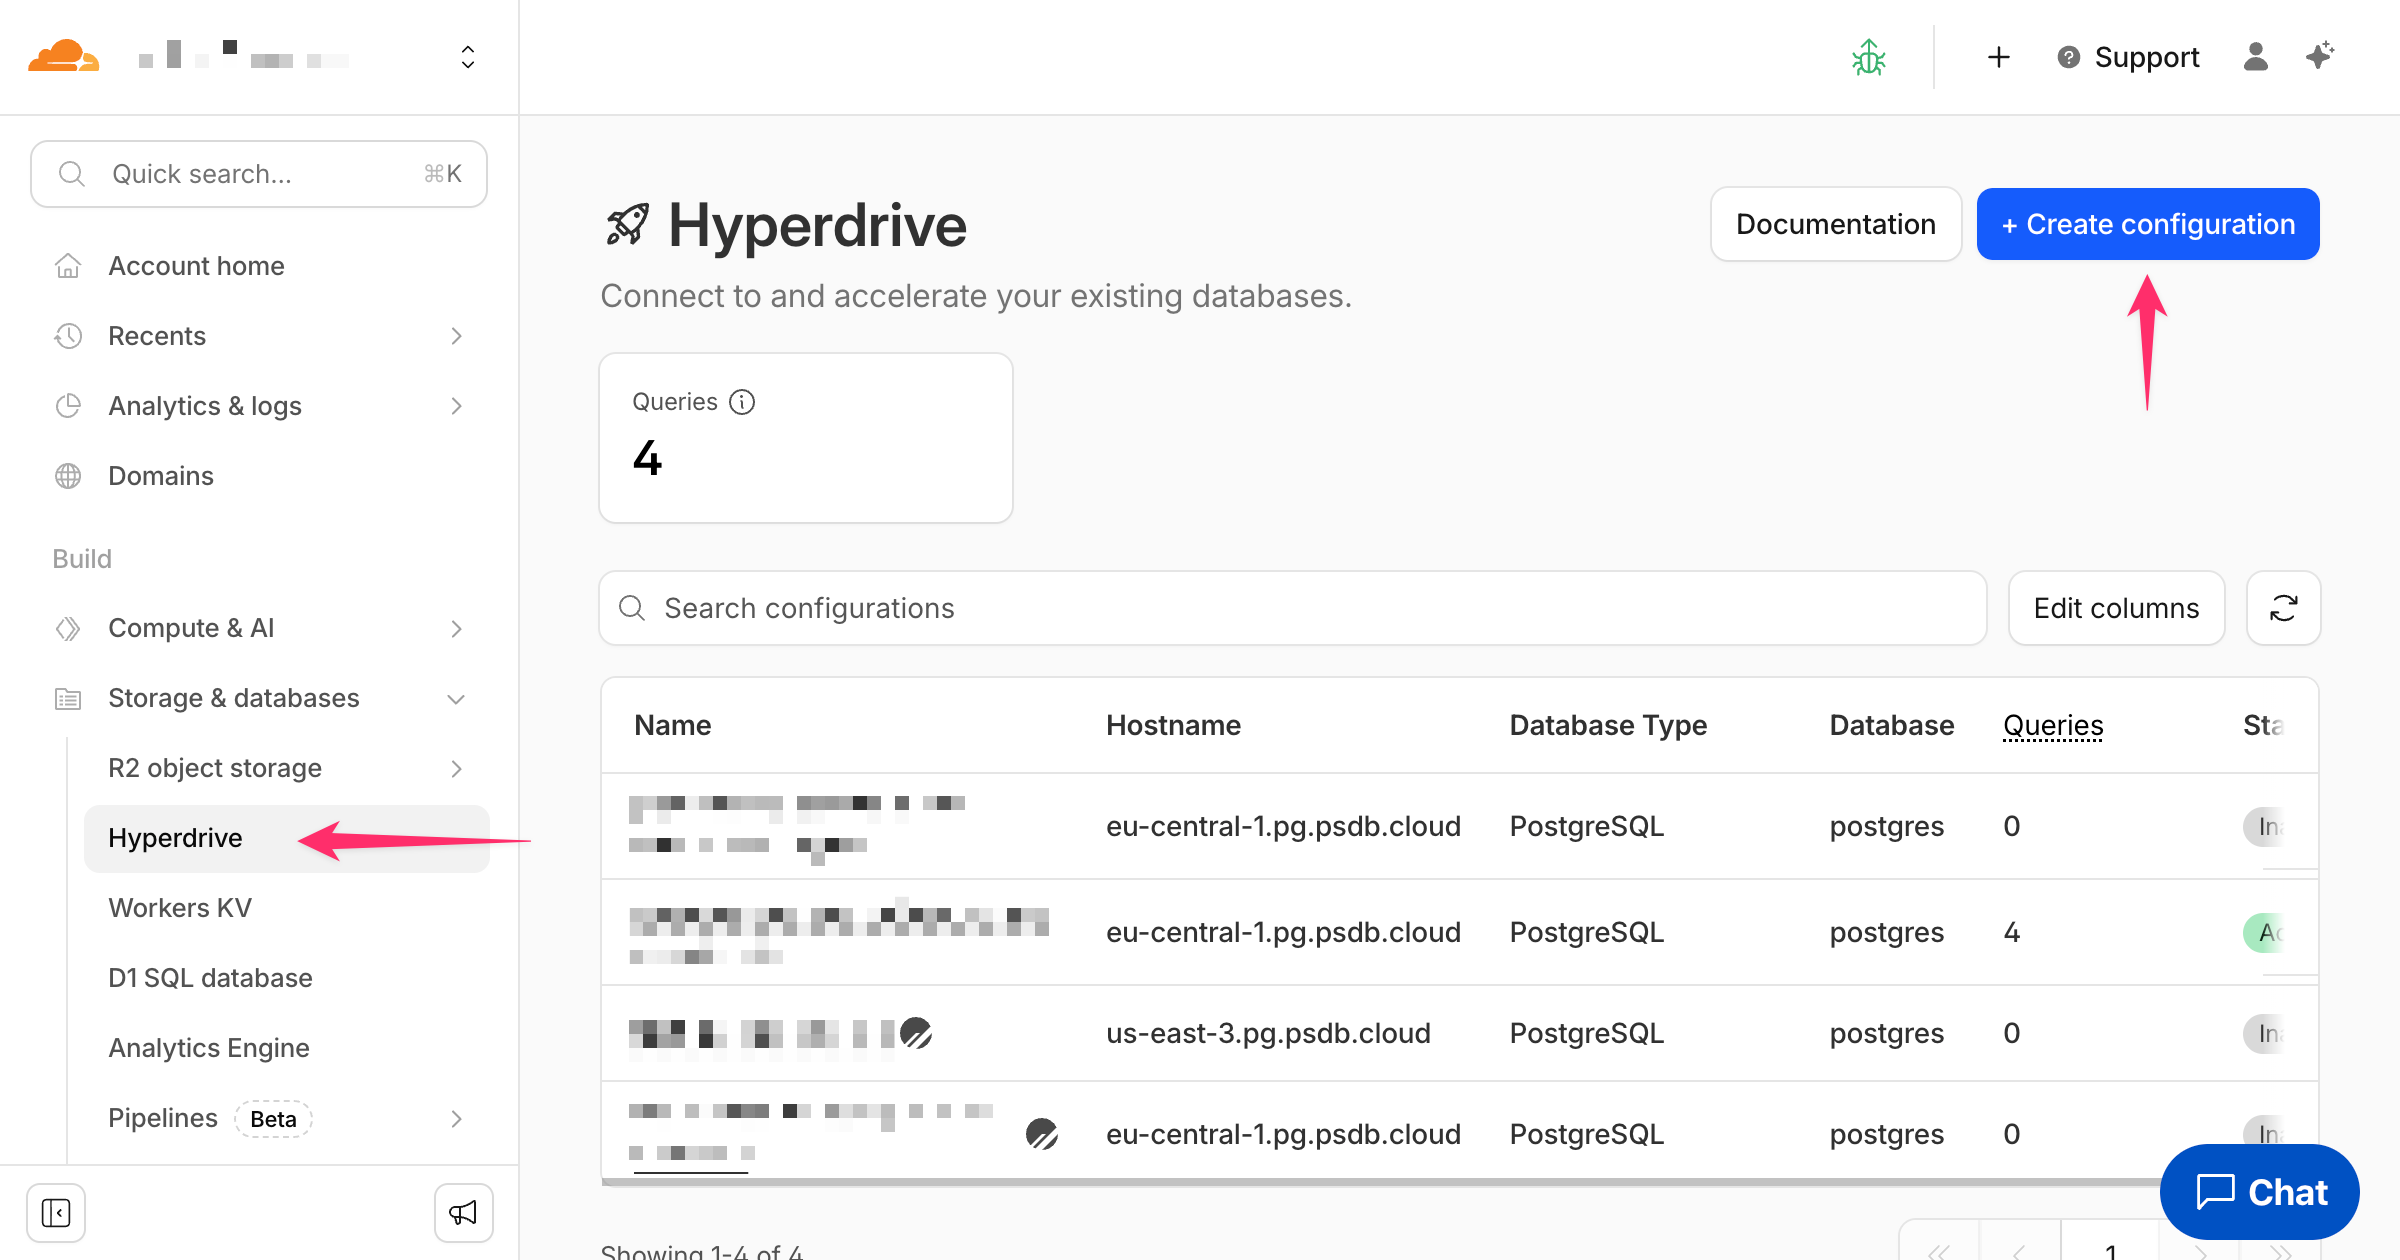
3
Click “Connect to PlanetScale database” then click Next.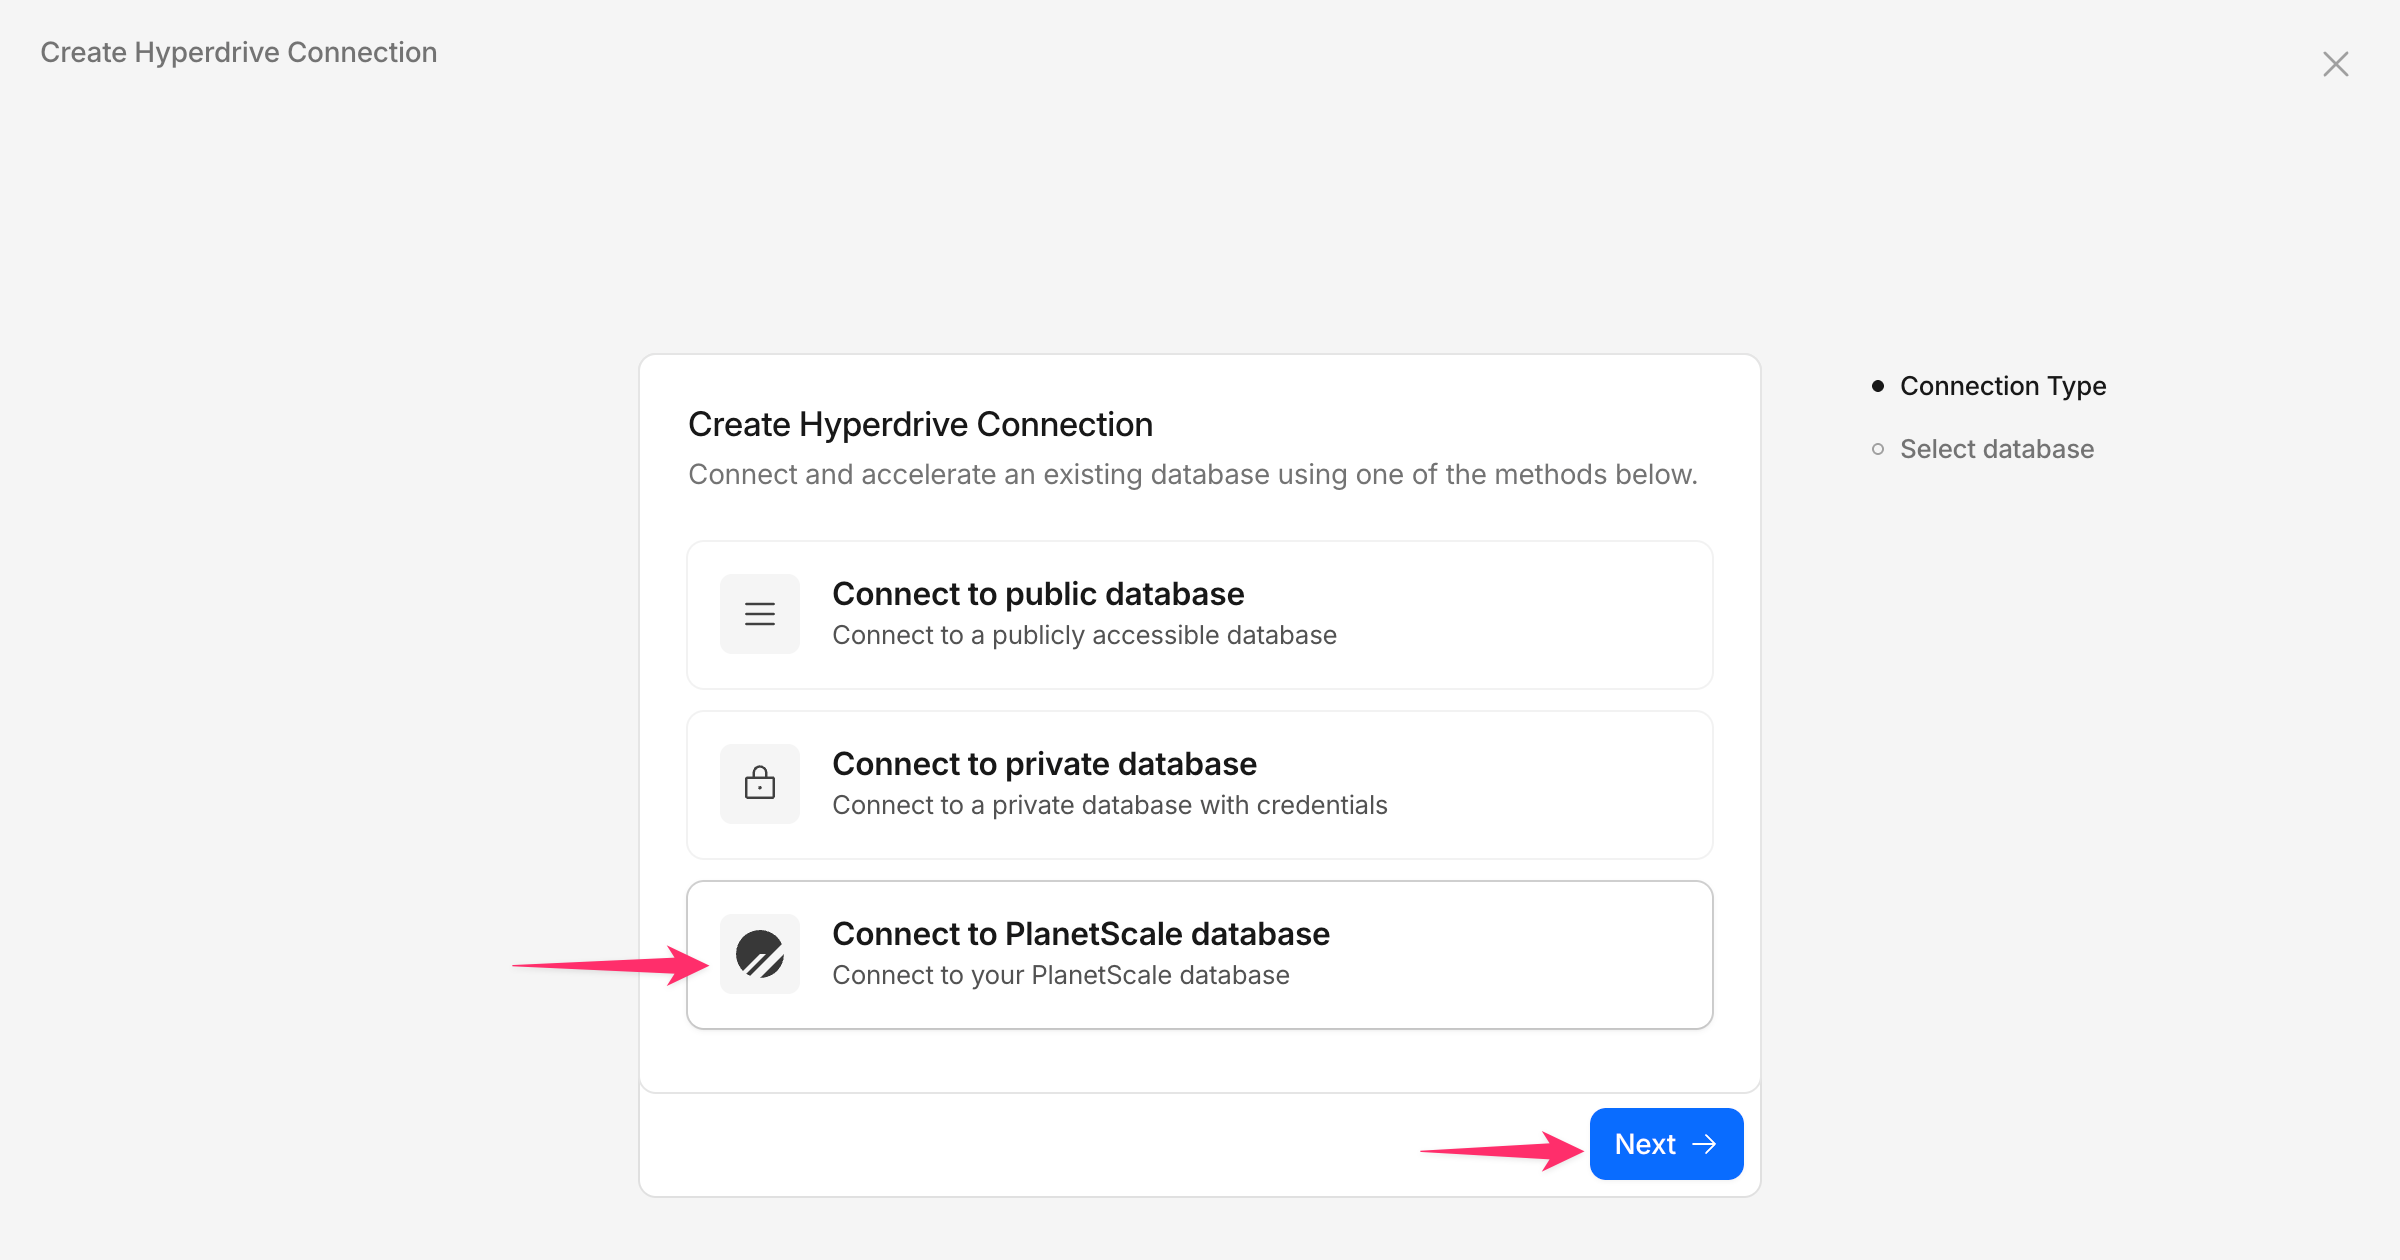
4
Click Login to PlanetScale to log in to your PlanetScale account.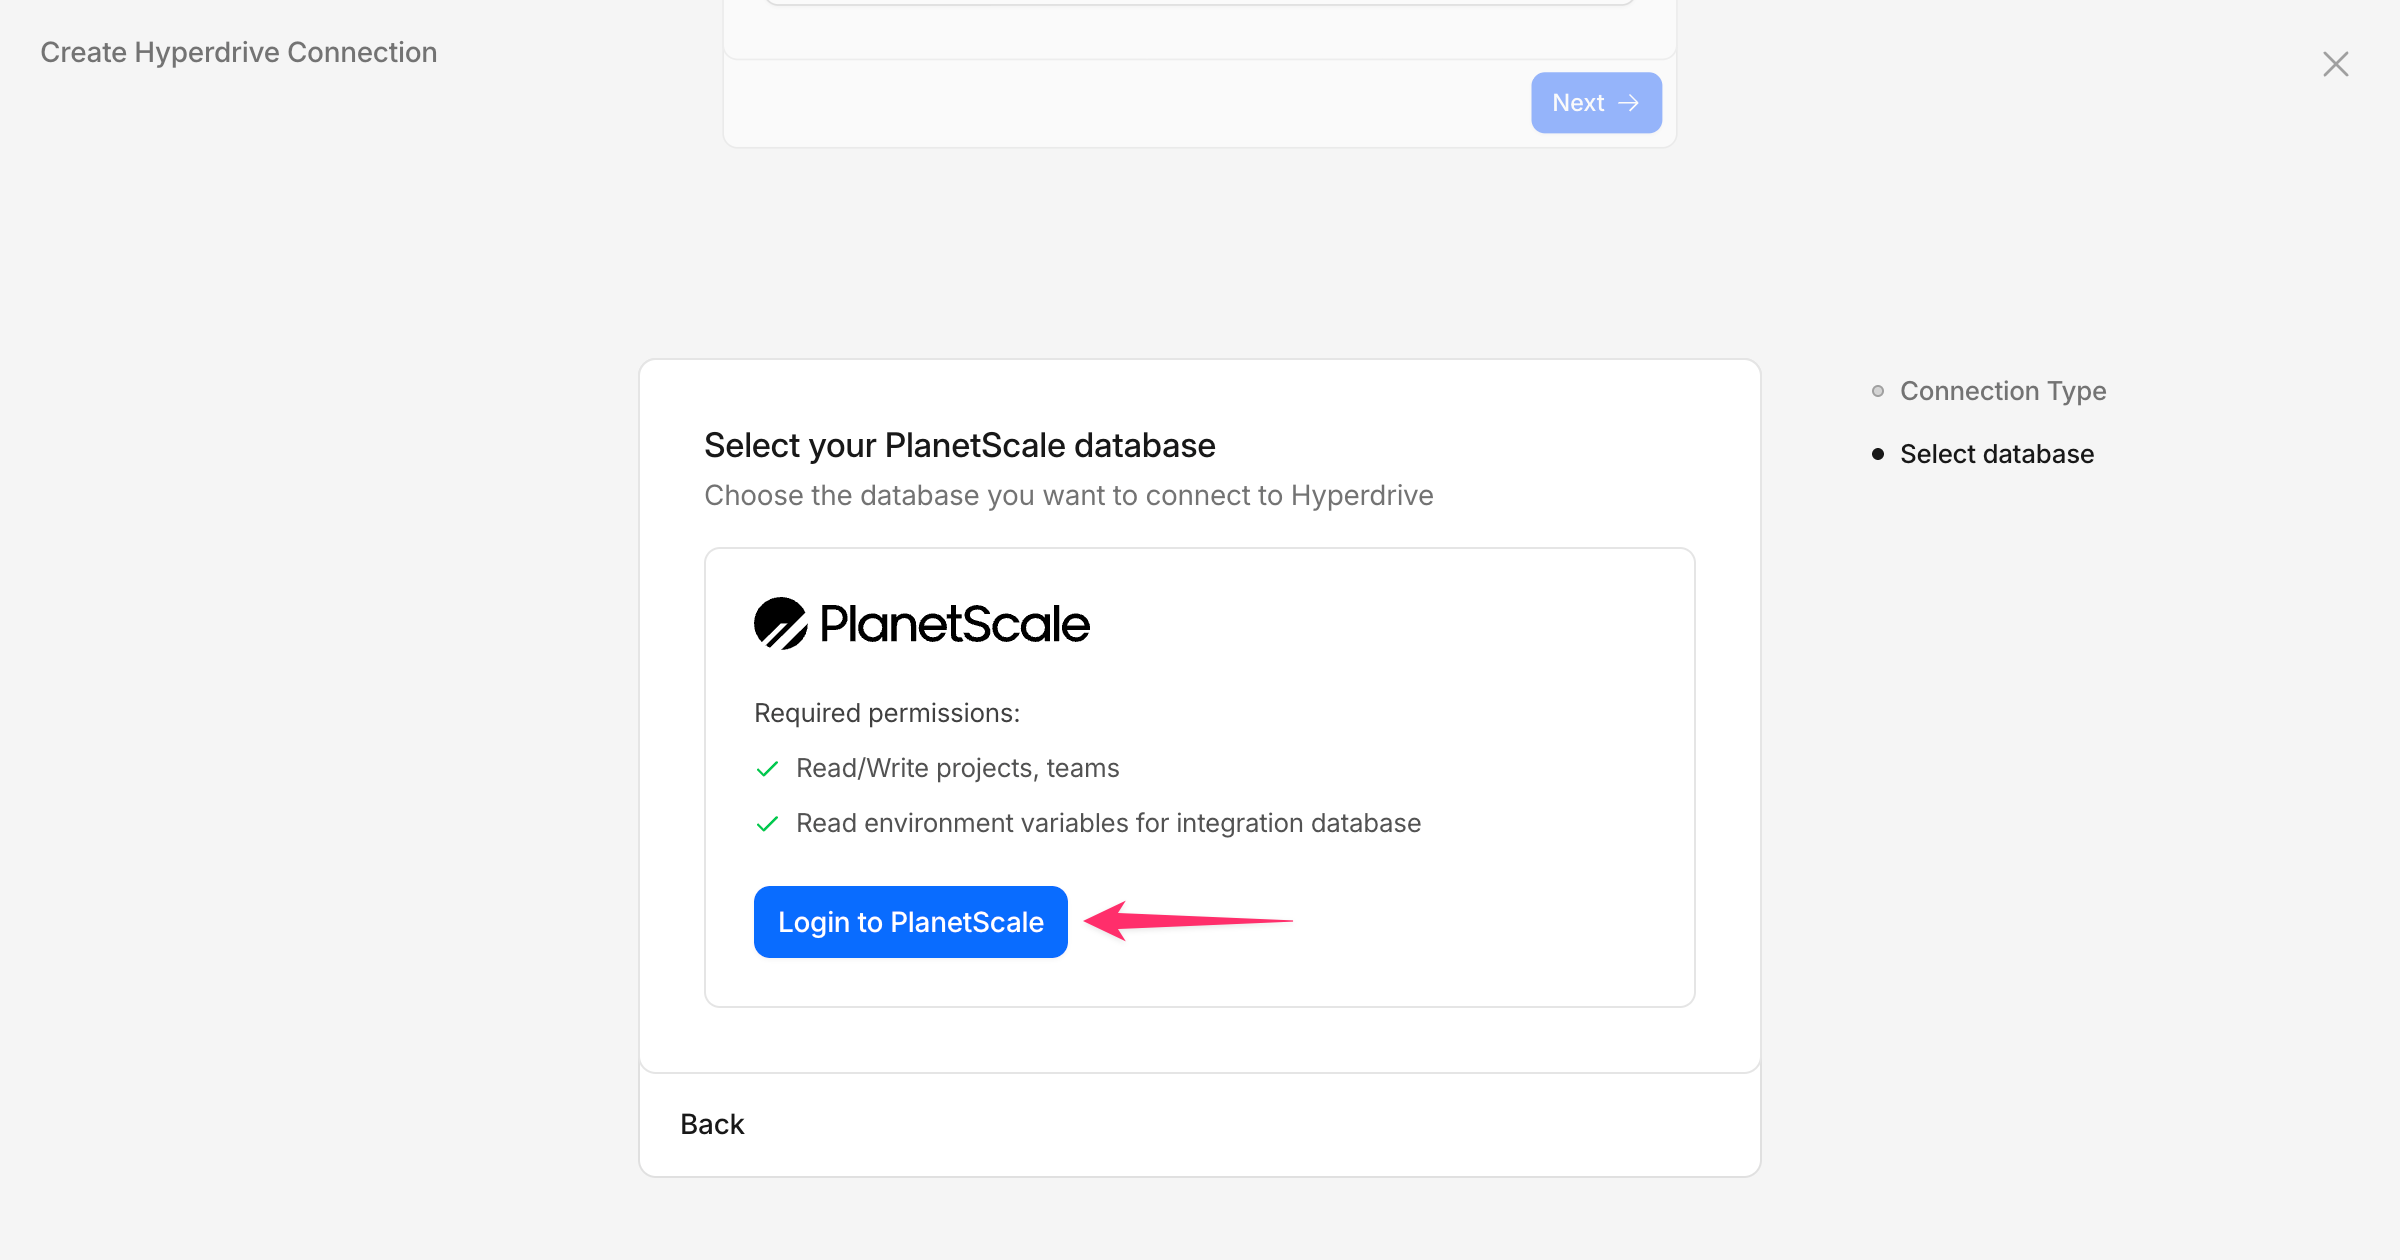
5
The next screen will allow you to grant access to your organization, database, and branch. Start by selecting your organization from the list.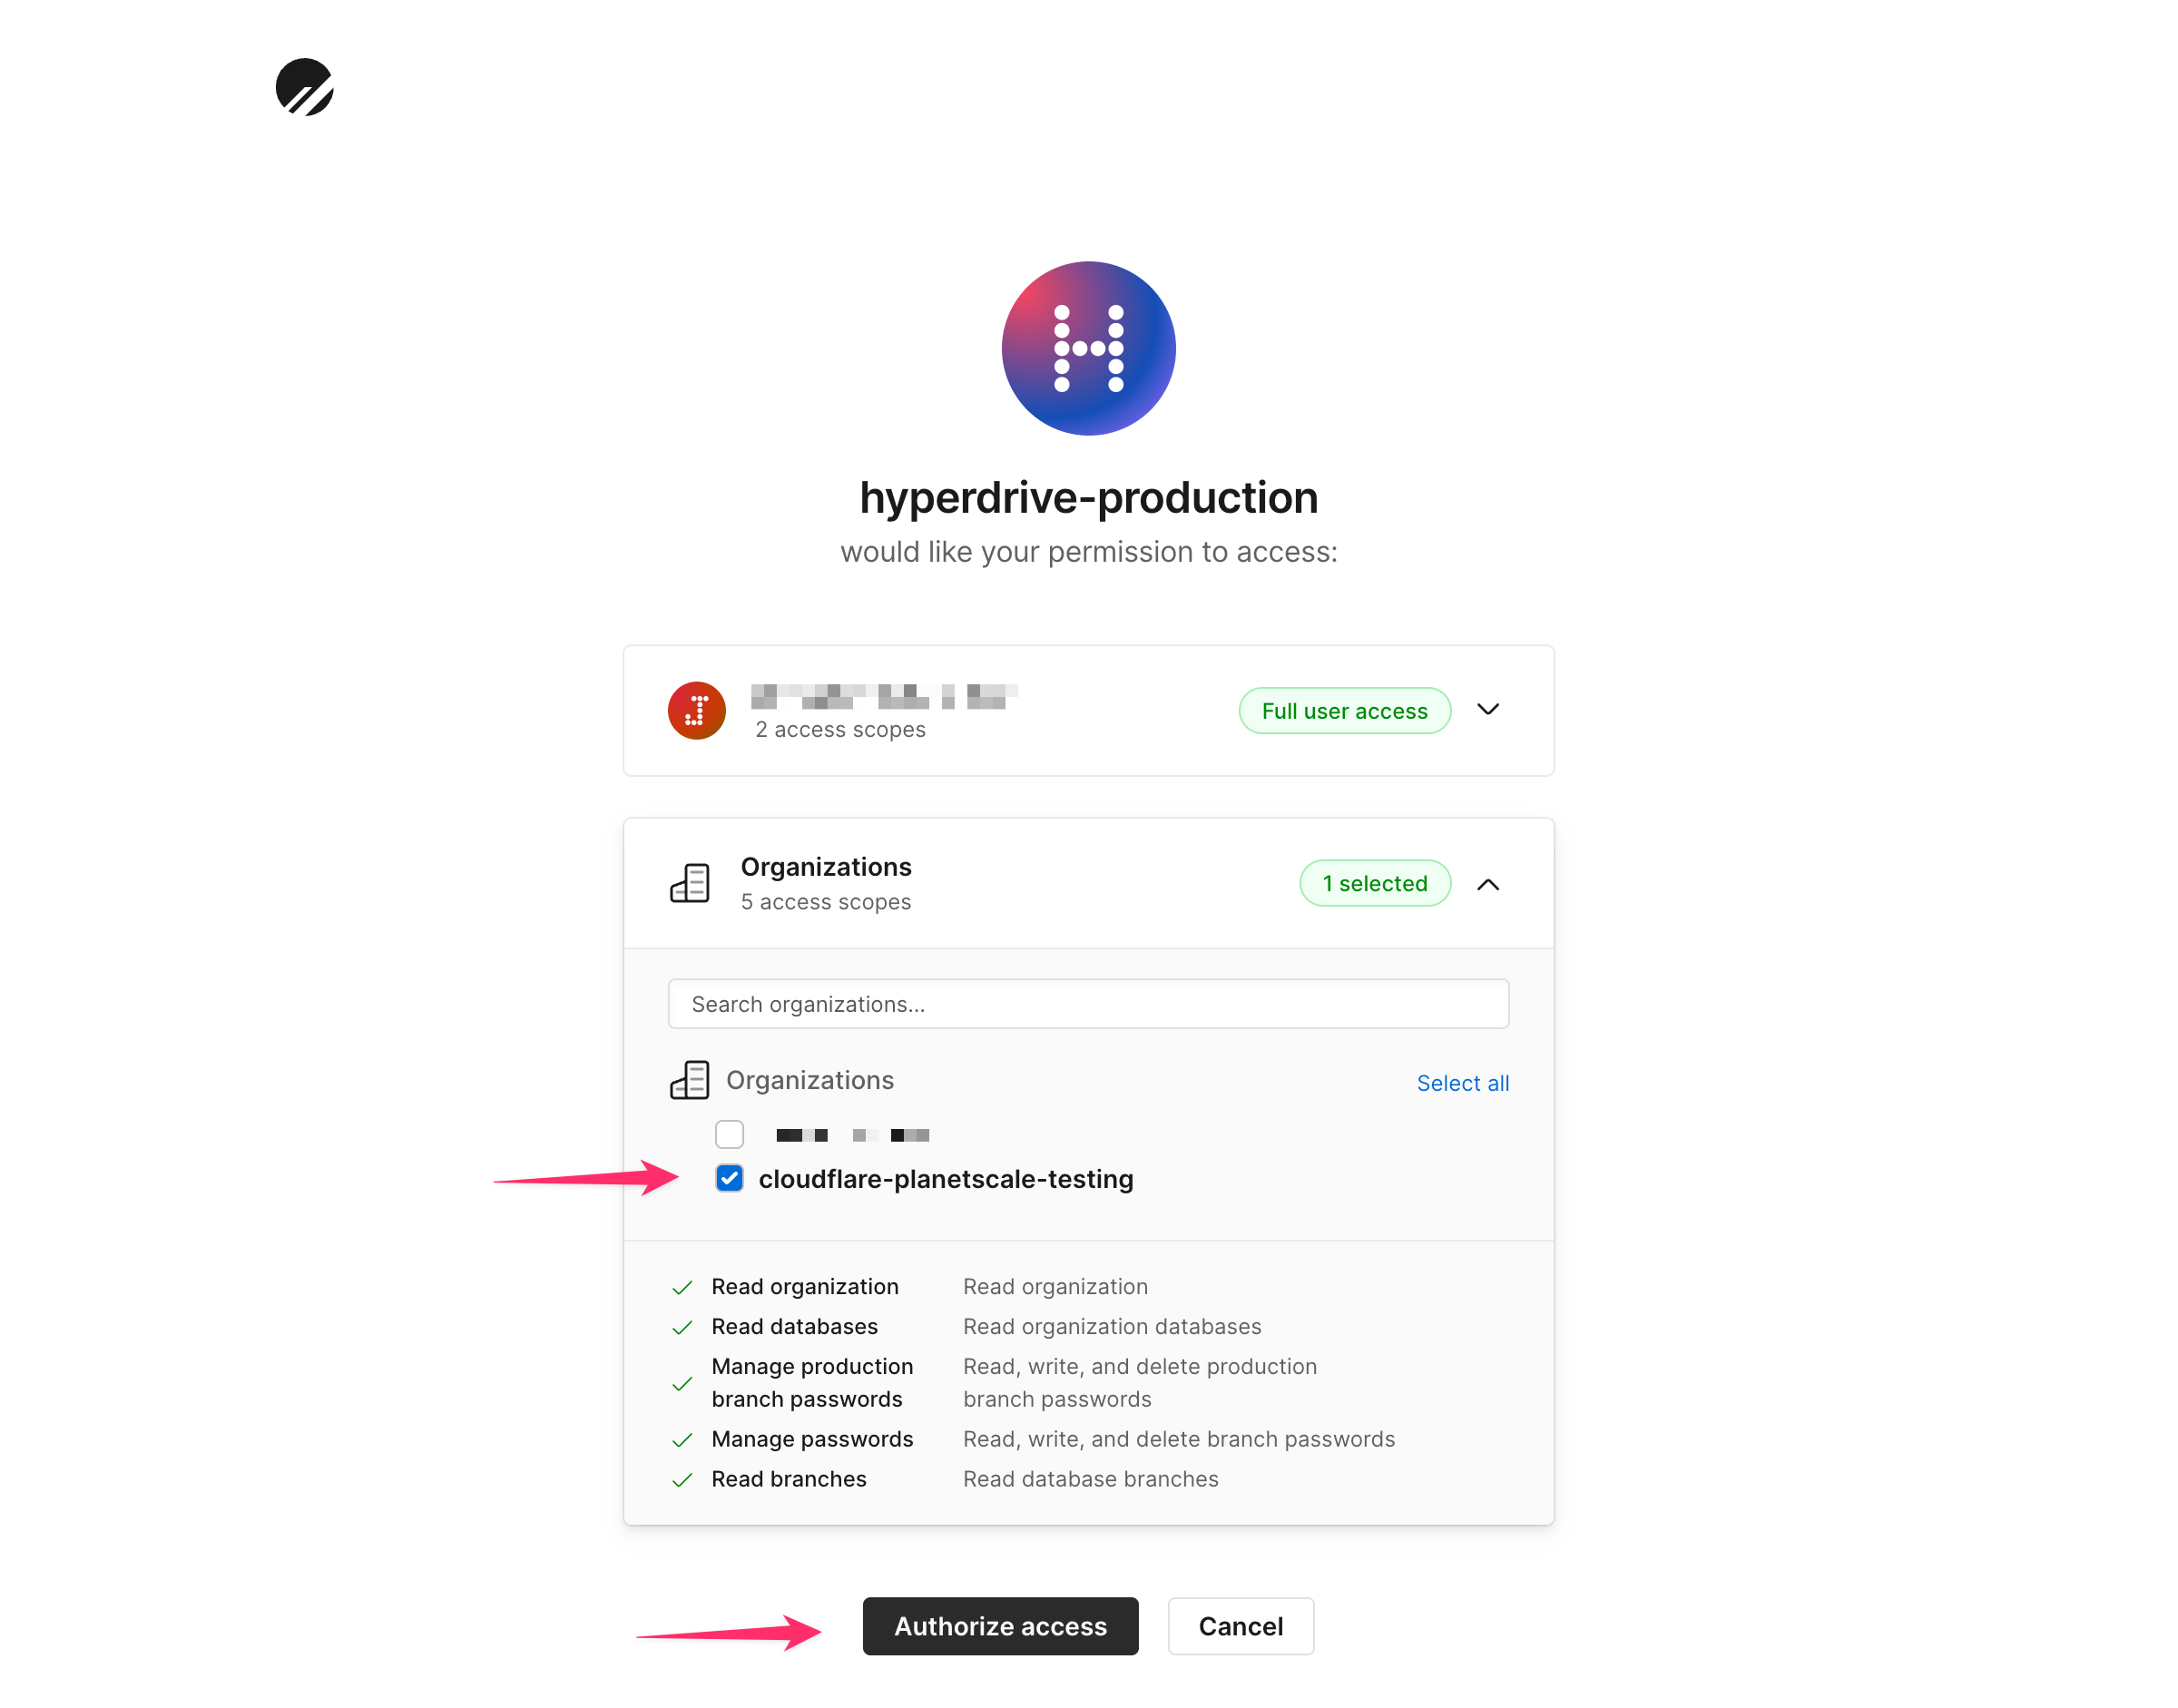
6
Select the database you created, the “main” branch and then click Next.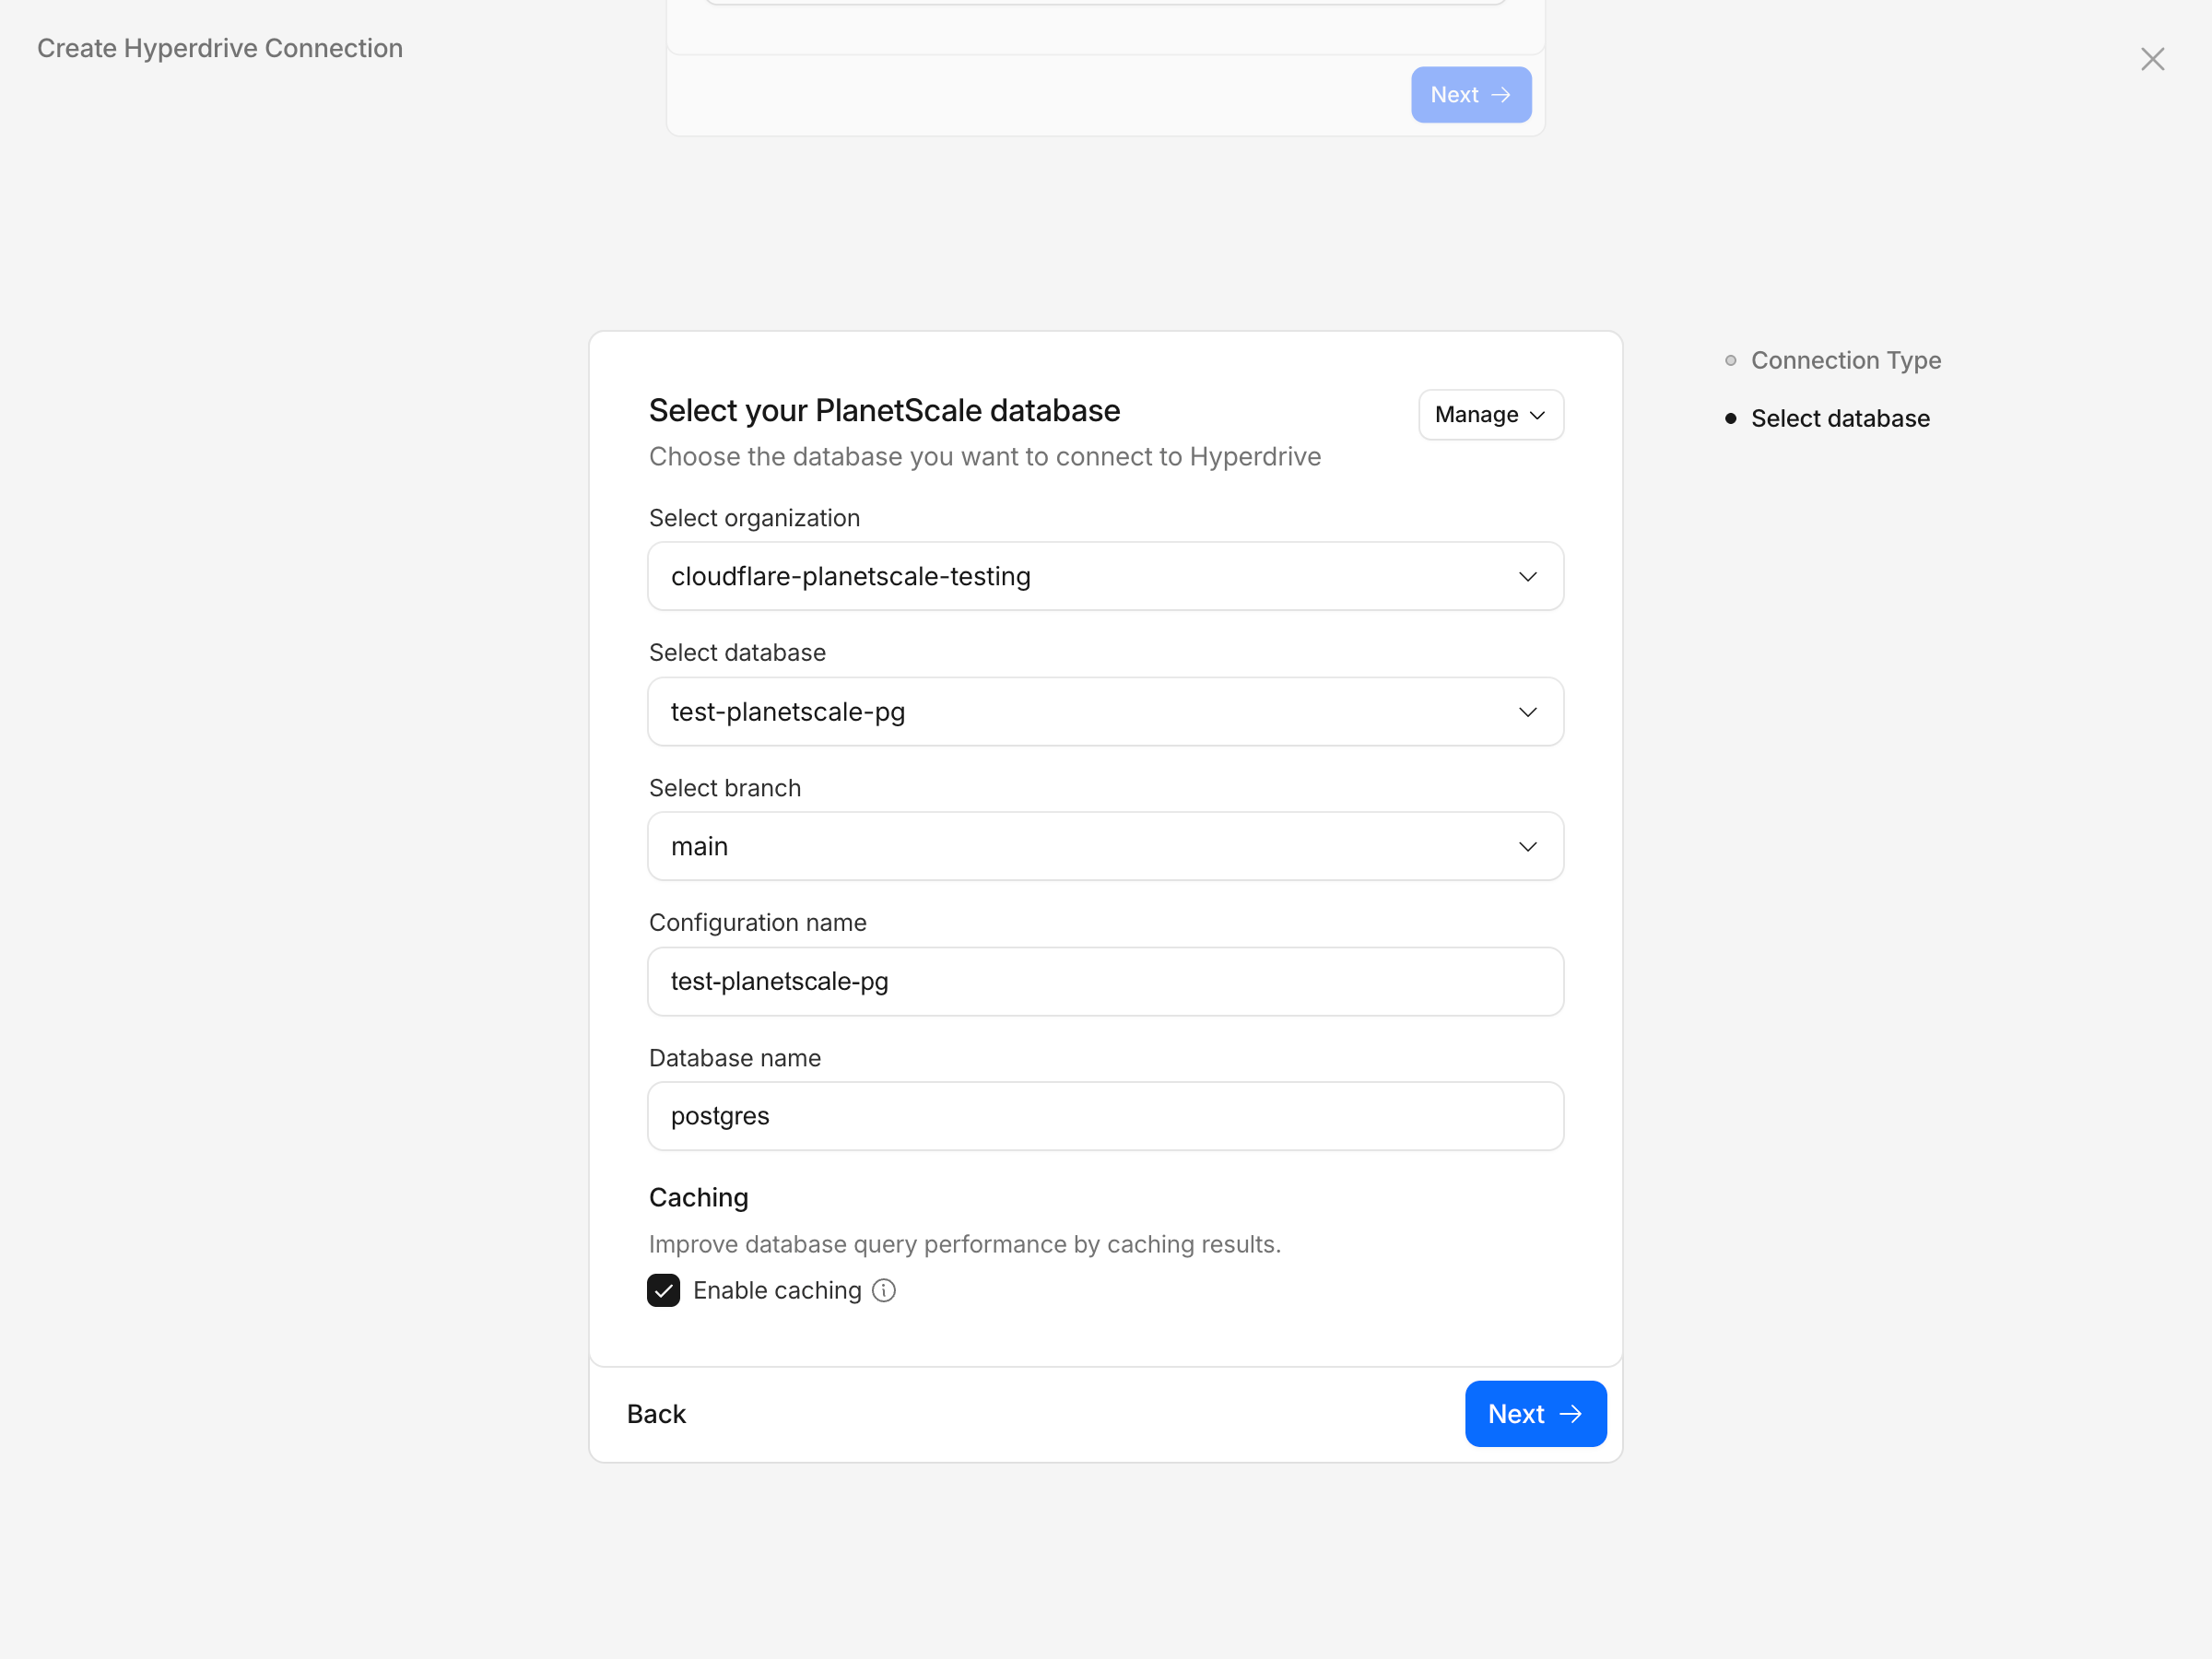
7
You should see a success screen with the connection binding details to add to your 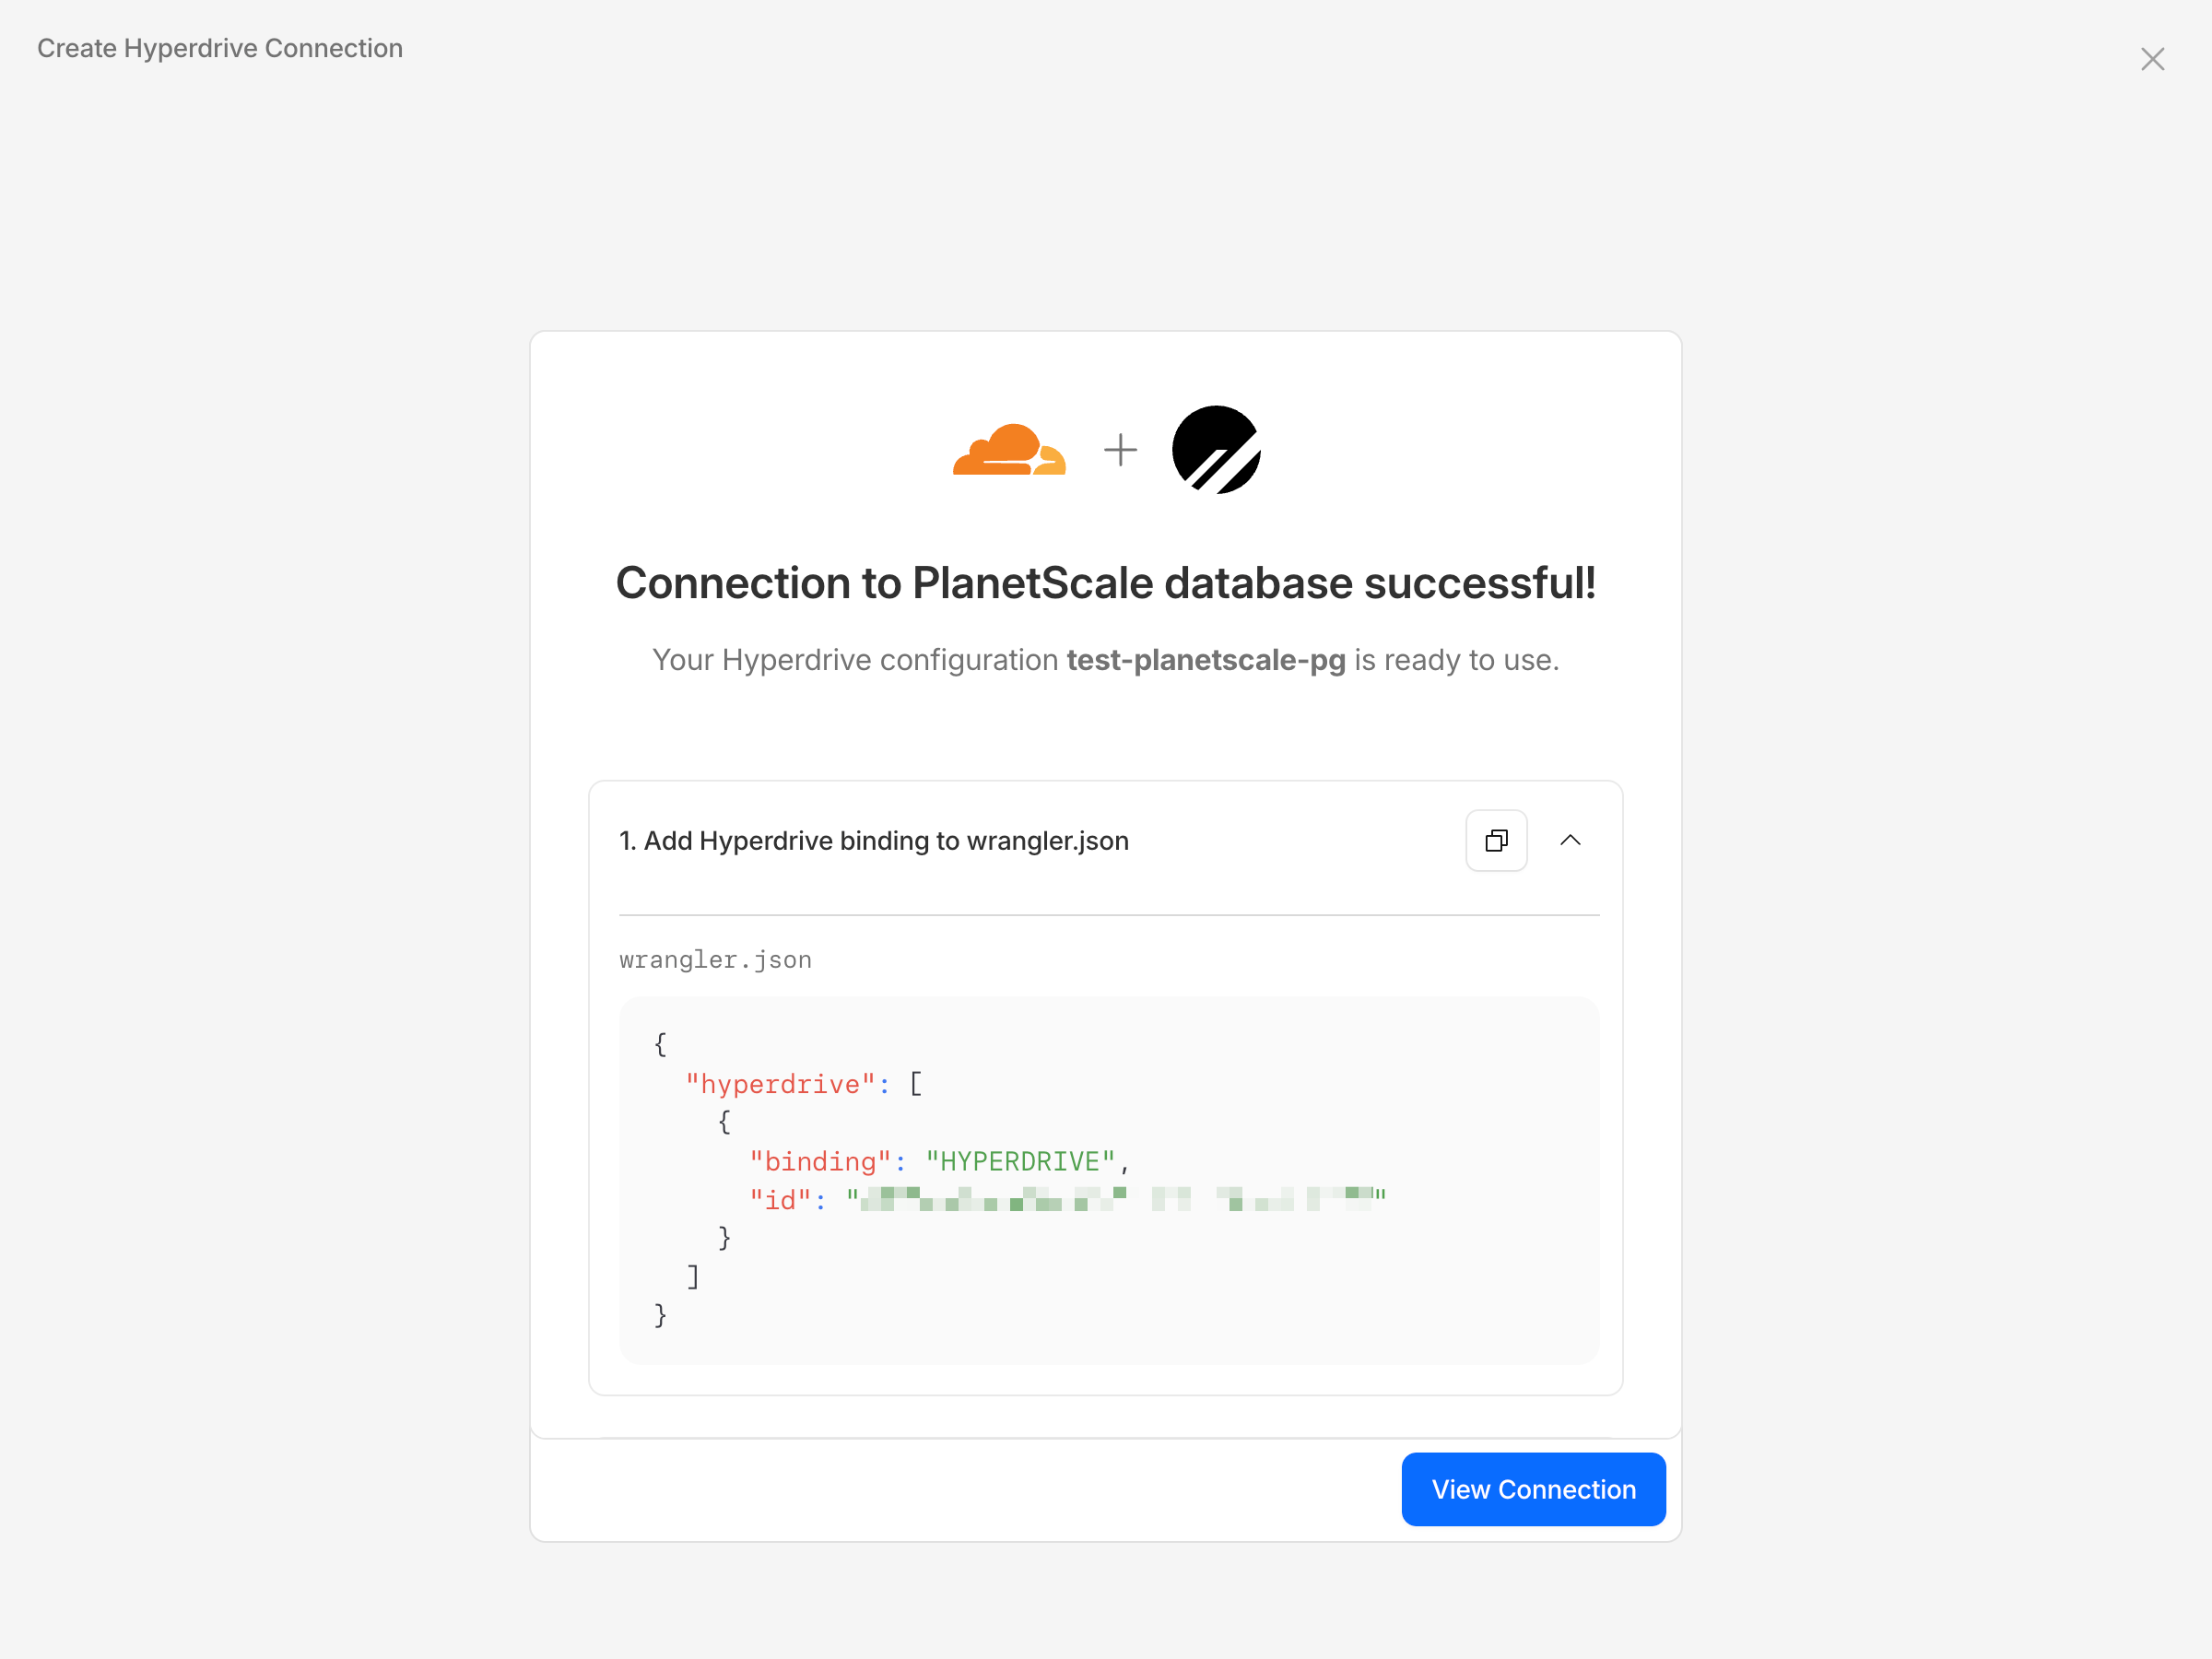
wrangler.json file.8
You should now have metrics within your Cloudflare dashboard in the Hyperdrive page.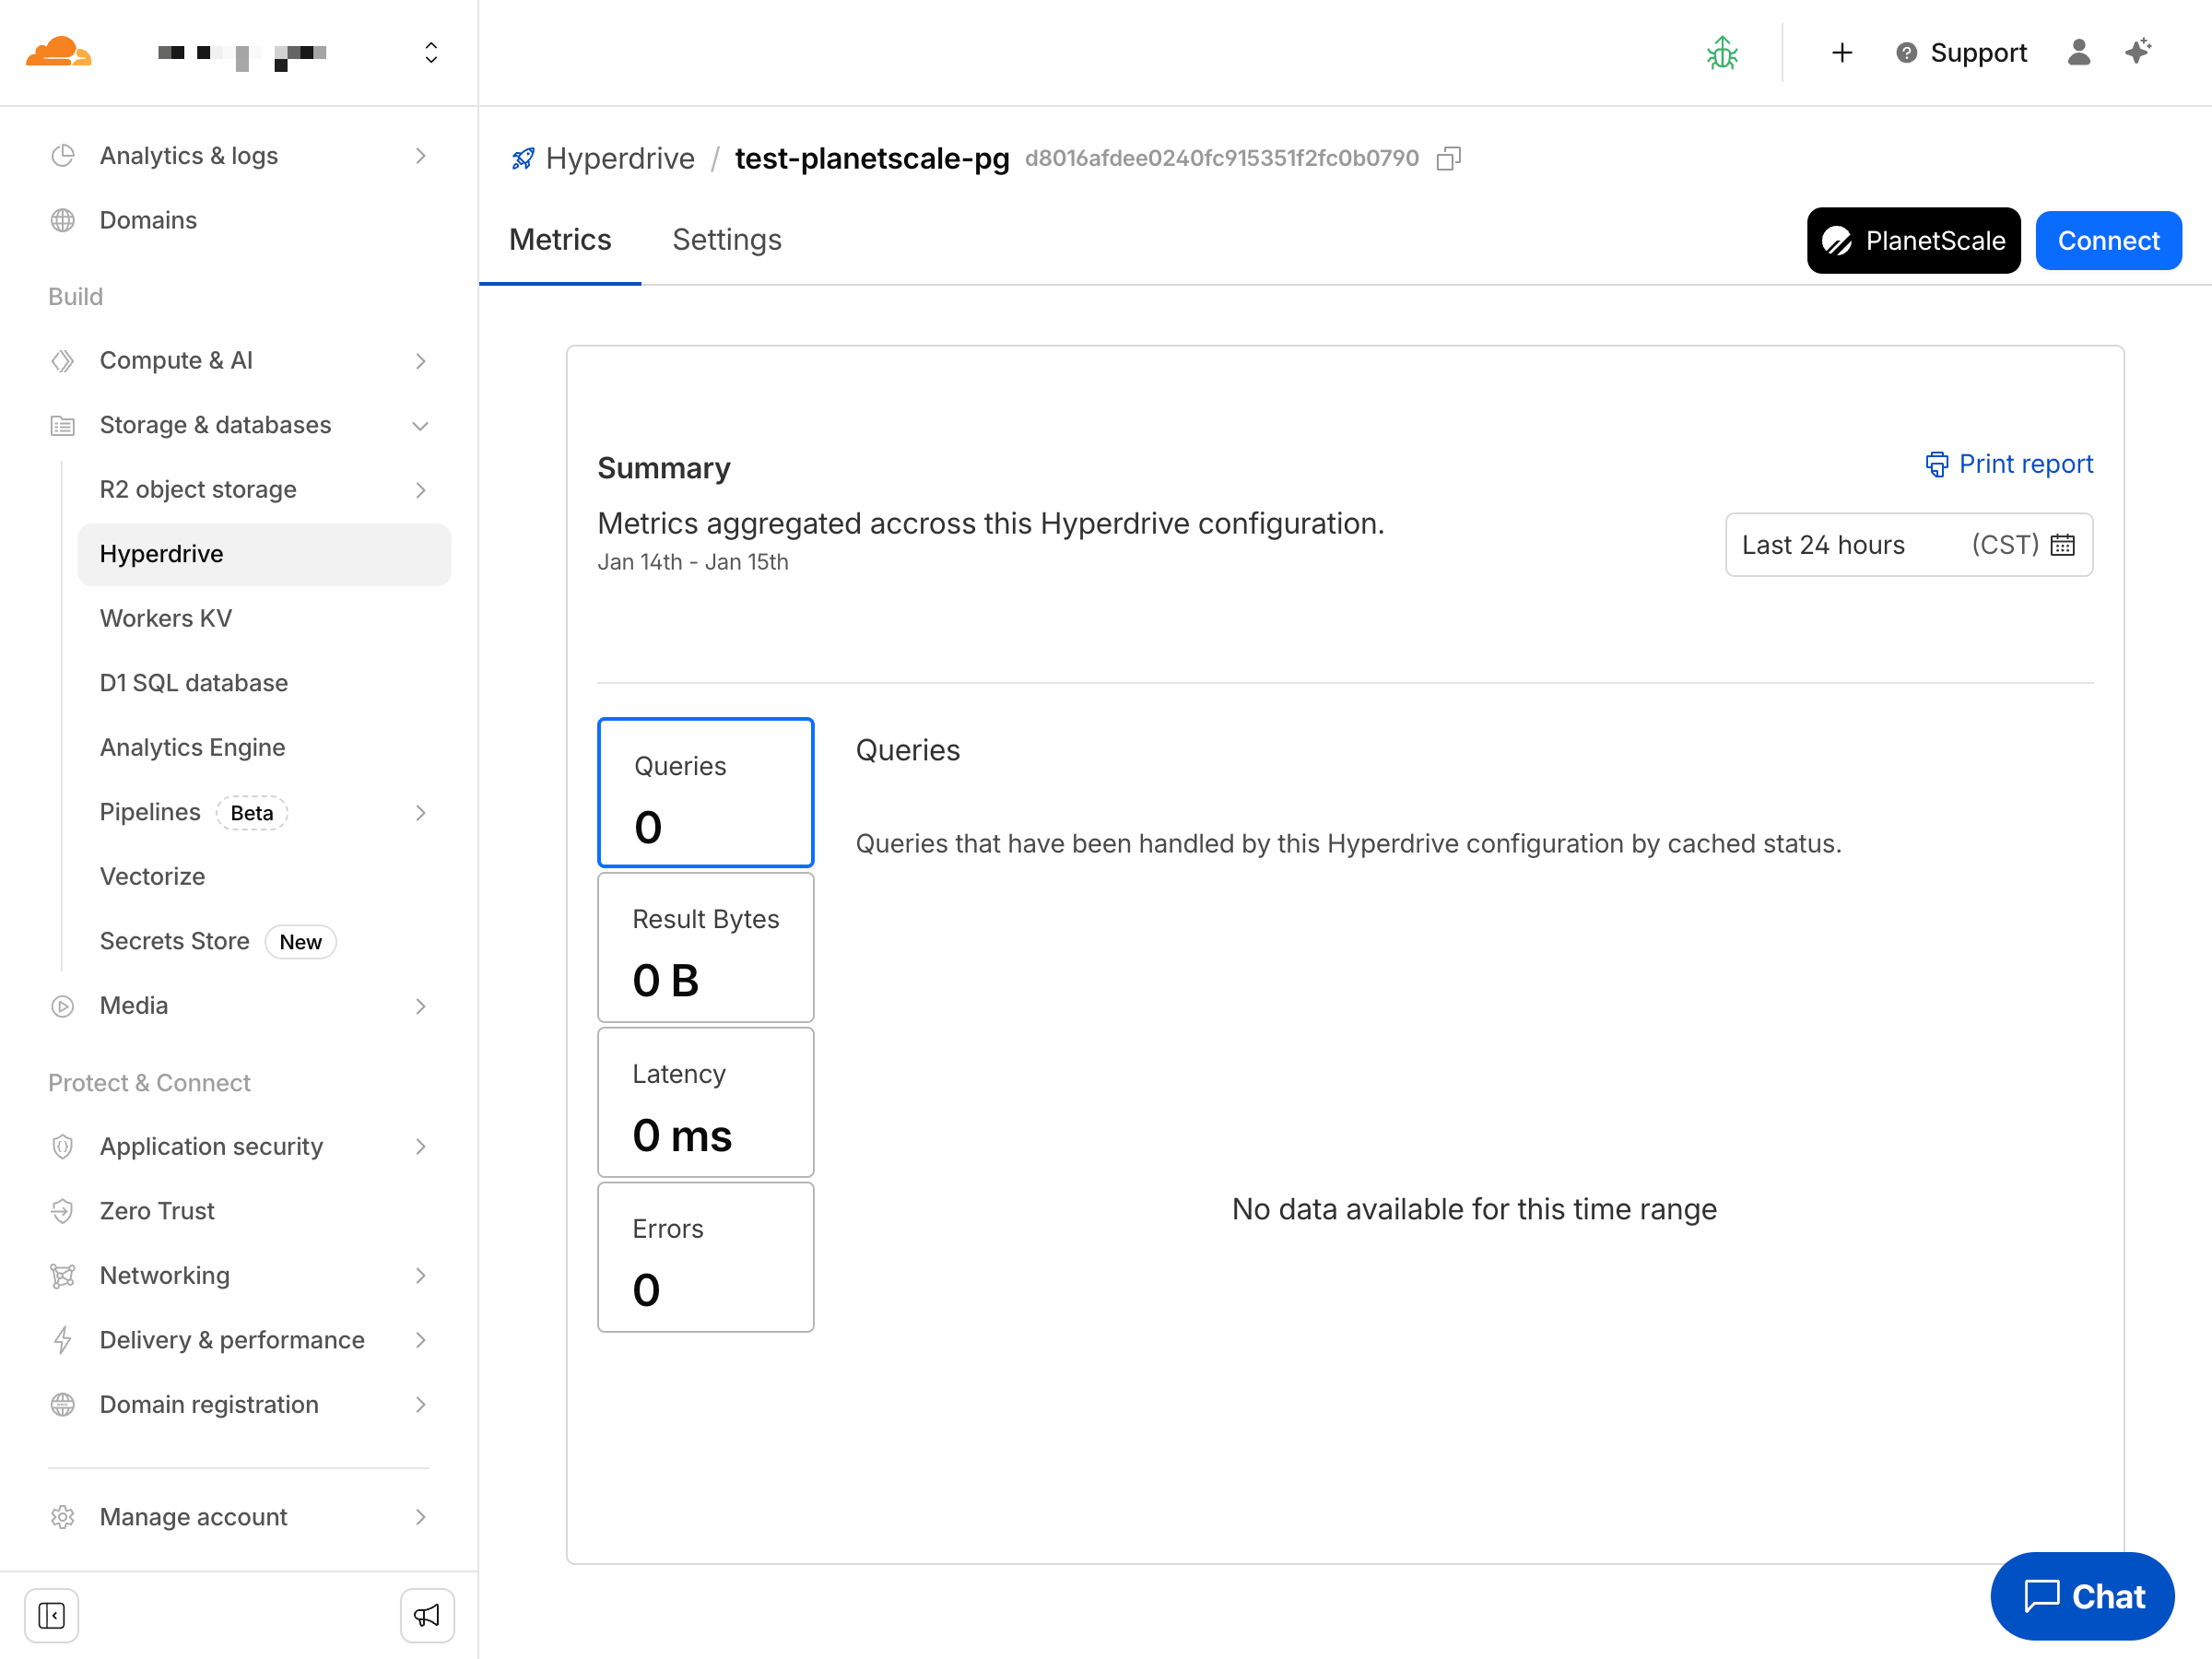
Configure Worker placement
By default, Workers run at the edge close to your users. For database-heavy workloads with multiple round trips, you can use placement hints to run your Worker closer to your PlanetScale database and reduce latency. Add aplacement configuration to your wrangler.jsonc file with the region that matches your PlanetScale database region:
wrangler.json
PlanetScale region to placement hint mapping
PlanetScale region to placement hint mapping
"mode": "smart" for automatic placement based on measured latency:
wrangler.json
Step 2: Deploy your Worker
Run the following to deploy your Worker.Terminal
What’s next?
Once you’re done with development, it is highly recommended that safe migrations be turned on for yourmain production branch to protect from accidental schema changes and enable zero-downtime deployments.
When you’re ready to make more schema changes, you’ll create a new branch off of your production branch. Branching your database creates an isolated copy of your production schema so that you can easily test schema changes in development. Once you’re happy with the changes, you’ll open a deploy request. This will generate a diff showing the changes that will be deployed, making it easy for your team to review.
Learn more about how PlanetScale allows you to make non-blocking schema changes to your database tables without locking or causing downtime for production databases.