Overview
This document will demonstrate how to migrate a database from Google Cloud Platform (GCP) Cloud SQL MySQL Cluster to PlanetScale using our Import tool.This guide assumes you are using MySQL on GCP. Other database systems available through GCP will not work with the
PlanetScale import tool.
Prerequisites
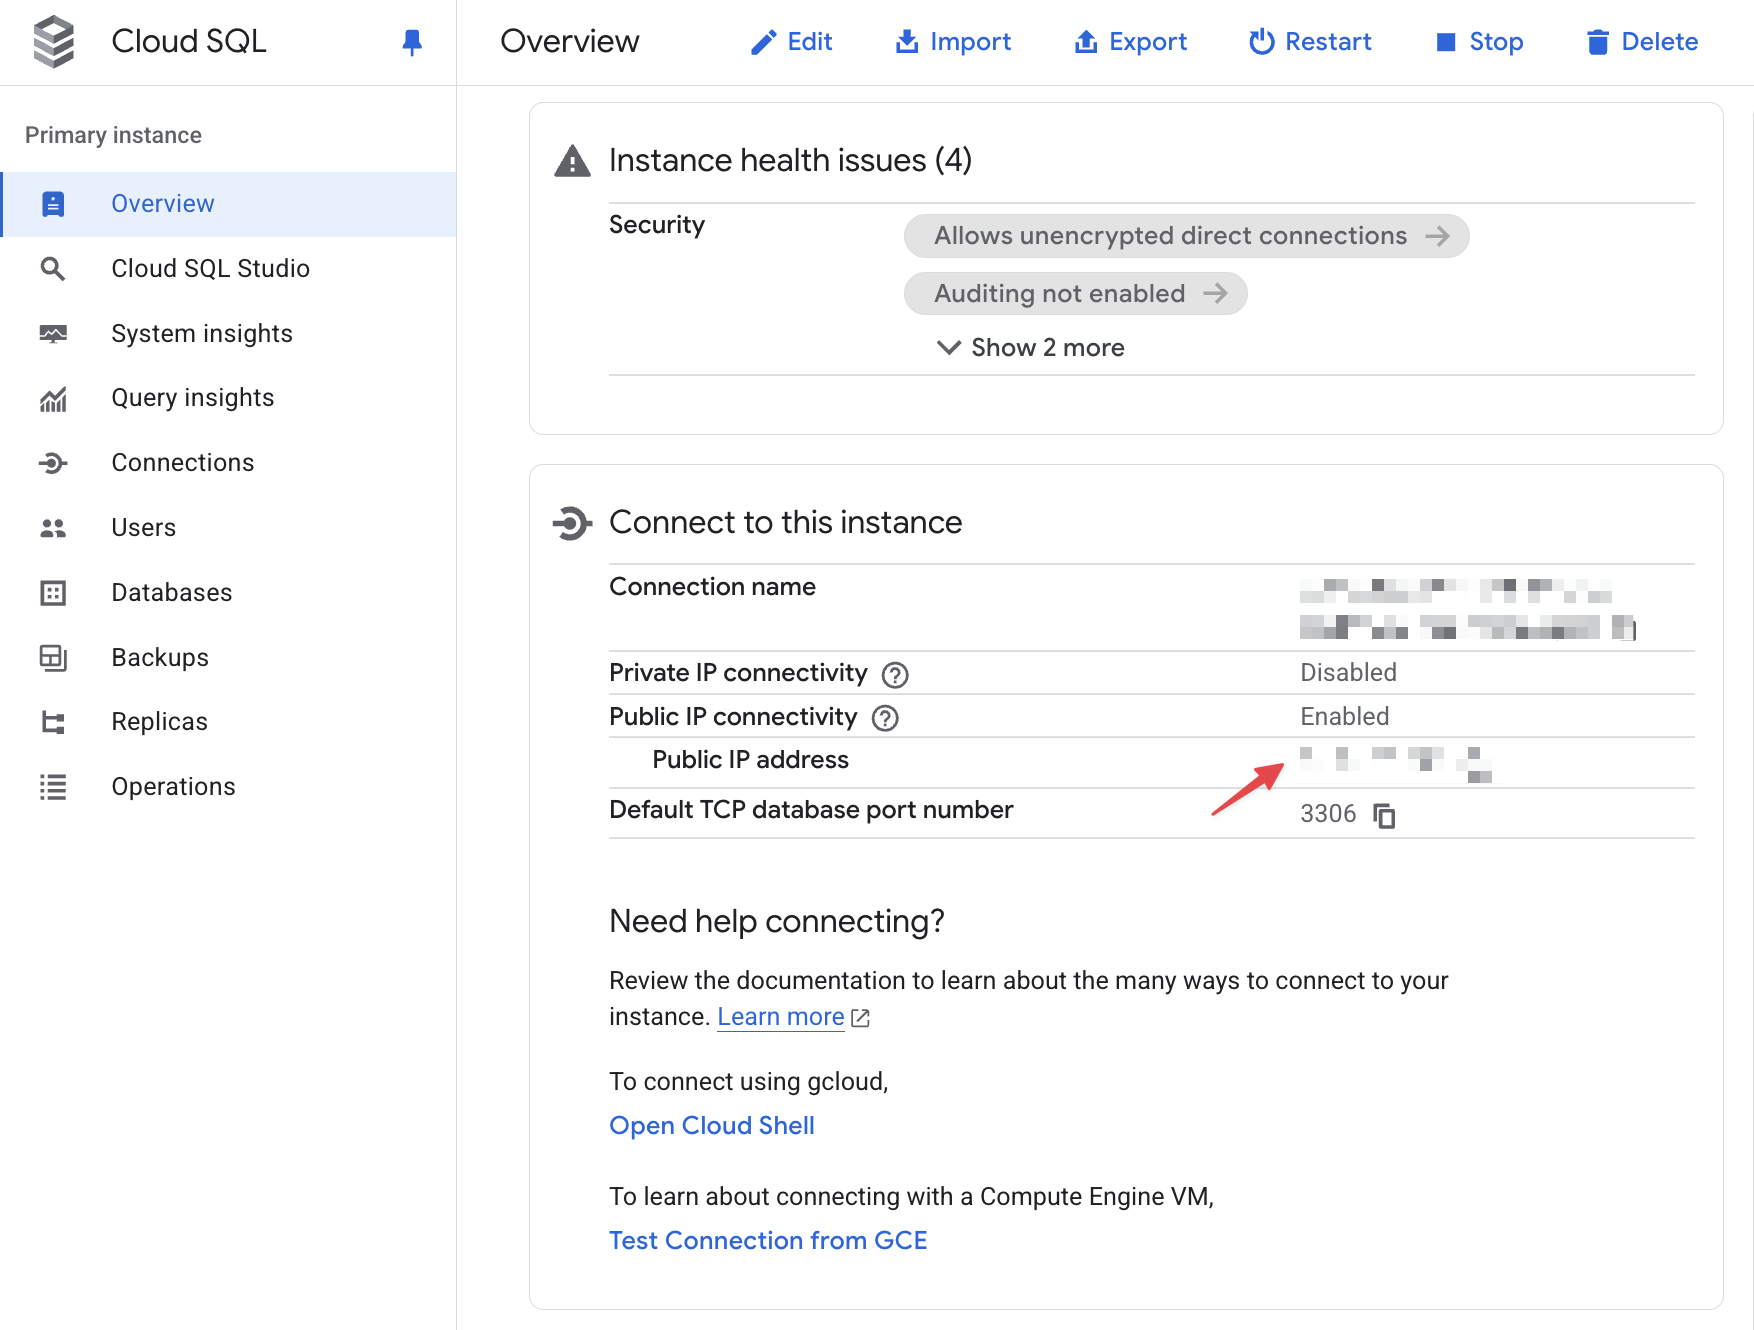
Before you can perform a migration, gather the following information from the GCP Console:- Public IP address - Found in the Overview tab of your Cloud SQL cluster under the Connect to this instance section
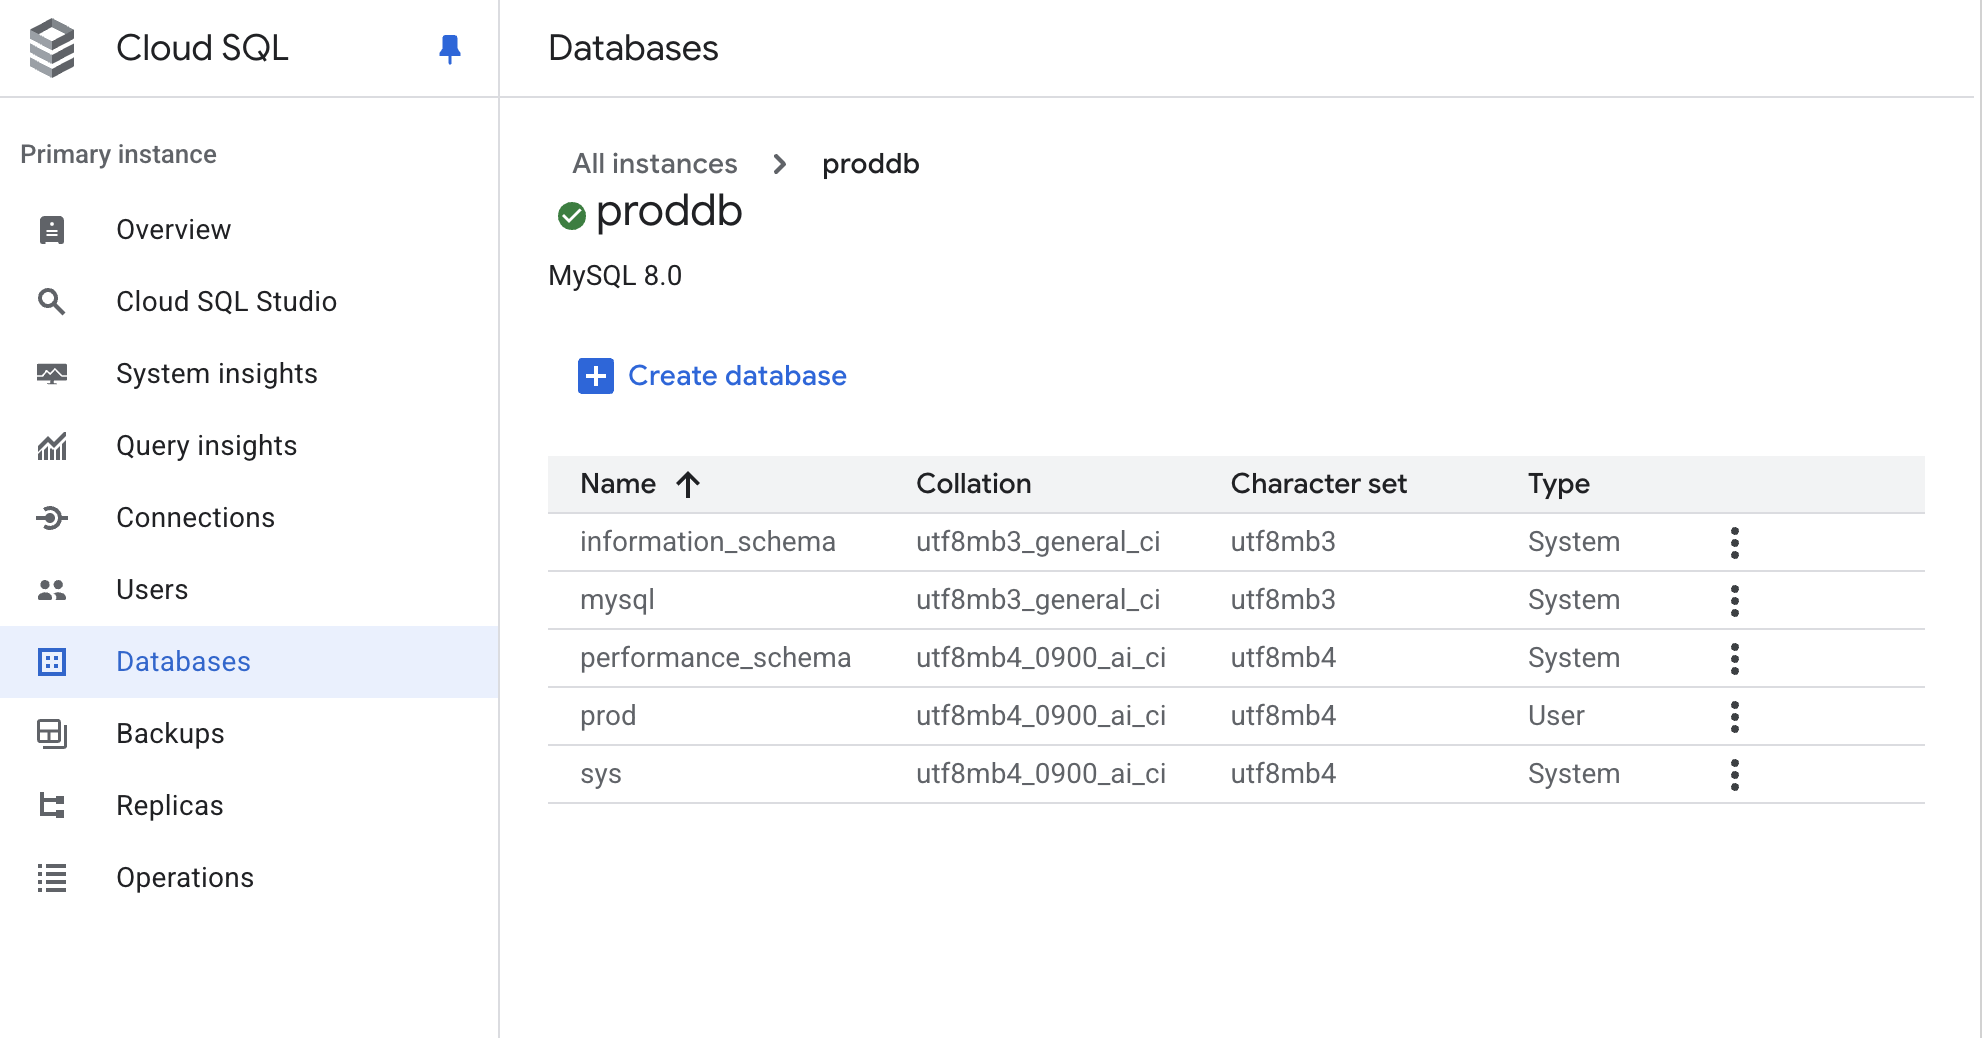
- Database name - The name of the database you want to import
- Root username and password - You’ll need these to create the migration user
prod database.
Create a migration user
Create a migration user account with limited privileges for the import process. You must run this as the root user or another user with admin privileges. Connect to your Cloud SQL instance as root using the MySQL command line:<SUPER_STRONG_PASSWORD>- The password for themigration_useraccount<DATABASE_NAME>- The name of the database you will import into PlanetScale
ImportantYou must create the migration user on the MySQL command line and not in the GCP console. Creating users through the GCP console automatically grants the
cloudsqlsuperuser role, which will cause the import to fail.Allow PlanetScale to connect to your Cloud SQL instance
For PlanetScale to connect to your database, you’ll need to update the Authorized networks for your cluster. The specific IP addresses to permit are shown during the import workflow on the Connect to external database step. The list includes IP addresses specific to your PlanetScale database region. See the Import public IP addresses page for more details on where to find these IP addresses in the workflow. To permit traffic from these IP addresses to your database in GCP, select Connections from the navigation on the left. Under Authorized networks, click “Add network”. This will display an inline form for you to add a network. The name of the field is arbitrary, but the Network field should contain the IP address that needs access to your database. Click “Done” to add the new entry. Perform this step for each IP address for the selected region, then click “Save” to apply the settings.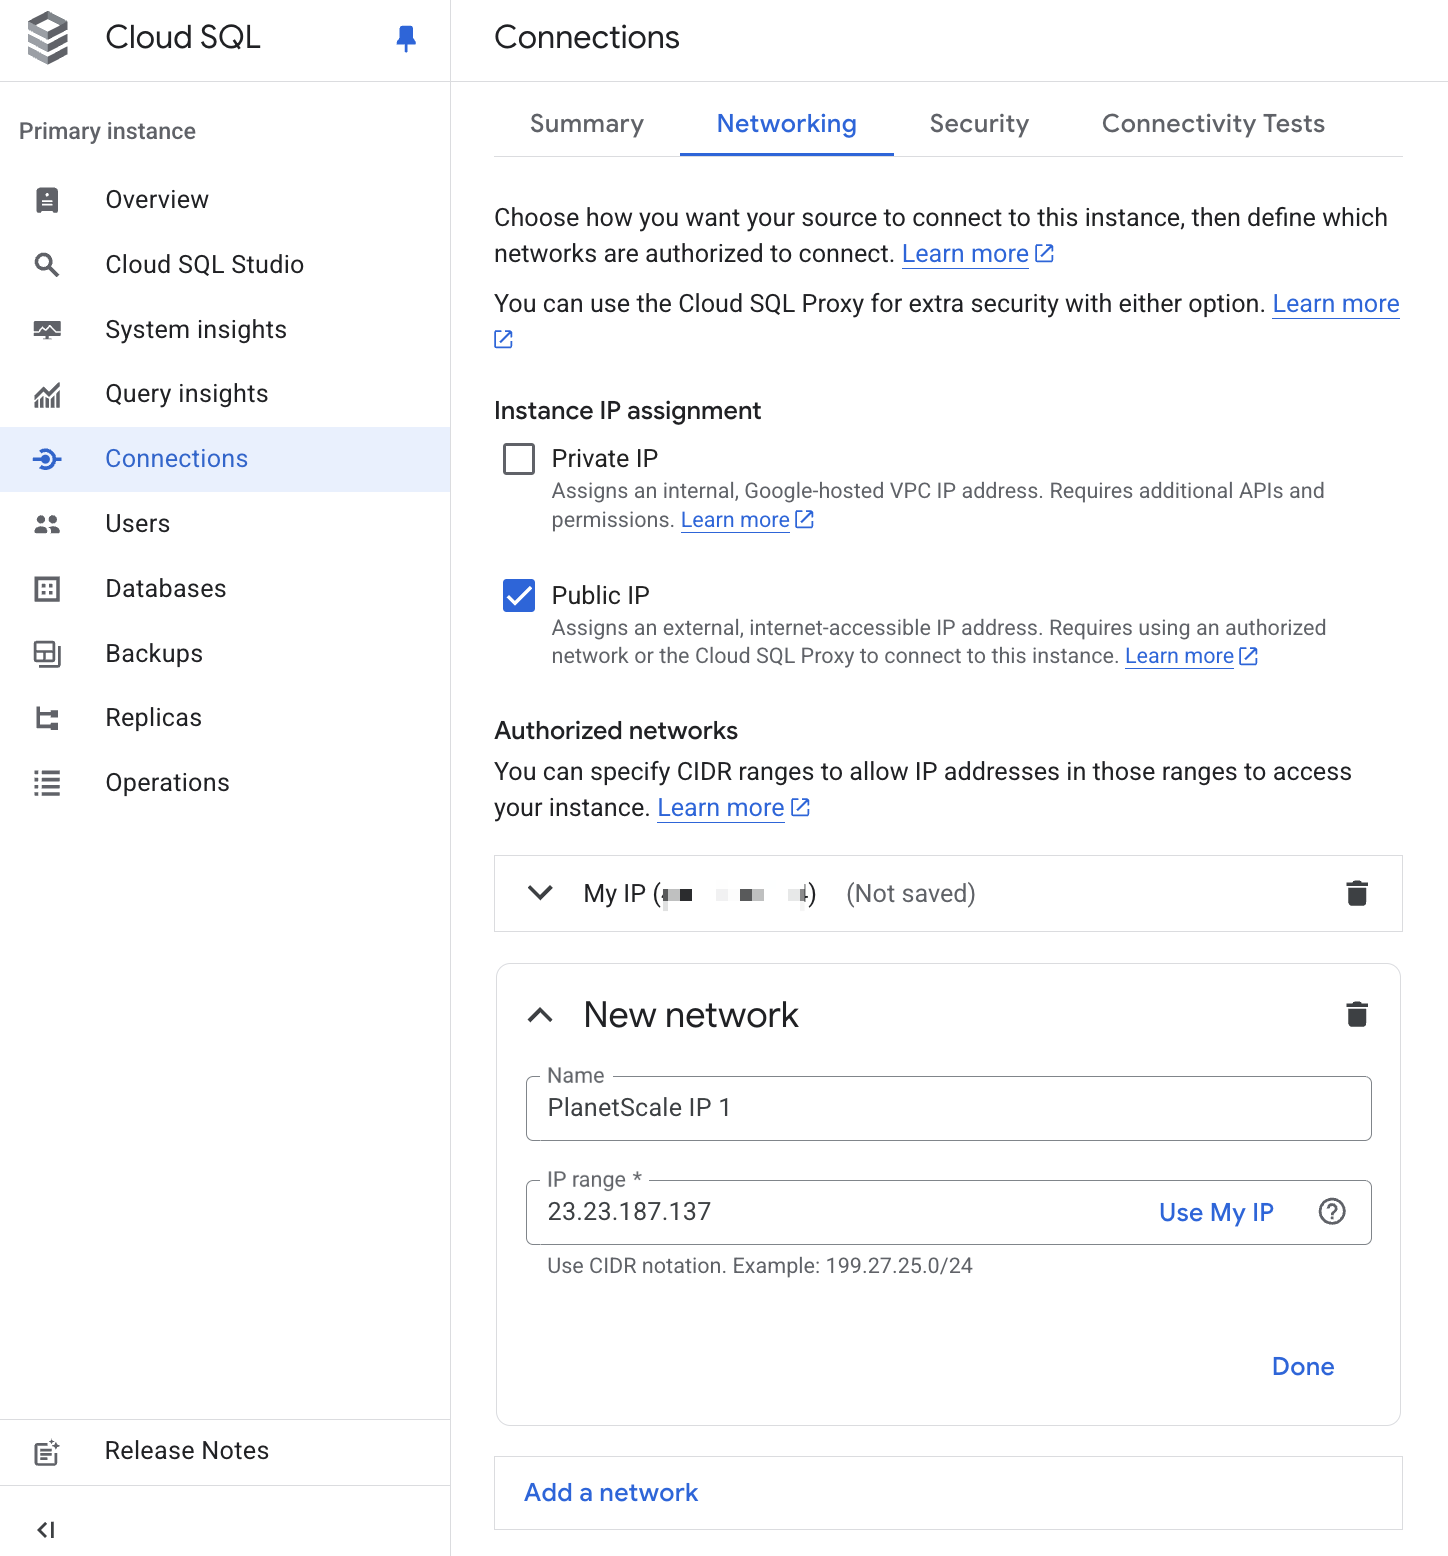
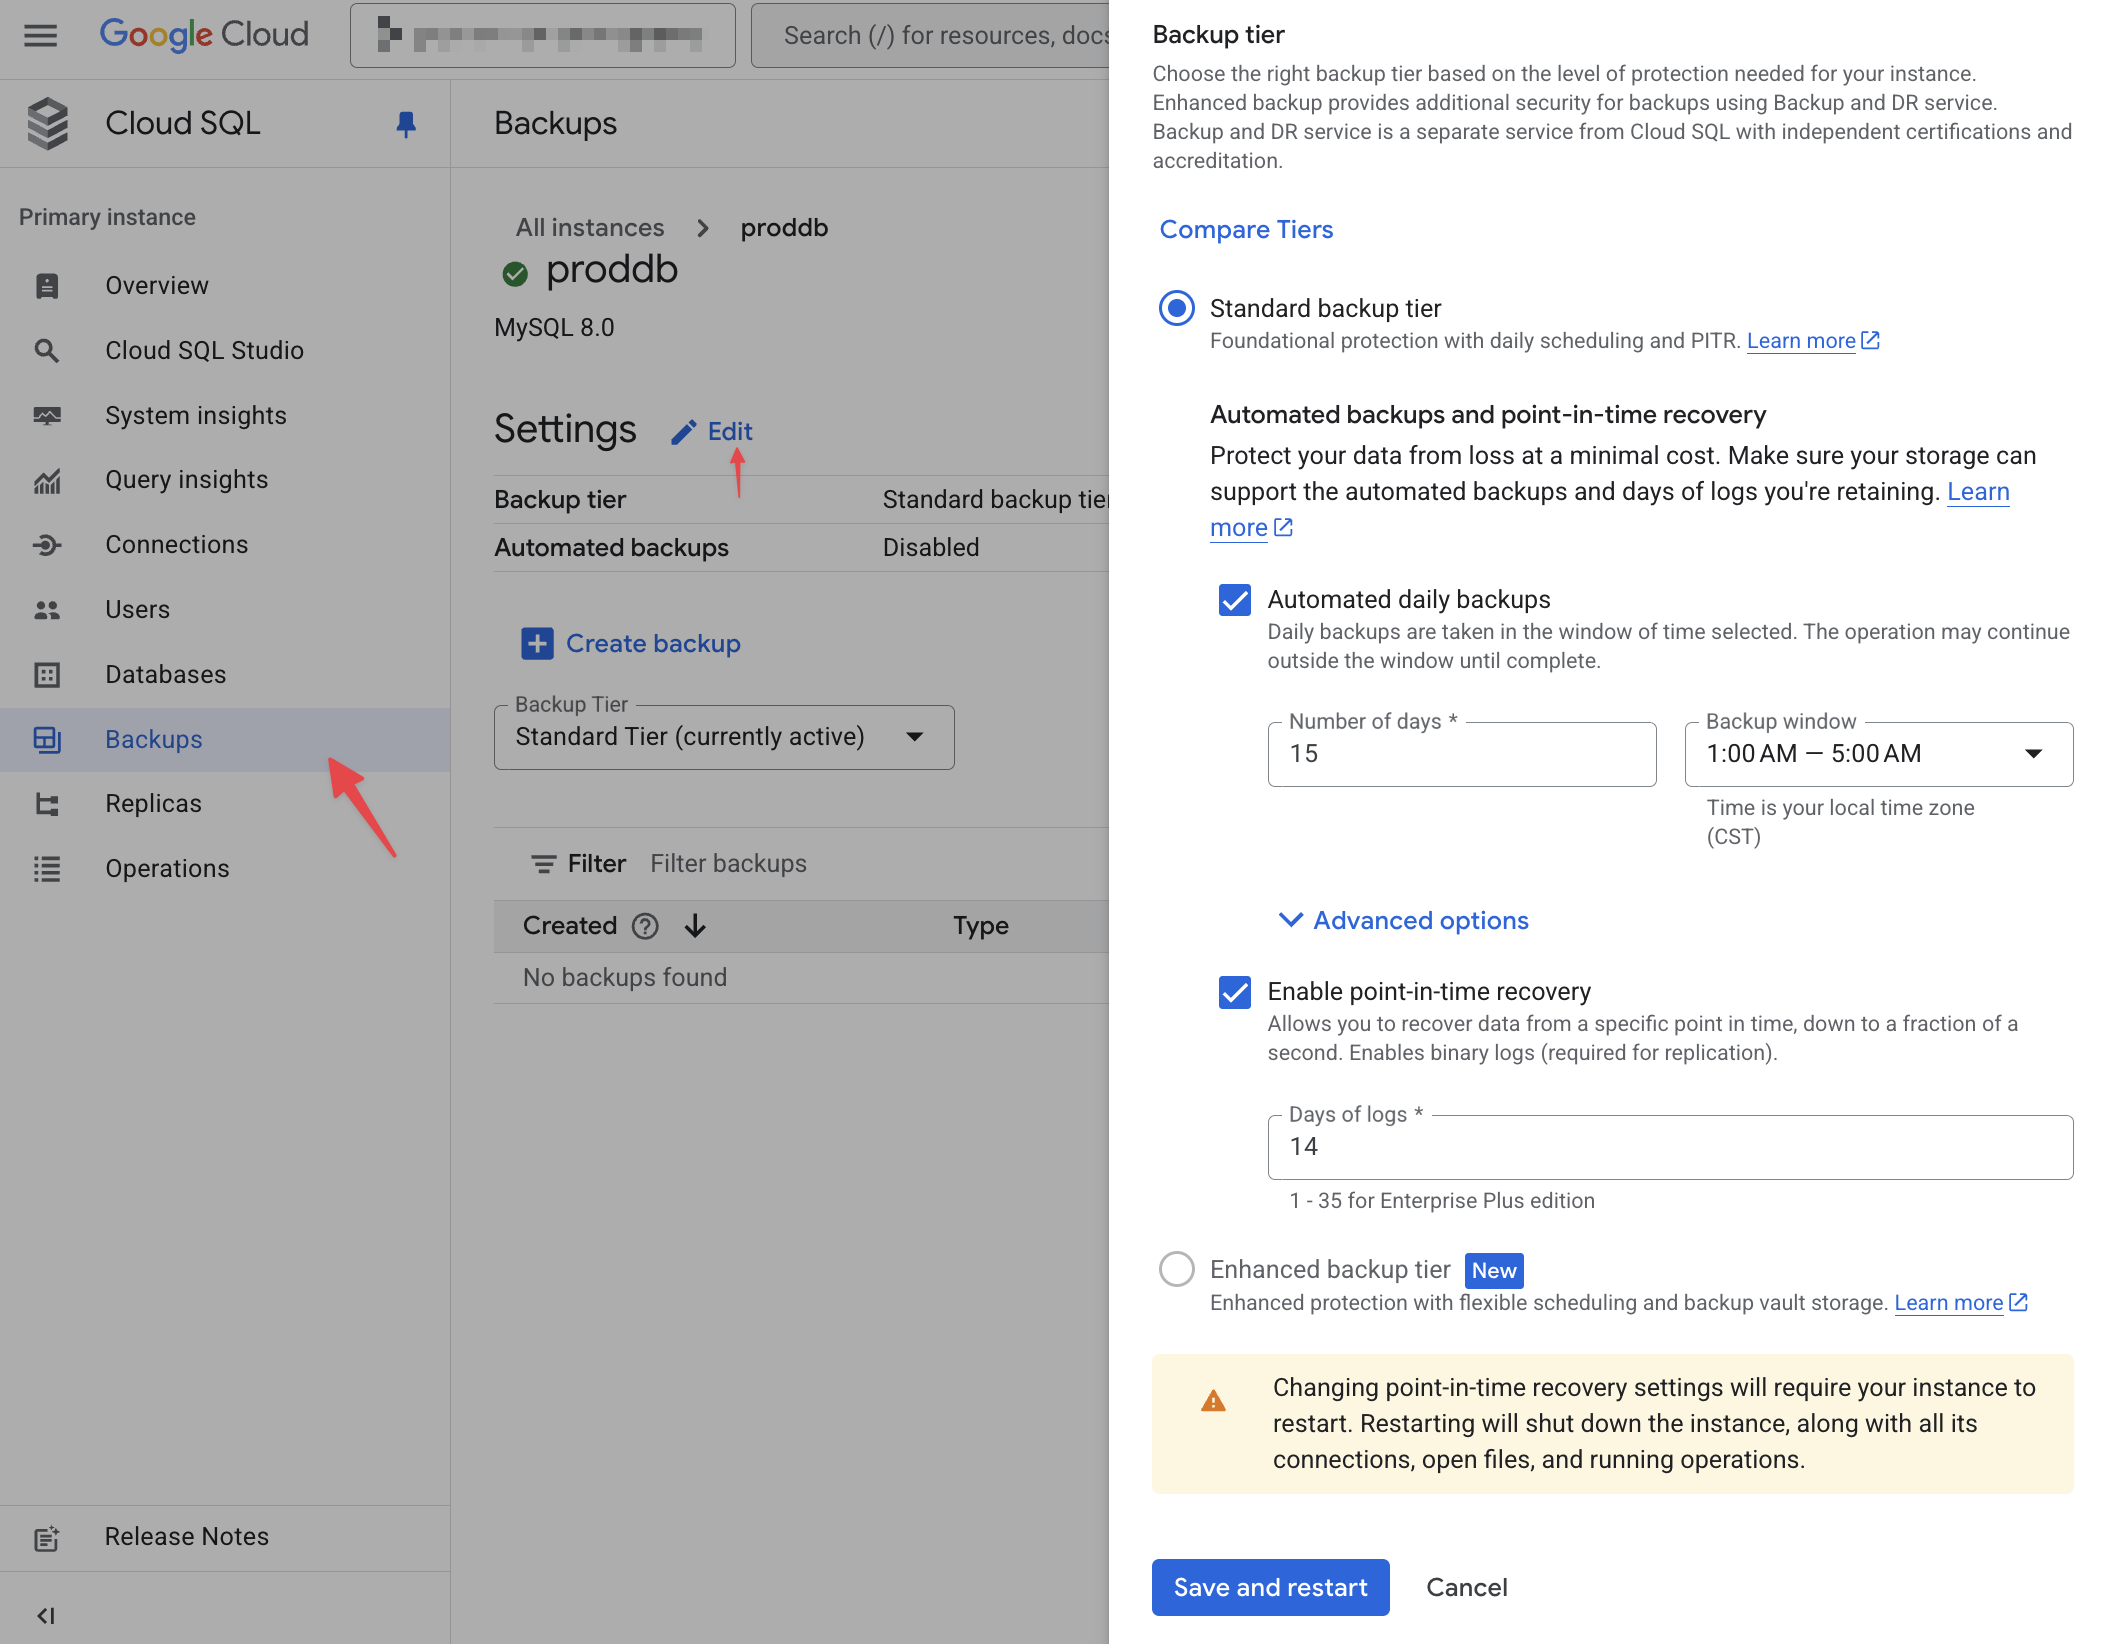
Configure MySQL server settings
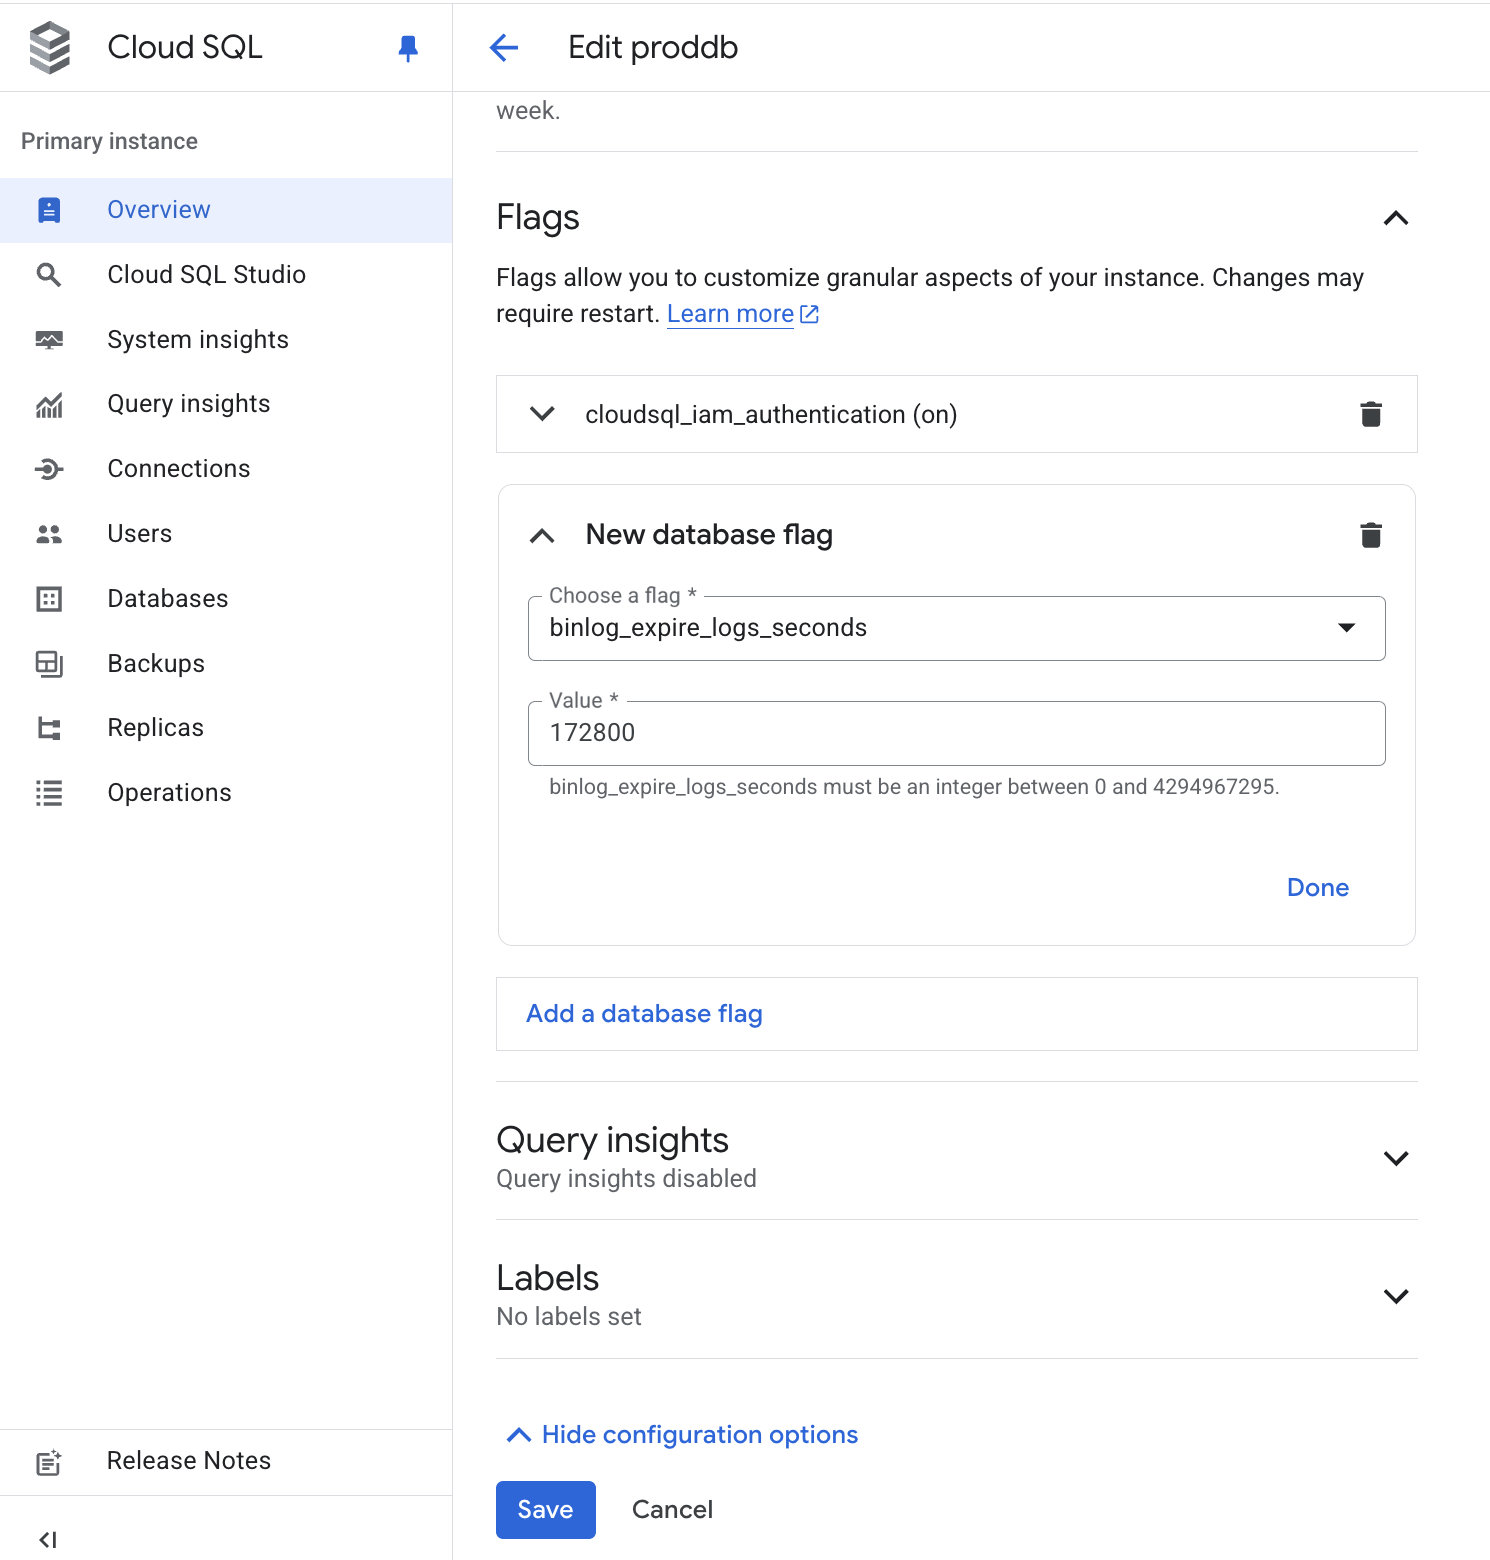
Certain MySQL server settings may need to be changed before you can begin the import. The initial connection test will fail if these settings are not configured correctly.- binlog_expire_logs_seconds
172800 seconds.
Make sure to select the “Done” button.
- log_bin
log_bin is set to OFF you may need to enable Point in Time Recovery (PITR) from the GCP console to start binary logging.
Importing your database
Now that your GCP Cloud SQL database is configured and ready, follow the Database Imports guide to complete your import. When filling out the connection form in the import workflow, use the following information:- Host name - Your GCP Cloud SQL public IP address (from Prerequisites)
- Port - 3306 (default for Cloud SQL)
- Database name - The exact database name to import
- Username -
migration_user - Password - The password you set for the migration user
- SSL verification mode - Select based on your Cloud SQL SSL configuration
- Creating your PlanetScale database
- Connecting to your Cloud SQL database
- Validating your configuration
- Selecting tables to import
- Monitoring the import progress
- Switching traffic and completing the import