Overview
If you are on the Base plan and would like to set up AWS PrivateLink, see our Private connections documentation.How PlanetScale Managed and AWS PrivateLink work
AWS PrivateLink requires two components:- A VPC endpoint service deployed in the AWS Organizations member account that PlanetScale controls.
- A VPC endpoint interface, sometimes referred to as a “VPC endpoint” in AWS, deployed in the account that your applications operate in.
Step 1: Initiating the setup process
There is no fully automated way to establish a PrivateLink connection. If you would like to initiate the process, please get in touch with your Solutions Engineer and let them know the AWS Account ID that you intend to create the VPC endpoint in. Once they receive your AWS Account ID and forward it to the team responsible for provisioning your deployment, the team will provide the Solutions Engineer (and ultimately you) with the Service Name of the VPC endpoint service that will be responsible for accepting your connection.It is important to keep the service name in your records. It is the only piece of information you need to input when creating your VPC endpoint.
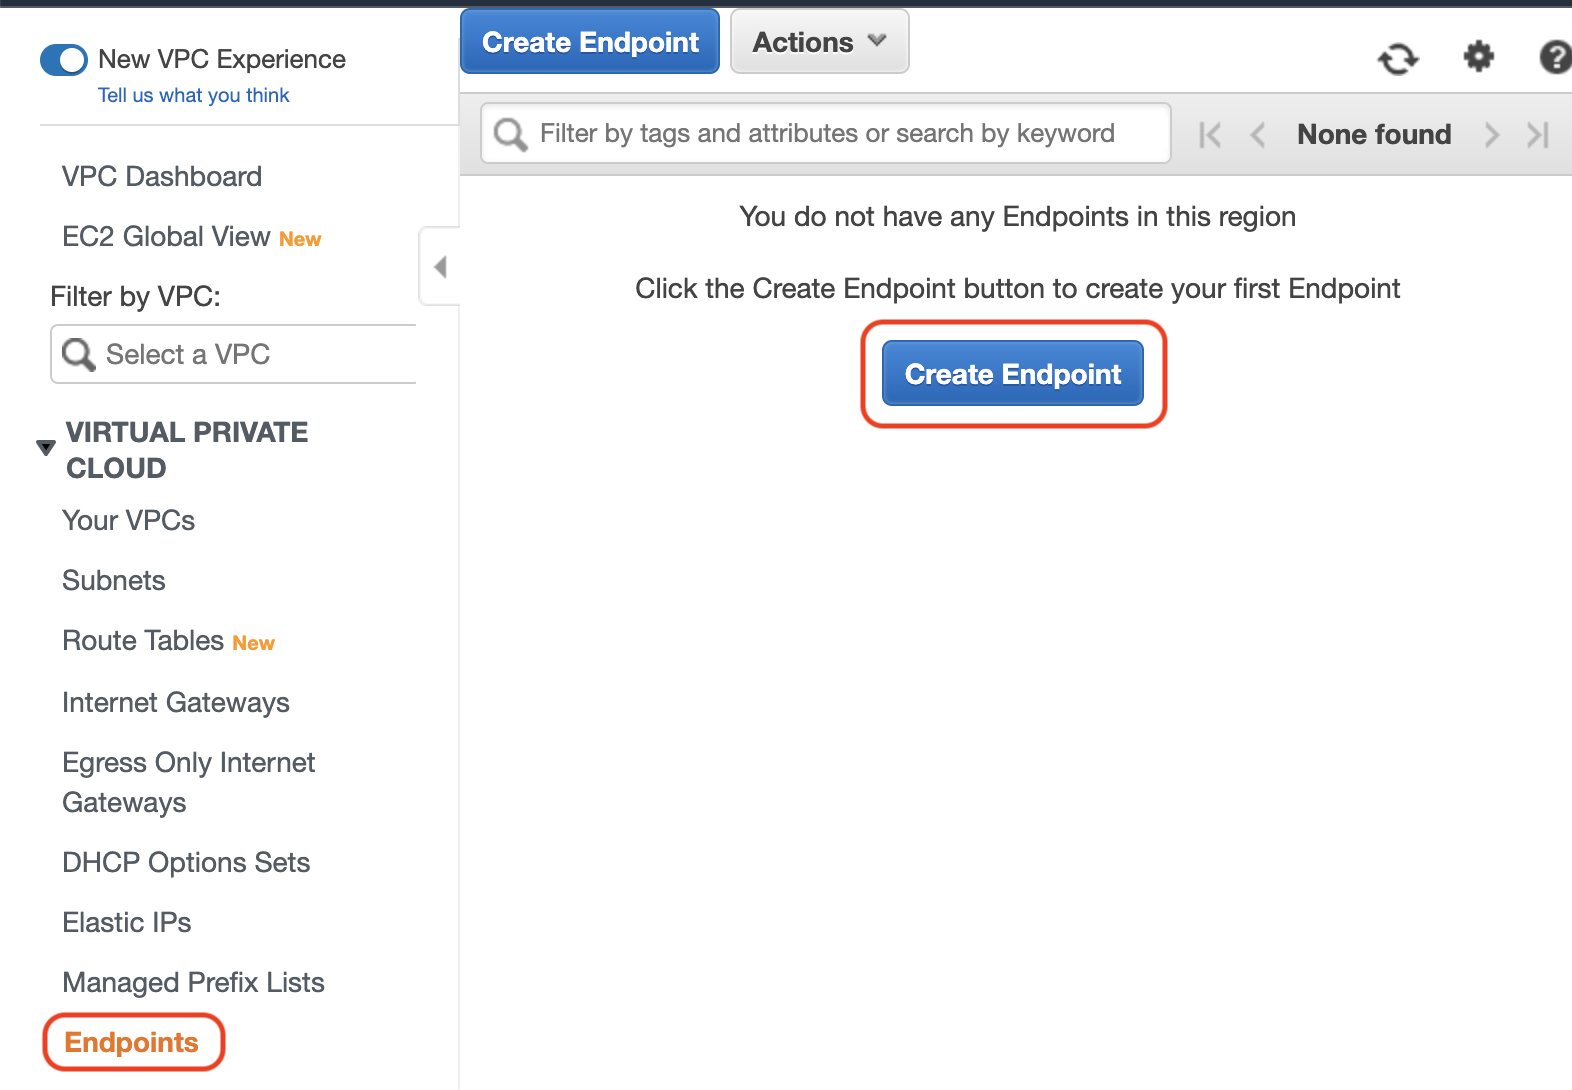
Step 2: Establishing a VPC endpoint connection
The following steps are an example of establishing a VPC endpoint connection in the AWS Console. In this example, the customer has requested that their deployment be in theeu-west-1 region.
When you go through the steps, make sure that you have selected the region that matches the region that your PlanetScale Managed cluster deployment has been provisioned into.
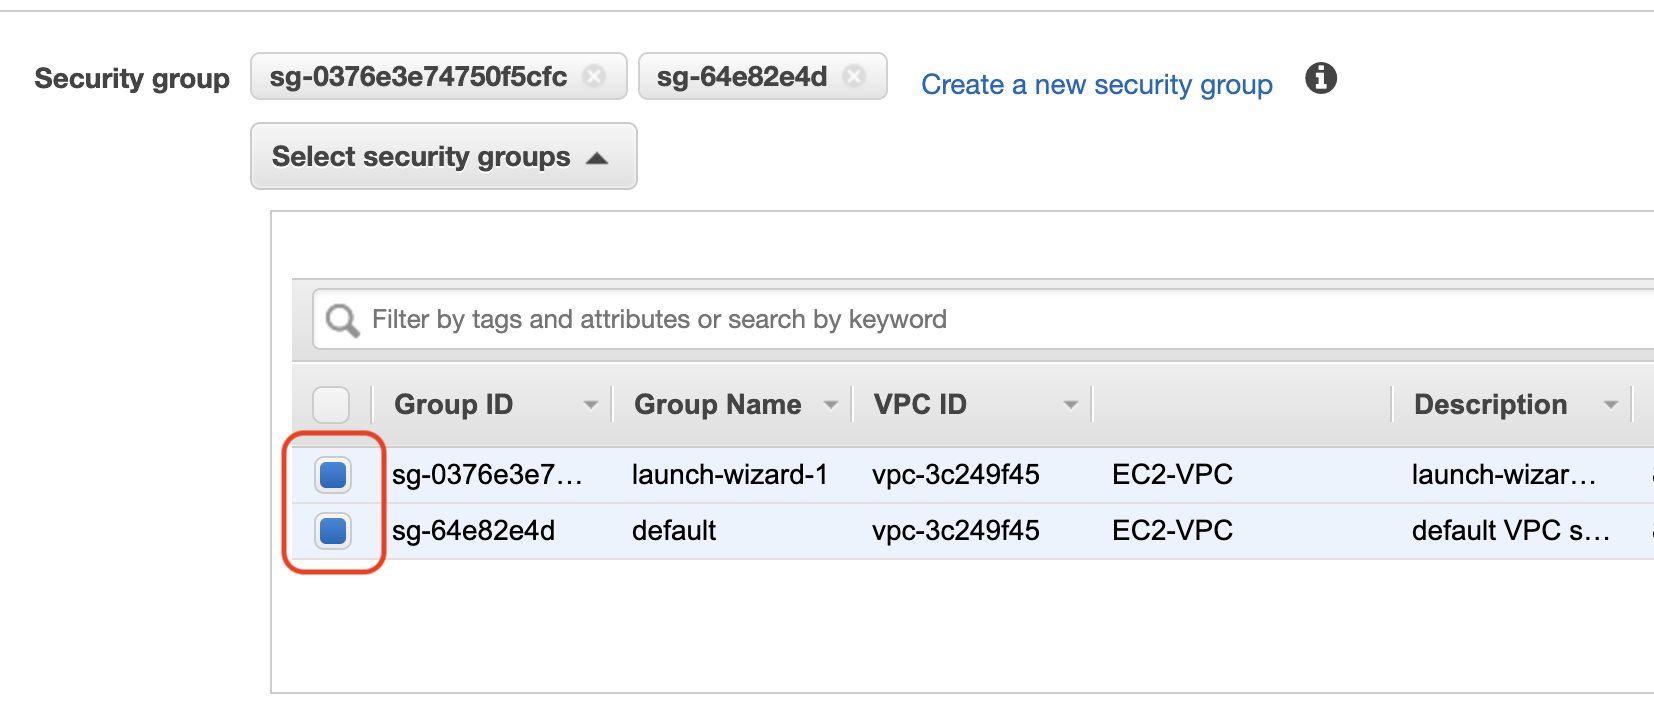
Select the “Find service by name” selector, input the provided Service Name, and select the “Verify” button.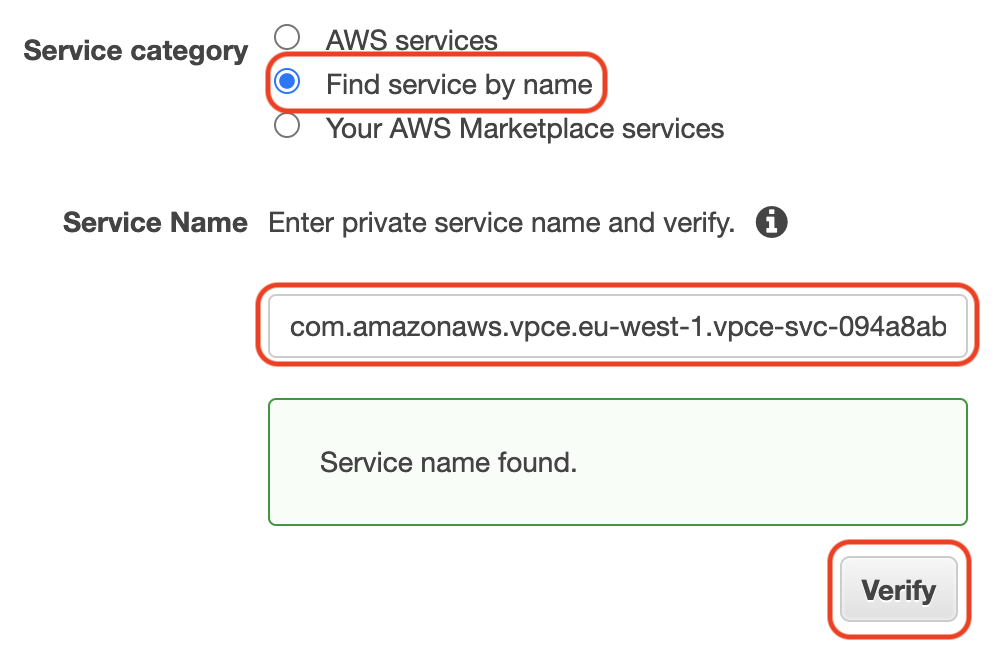
Select the VPC in the drop-down where you wish to provision this VPC endpoint and the relevant subnets inside your VPC.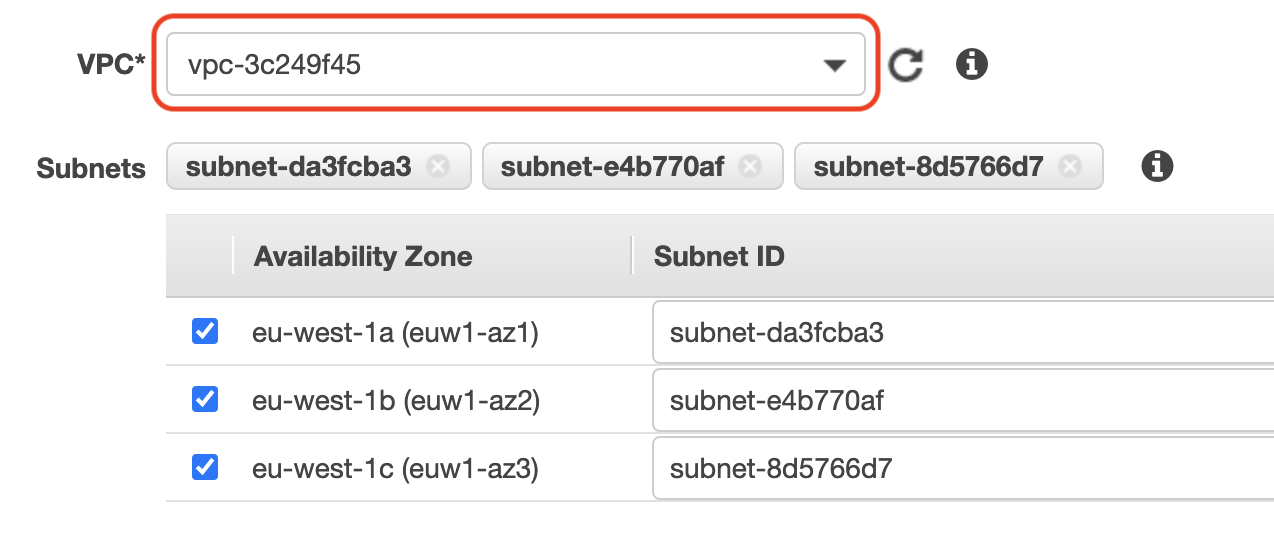
Select the “Enable DNS Name” checkbox. Take note of the value of your “Private DNS Name” field. That is how we will verify that the connection is operating successfully.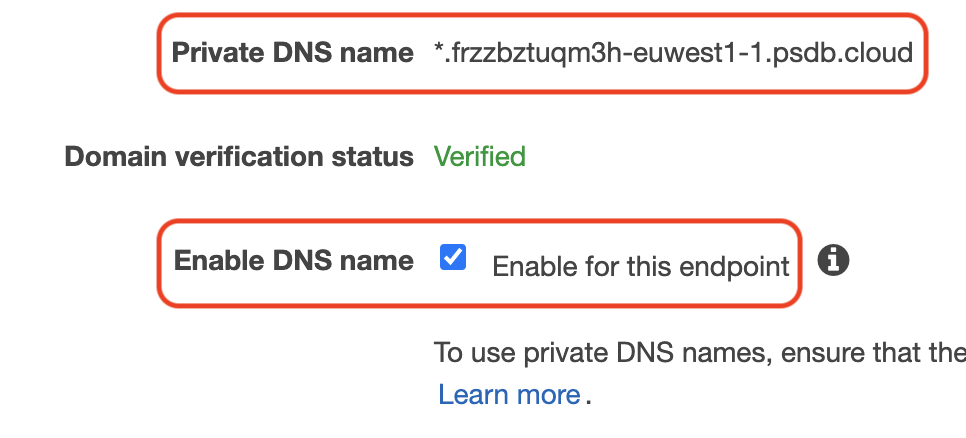
The “Creating” spinner will spin momentarily and then deliver you the news of the endpoint creation. You should see a VPC endpoint in the 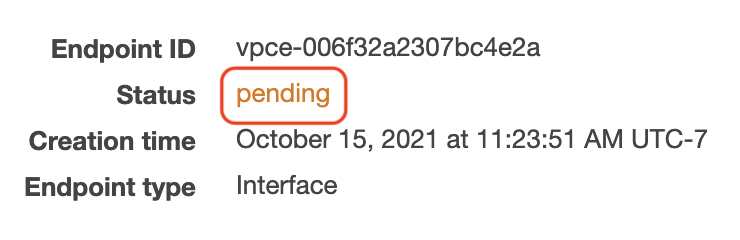
pending state if it was successful. If the creation failed, record the reason and consult your Solutions Engineer.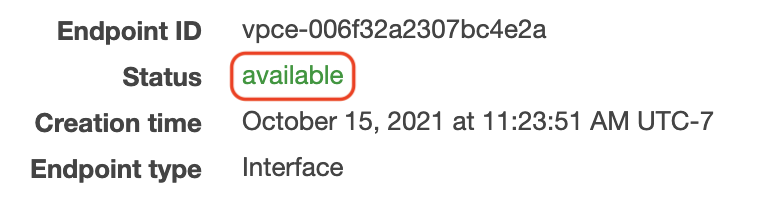
Step 3: Verifying a VPC endpoint connection
PlanetScale publishes a wildcard DNS record for your private region. AWS PrivateLink will override the DNS record in your VPC to point to your VPC endpoint instead of the publicly published record. To verify that the DNS override is working correctly, issue the followingdig command using the value of your “Private DNS Name” instead of the value in the example:
dig command returns a set of static IP addresses, your VPC Endpoint connection is operating successfully. If it returns a CNAME to an ELB record (for example, something like something.elb.region.amazoneaws.com), your connection is not operating successfully, and you should consult your Solutions Engineer.
Once you’ve verified that your connection is operating successfully, you will need to verify that you can reach a database you’ve provisioned:
Create a connection string for a PlanetScale database using the “Connect” button. Select “MySQL CLI” and copy the command.
The correct path for the CA root configuration for the
--ssl-ca flag depends on your operating system. See the CA root configuration documentation for more the correct path.mysql> prompt, your connection is operating successfully, and you have just confirmed that your connections to PlanetScale will be established through AWS PrivateLink. If you do not receive the mysql> prompt, please consult your Solutions Engineer.