What are branches on PlanetScale
Database branches on PlanetScale are isolated database instances that give you flexibility when developing your application. When your database is first initialized, a single production branch is created calledmain and acts as the default branch. When you create additional branches, the schema of the source branch is copied to the new branch, giving you an isolated MySQL instance to develop with. Changes made in one branch, whether to the schema or the data, do not affect any other branches for a given database.
Development and production branches
PlanetScale provides two types of database branches:- Development branches — Development branches provide isolated copies of your production database schema where you can make changes, experiment, or run CI. Please note that only the schema is copied. A new development branch will not have any data stored in it unless you restore from a backup. To automatically create a development branch with data from another branch, see the Data Branching® feature.
- Production branches — Production branches are highly available databases intended for production traffic. They are automatically provided with an additional replica to resist outages, enabling zero-downtime failovers. The Base plan includes two additional replicas, and Enterprise plans are customizable.
Promote a branch to production
PlanetScale provides the ability to promote any development branch with a valid schema to production. Promoting a branch to production will automatically set up the database replica(s) to make your database highly available. Note: Only one production branch is included in the Base plan, but you can add more production branches for an additional fee. Only administrators can promote database branches.Promote a development branch to production
Every new PlanetScale database is created with a production branch namedmain. This branch is intended as the starting point for building your database on PlanetScale and has increased performance and resilience by default when compared to development branches.
That said, you don’t have to use the default main branch as your production branch. Any development branch can be promoted to production.
Once you are satisfied with the changes you’ve made to a given development branch, you can promote it to production. Going forward, you can continue to make new development branches off of this production branch to experiment with changes as needed.
A branch can be promoted from the branch overview page in the PlanetScale app or by using the PlanetScale CLI, as shown below:
Demote a production branch to development
Sometimes, you might need to demote a production branch to a development branch. This can be done from the production branch’s overview page in the PlanetScale app (located in the right column of the page). Be aware when demoting a production branch to a development branch:- Databases must have at least one production branch at all times
- Development branches are not meant to be used with production workloads
- The branch will no longer have high-availability features
- Existing scheduled production branch backup policies will no longer run
- Any read-only regions will need to be removed
Create a development branch
If you need to experiment with schema changes, you can create a new development branch. This will copy the schema from the base branch into a new branch where you can create and test your changes. Development branches will not copy over data, just the schema. To create a development branch with data from another branch, see the Data Branching® feature section. How to create a development branch:1
On the database dashboard page, click the “New branch” button.
2
Give your development branch a name and select the region closest to your or your application.
3
Select the base branch you want to branch off of.
4
Click “Create branch”.
5
(Optional) You can also create a new branch from the PlanetScale CLI with:
Safe migrations
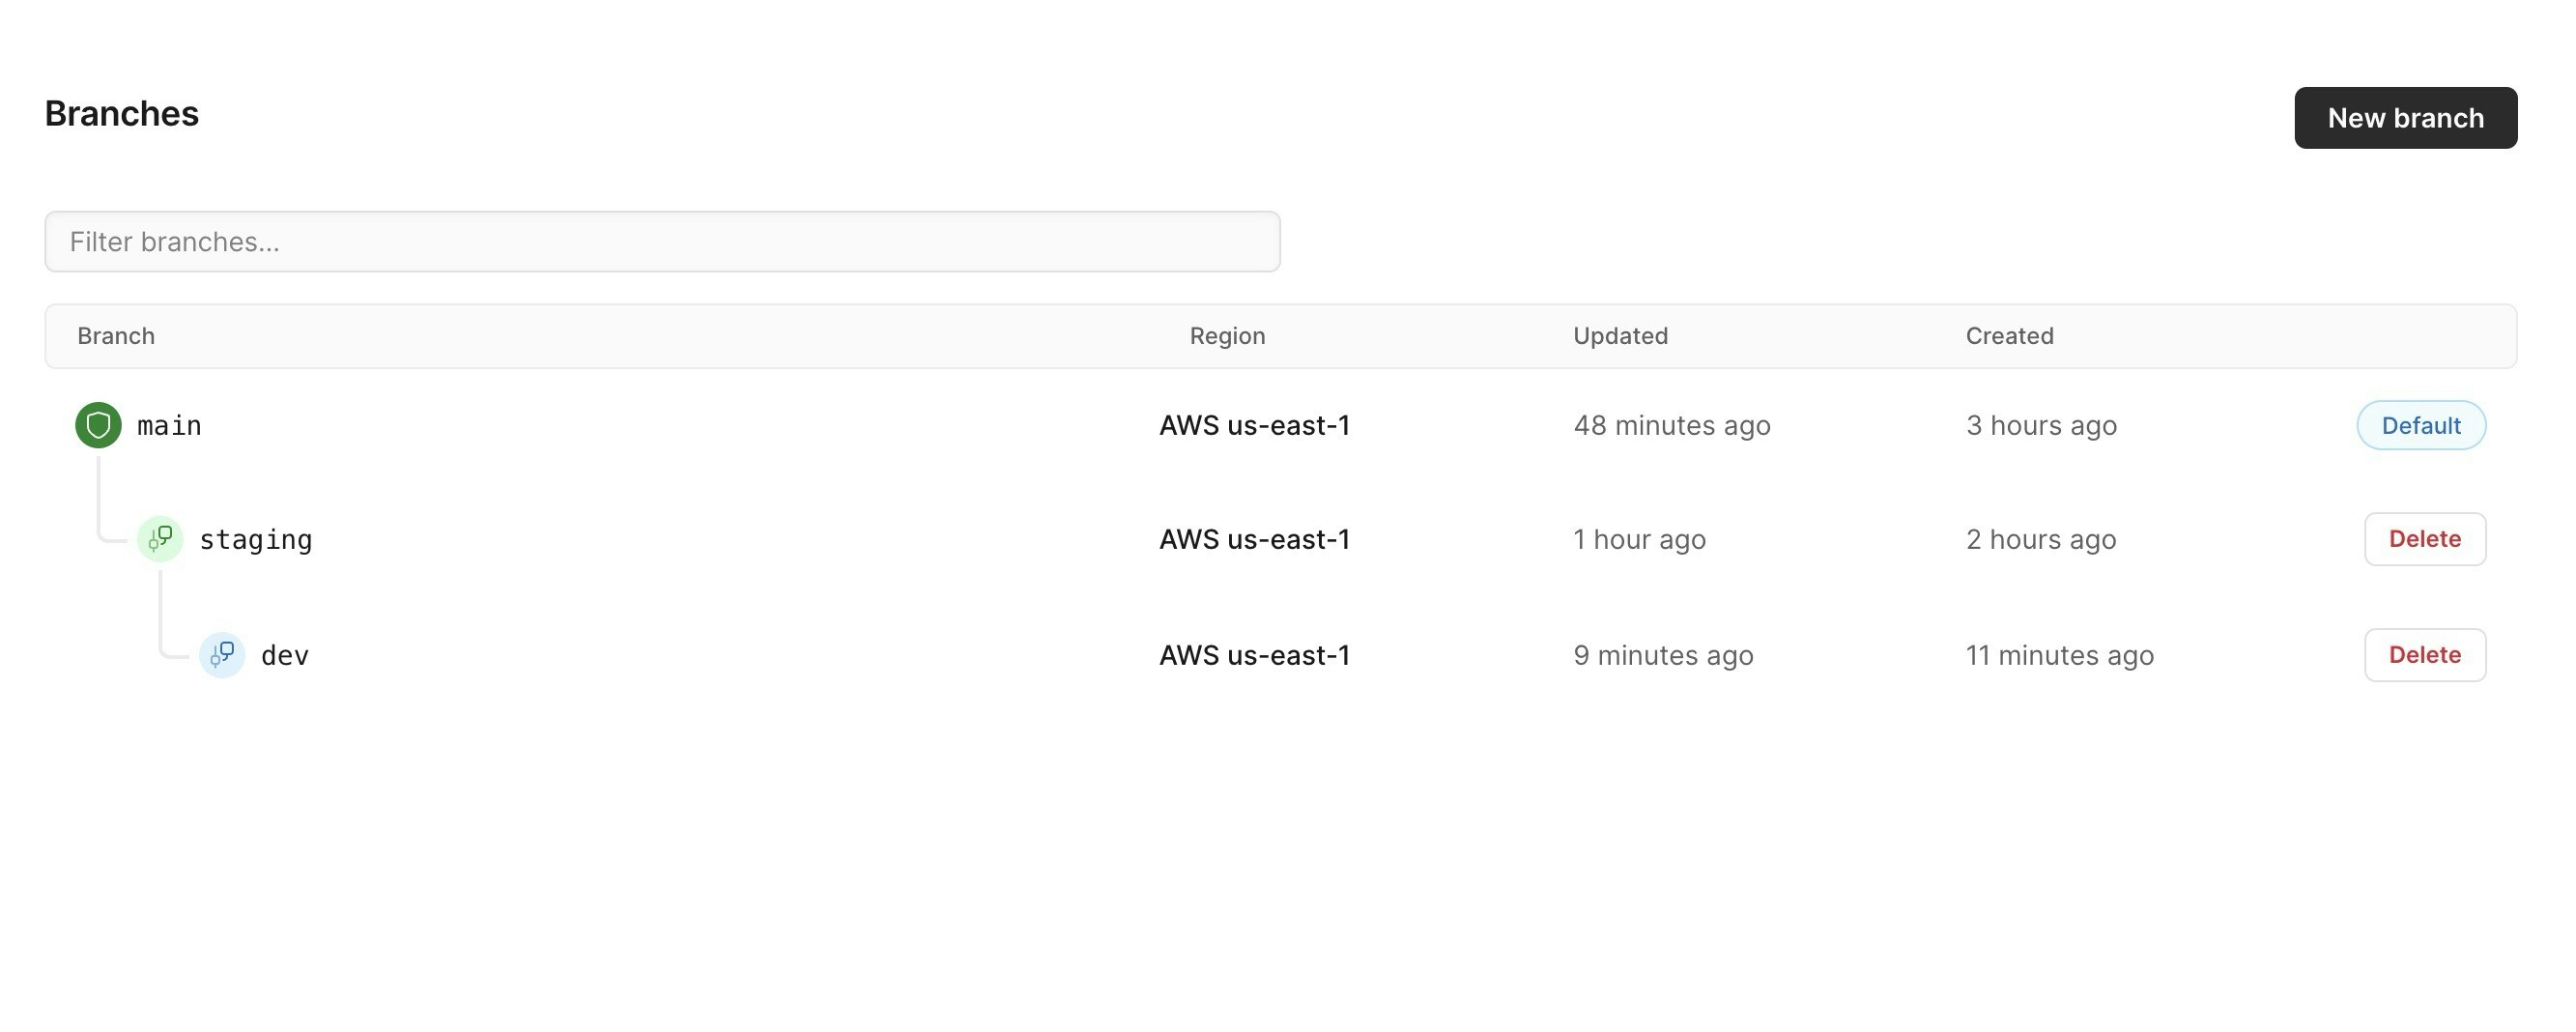
Safe migrations is an optional, but recommended, feature that can be enabled on branches. Branches with safe migrations enabled are restricted from accepting DDL directly. This prevents accidental changes to the database schema, and also enables non-blocking schema migrations. To make changes to branches with safe migrations enabled, you must create a new branch, then merge changes using a deploy request. Using this method, you get to see a schema diff before merging changes, have the option to have your team review changes, and receive additional checks and warnings prior to making a production schema change. To enable safe migrations on a branch, select the branch you want to modify from the branch dropdown and click the ”cog” in the upper right of the infrastructure card on the ”Dashboard” tab of the database. In the modal, toggle the option labeled ”Enable safe migrations”, then click the ”Enable safe migrations” button to save and close the modal.Staging branches
You can use a development branch with safe migrations enabled to set up a workflow with a “staging” branch. First, make sure you have safe migration enabled for your main production branch. Then, create a “staging” branch with your main production branch as the base and turn on safe migrations. All new branches created for development can use this “staging” branch as the base branch. You can then open a deploy request against either the main production or “staging” branch. Once it is deployed to “staging,” you can open a deploy request against the main production branch. The main production branch must be set as the default branch to open a deploy request against it.In this setup, the “staging” branch is still a development branch. Compared to your main production branch (additional production branches are an additional cost), it will have reduced resources, similar to other development branches.
How to make schema changes on a branch with safe migrations enabled
Since DDL is restricted on branches with safe migrations enabled to prevent accidental changes and enable zero-downtime migrations, you’ll need to perform the following steps in order to make changes to a safe migrations enabled branch: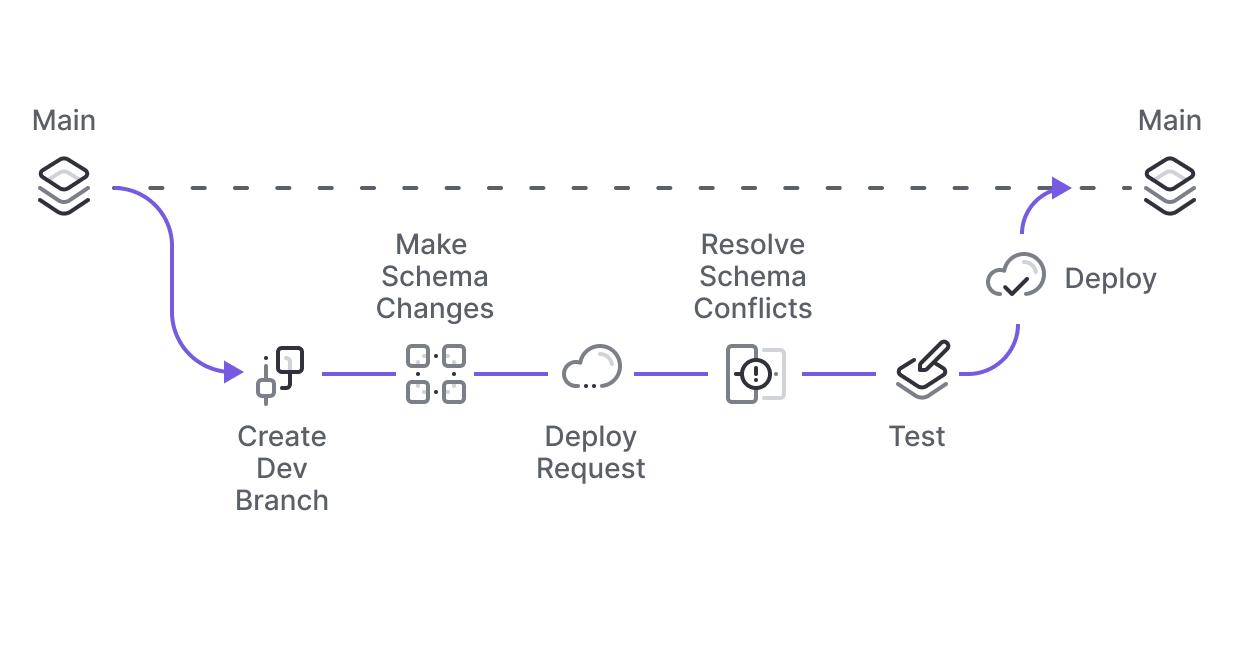
1. Create a development branch
The first step is to create a new development branch off of the branch you want to make changes to. This will make a copy of the source branches schema into the newly created development branch where you can perform the necessary changes to the schema.2. Create a deploy request
If you are working in a team, the deploy request creates an opportunity for your teammates to review the changes you have made before they are deployed to production.1
To create the deploy request, go to the branch overview page for the branch you want to deploy.
2
Select the base branch you want to deploy to from the “Deploy to” dropdown.
3
(Optional) Add a comment describing your deploy request. . Click “Create deploy request”.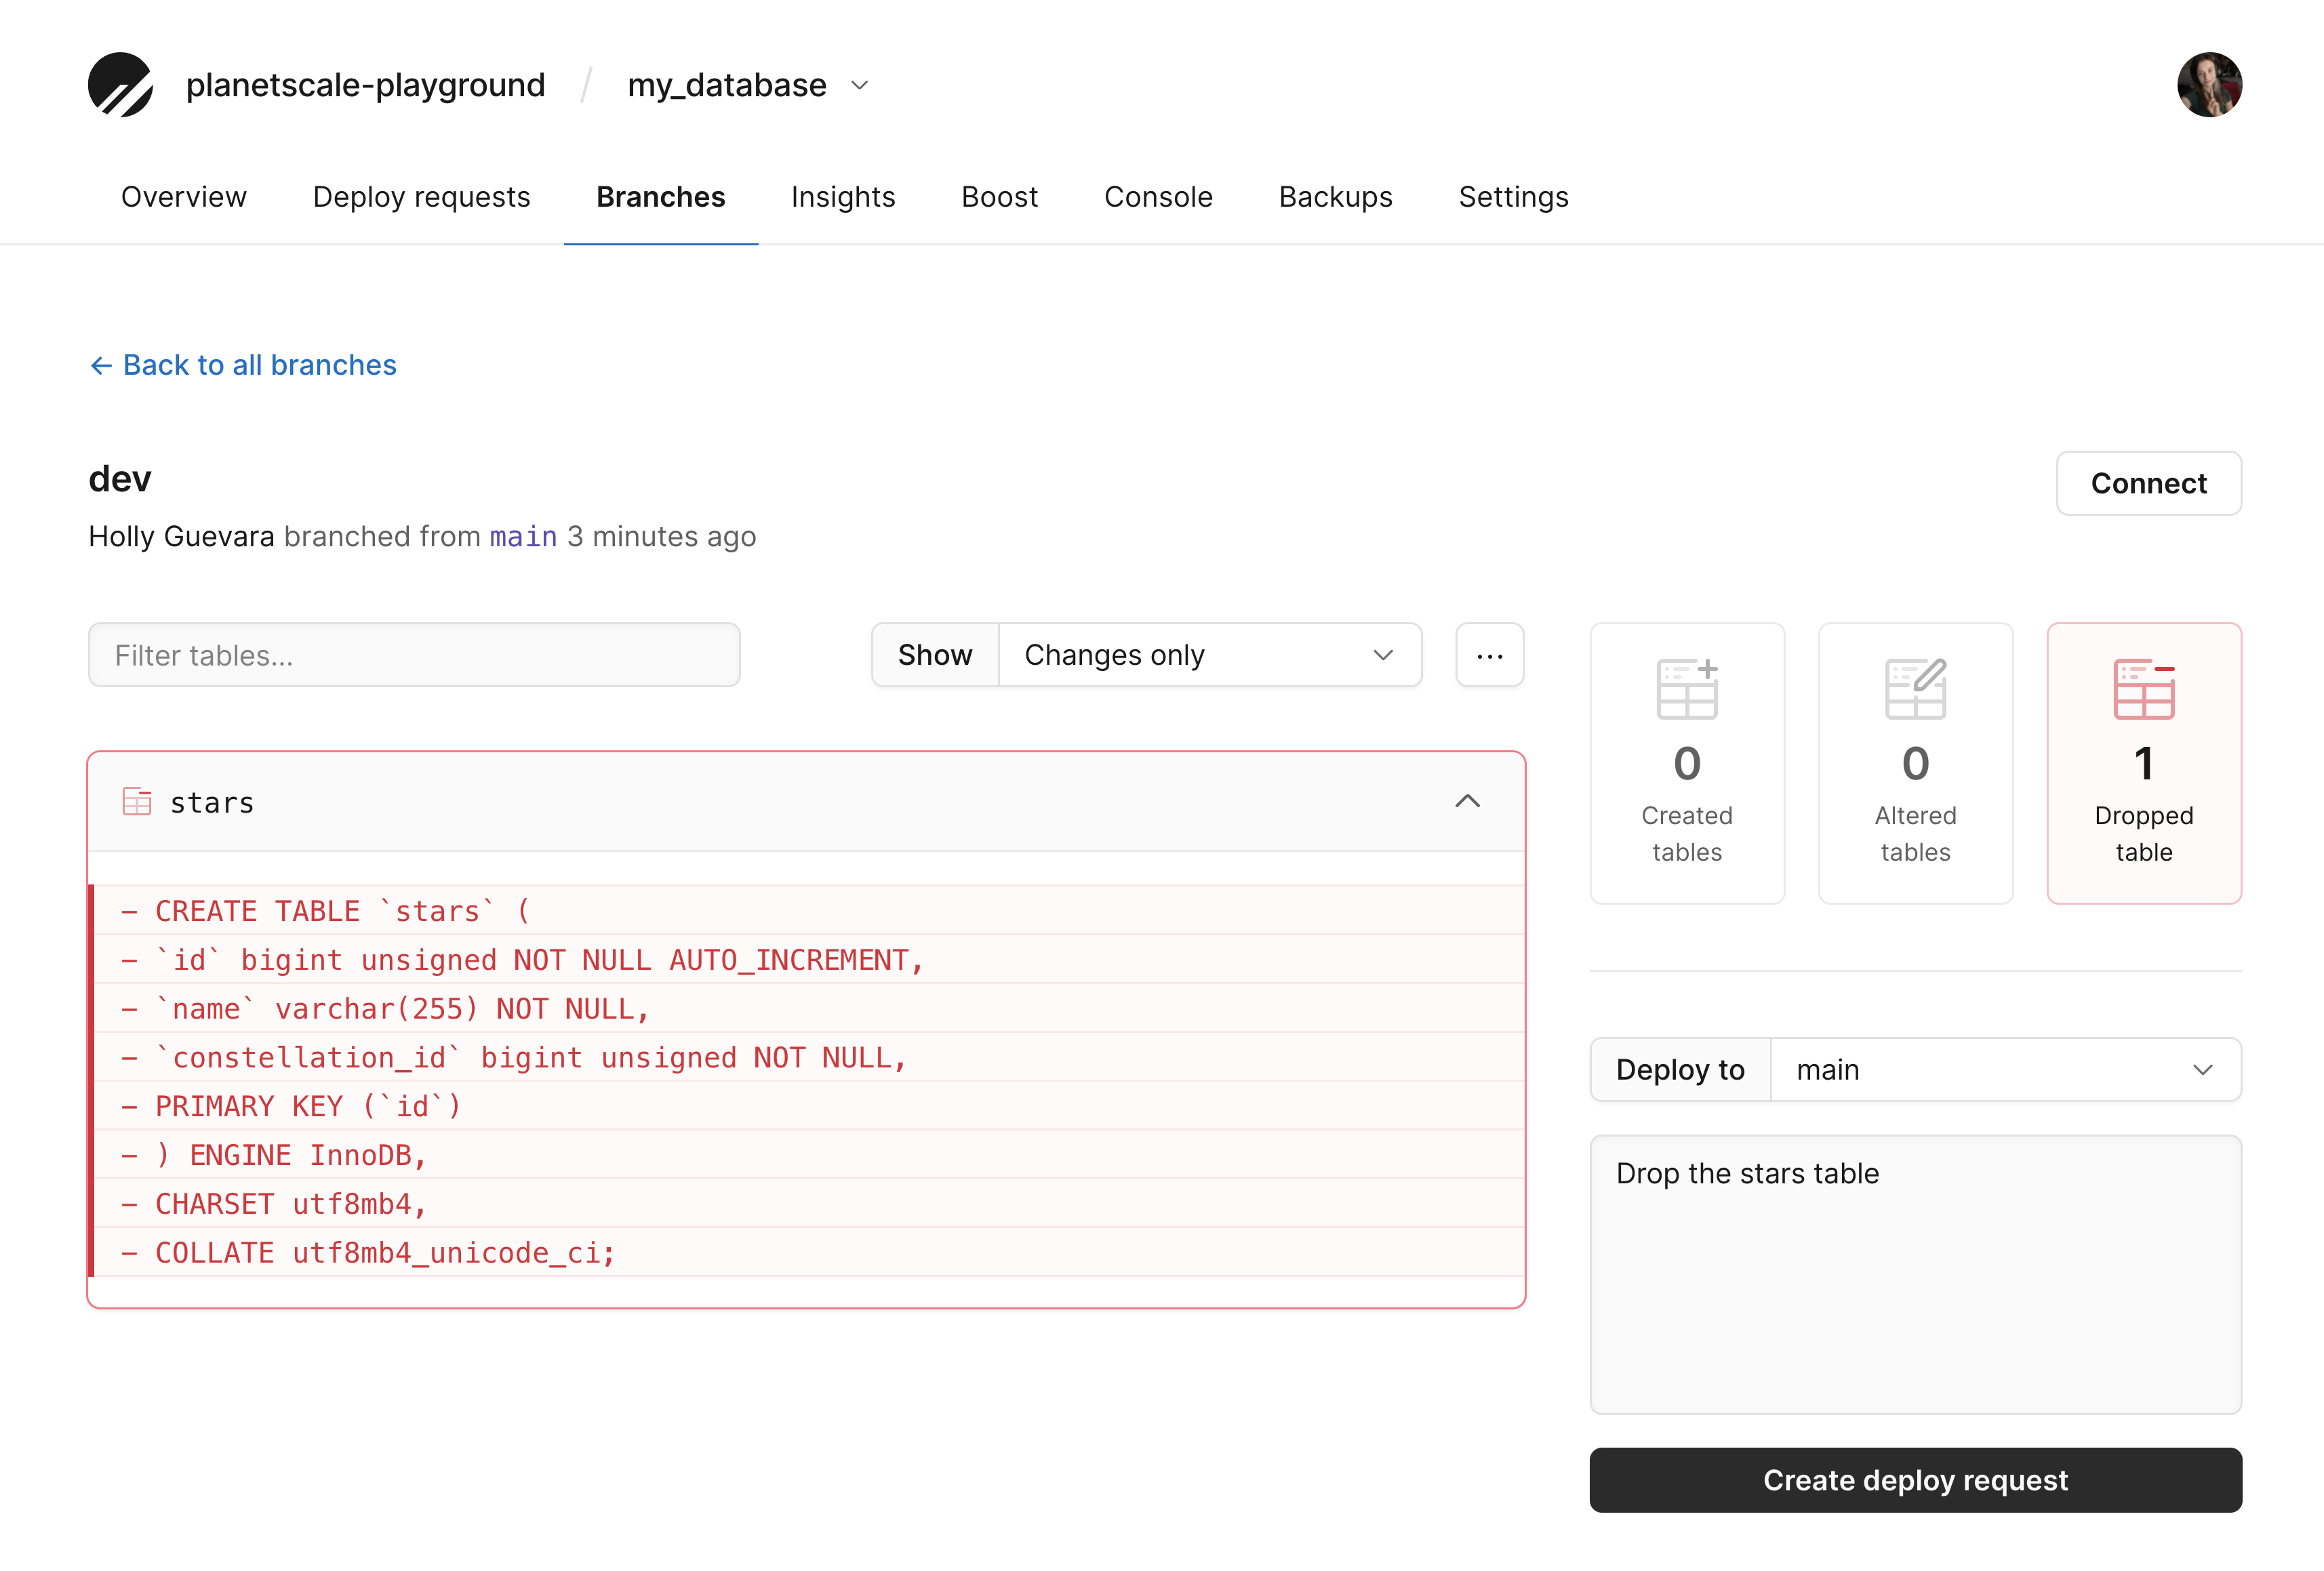
3. Review the deploy request
The deploy request includes a schema diff so that you can review the schema changes introduced by the deploy request against the base branch.1
On the deploy request page, click the “Schema changes” tab.
2
Schema additions are highlighted in green, and deletions are highlighted in red.
4. Add changes to the deploy queue
Once a deploy request has been created and, optionally, approved, you need to add the changes to the deploy queue. Schema changes are deployed to a database in the order in which they are received. PlanetScale analyzes the schema changes in a deploy request when they are added to the deploy queue to ensure that the changes do not conflict with any of the queued schema changes. PlanetScale also provides insight on the deploy queue, listing all of the schema changes in the queue with their completion status.1
Organizations have the option to require approval before a deploy request can be added to the queue. If this is enabled, first make sure the request is approved. You can control this option in the database’s “Settings” tab.
2
To add a deploy request to the deploy queue, click “Add changes to the deploy queue” on the deploy request page.
3
If successful, you’ll get the message “These changes have been deployed”.
4
Your deploy request has now been merged into production. You can click on the “Deploy requests” tab of the database to see the list of previous deploys.
Default branches
Themain branch is automatically set as the default branch when the database is initialized. However, you can change the default branch if needed.
How to change the default branch:
There are two ways to change the default branch.
1
Go to the “Branches” page in your dashboard.
2
Click on the three dots ”…” next to the branch whose name you’d like to change.
3
Click “Set as default branch”.
1
Go to your database dashboard page and click the “Settings” tab.
2
Under “General” in the sidebar, you’ll find the “Default branch” dropdown.
3
Select the branch you want to be the default branch. It does not have to be a production branch.
4
Scroll down and click “Save database settings”.
If you change the default branch, you will also need to update your credentials in your application, or wherever else you use credentials, to reference the new default branch (if desired).
Renaming a branch
You can change the name of a branch from the Branches tab in your PlanetScale dashboard. Click on the three dots (”…”) next to the branch name that you would like to change, type in the new name, and click “Save changes”. Renaming a branch does not affect that branch’s credentials. You do not need to regenerate credentials if you rename a branch.Delete a branch
You can delete a branch from the Branches overview page or by running the following command in the PlanetScale CLI:Only Organization Administrators have permission to delete production branches.
Resolve a schema conflict
Schema conflicts occur when your branch has conflicting changes with the base branch. To resolve a schema conflict, create a new branch from the base branch, which will have the most up-to-date schema, and apply the necessary schema changes to the new branch before repeating the deploy process.Automatically copy migration data
Many frameworks and migration tools keep track of data schema changes in a migration table. When turned on, PlanetScale will automatically copy migration table metadata from your development branches to the production branch as part of our deployment process. Turn on automatic copying of migration data:1
On your database dashboard page, click the “Settings” tab.
2
Check the “Automatically copy migration data” box.
3
Select one of the listed frameworks: Rails, Phoenix, Laravel, Django, .NET, Sequelize, or Other, which allows you to specify a custom table name.