Using the PlanetScale CLI with GitHub Actions workflows
Learn how to build automated workflows to develop and operate PlanetScale databases with GitHub Actions.
Branching your database schema can be helpful when needing to develop and test changes in an isolated environment separate from your production database. Branching in PlanetScale makes it a reality, but what if you want to integrate this workflow deeper into your existing development and testing workflows in GitHub?
In this blog post, you will learn how to increase your database productivity and set up and use PlanetScale CLI (also known as pscale) with GitHub Actions workflows.
First, what are GitHub Actions?
Just in case you don’t know, GitHub Actions “is a continuous integration and continuous delivery (CI/CD) platform that allows you to automate your build, test, and deployment pipeline.” Most importantly, GitHub Actions are closely tied to your GitHub code repository itself, making it easier to trigger based on events in your repository. Think of events such as opening a pull request, creating a branch, and other events that can trigger a workflow listed in the documentation.
GitHub Actions makes it possible to create, share, reuse, and fork workflows across teams. In GitHub Actions, a workflow “is a configurable automated process made up of one or more jobs.”
GitHub Actions workflows aim to help teams deliver software quickly and reliably by integrating different tools. In PlanetScale’s case, we want teams to increase database productivity. So, let’s see how you can implement workflow automation with your database and code repository!
Setting up the pre-built GitHub Actions workflows repository
If you are interested in getting a feel for how pscale can work with GitHub Actions, you can check out this repository filled with pscale workflow helper scripts built by Johannes Nicolai at PlanetScale. If you have any feedback or improvement suggestions, please add an issue or pull request to the repository.
These pre-built GitHub Actions workflows can do all sorts of workflows, such as:
- Create a database and create a table
- Create a database branch and deploy request
- Merge the latest open deploy request
- Add and remove a column to the schema and an index
- React on “magic words” in pull request comments like “/ps-create”, “/ps-attach” or “/ps-merge”
If you want to try it out, follow these steps below to set it up in GitHub.
Steps to try out the pre-built PlanetScale and GitHub Action workflows
First, click the green “Use this template” button in the repository and name the new repository whatever you want.
Once the repository is created, go to the "Actions" tab.
01 - Create Database
This workflow will create the database.
- Click "01 - Create Database step" in the sidebar.
- Select the “Run workflow” dropdown and click "Run."
- As it runs, click on the new workflow in the main section, "01 - Create Database."
- Click "Create database - click here."
- It will eventually prompt you to click a link to authenticate with PlanetScale. You can log in to an existing account or set up a new PlanetScale account with this link.
02 - Add Operation Column & Index
This workflow will create a new database branch with a new column and index. It will also open a deploy request, which will be discussed soon.
- Once the database creation step is complete, click the "Actions" tab and move on to "02 - Add Operation Column & Index."
- You will again need to click twice into the workflow run to authenticate with PlanetScale. (Later in this blog post, we will teach you how to use service tokens so this is automated.)
- After this workflow has run, you can look at the updated schema in the PlanetScale branch to see the column and index added to the schema. To see this, go to https://app.planetscale.com and go to your database, in the "Branches" tab click on the
add-operation-column-and-indexbranch, and select the "Schema" tab. You can see that the workflow has added a column and index to the SQL schema.
03 - Merge latest Deploy Request
This workflow will merge the deploy request that was created in the previous workflow.
Deploy requests allow you to propose schema changes and get feedback from your team, similar to pull requests in GitHub. The order of when you merge a database deploy request and code pull requests often depends on the type of change.
- To run this workflow, refer to the steps in the previous workflow, as they are very similar.
- At the end of the workflow, you can see your schema change has been deployed in PlanetScale. You can also view the deployed change in PlanetScale by going to your database and the Deploy request tab.
- (Optional) If you want to see a column and index removed, you can follow through with "04 - Del Operation Column & Index" following similar steps as above.
How to build your own GitHub Actions workflows with pscale CLI
Now, if you want to build your own GitHub Actions workflows with pscale to customize them to your development and operations workflows, there are a few key things you need to know about:
- Workflow files, written in YAML, located in
.github/workflows/- When an event triggers a workflow in GitHub Actions, this file describes the steps. In this example, it describes what scripts should be run and when.
- Shell scripts, located in
.pscale/cli-helper-scripts/- These Bash shell scripts work closely with pscale. They handle logic, different CLI commands, error handling, waiting for asynchronous operations, and are reusable across GitHub Actions workflows.
Prerequisites: You already have a PlanetScale account and one database created. If you followed the steps above, you could use the same database too. You can also delete the database from above and create a new one or use an existing database.
In the following steps, we will create a GitHub Action workflow that is triggered when you create (or push) a git branch in GitHub that starts with db/ and automatically create a database branch in PlanetScale. This will allow you to have an isolated development and testing environment for your database changes.
Steps to create your own GitHub Action workflow with pscale CLI
- Create a new GitHub repository or use an existing repository.
- In your repository, create the workflow file
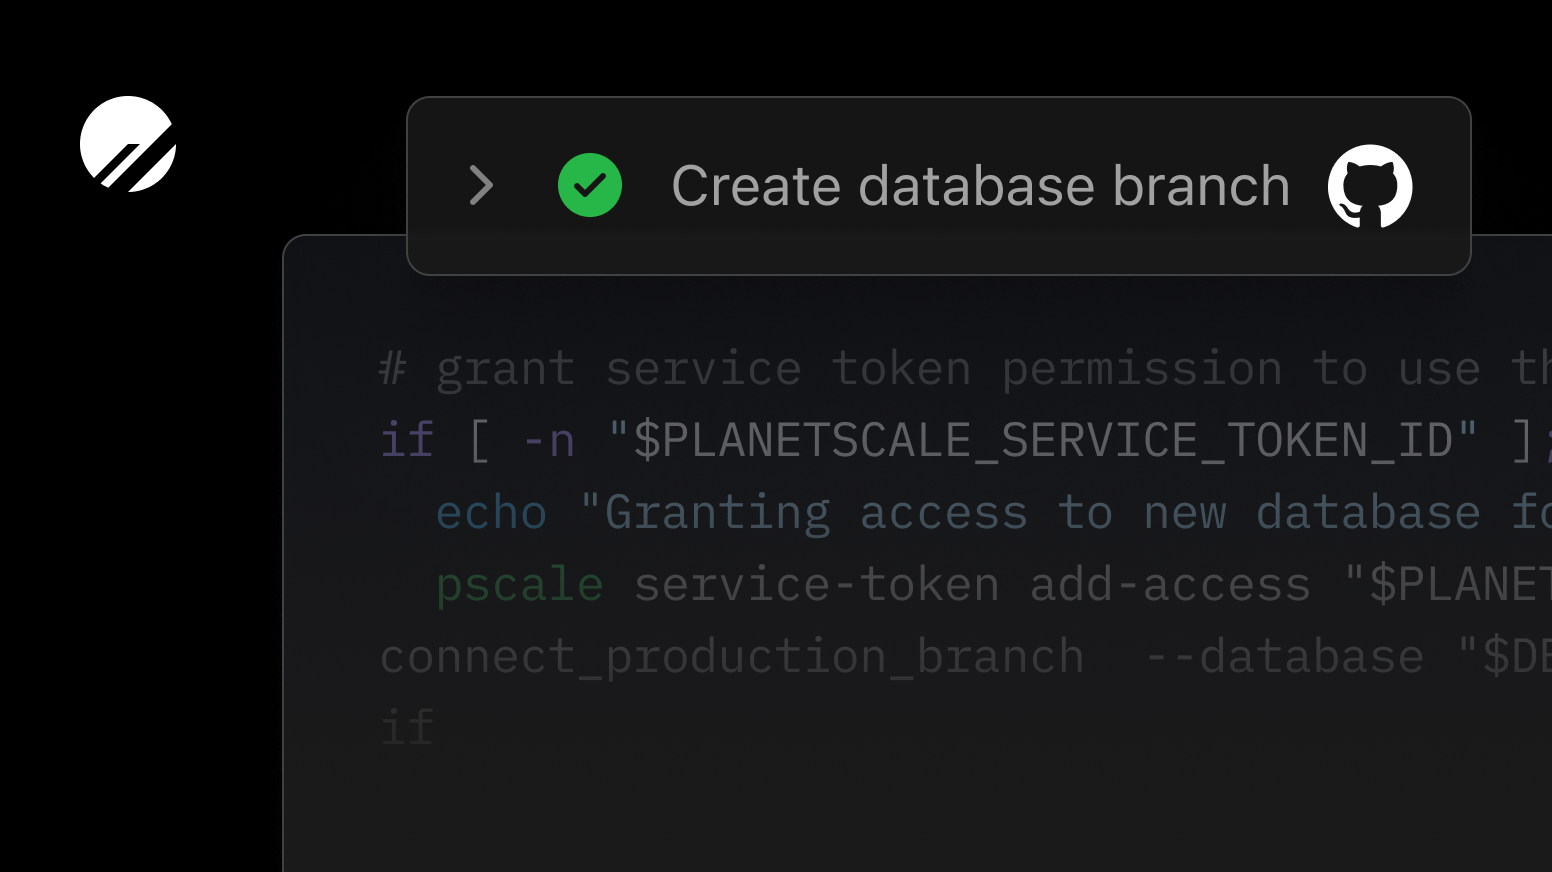
.github/workflows/create-branch.yml. Add the following code to your file. You can see in the workflow file that it is triggered when a branch that starts withdb/**is pushed to GitHub. You will see thecreate_database_branchjob has steps that extract the branch name, validate the name, check out the GitHub repository, and then create the database branch.
name: Create database branch


env:
  pscale_base_directory: .pscale


on:
  push:
    branches:
      - 'db/**'


jobs:
  create_database_branch:
    name: Create database branch
    runs-on: ubuntu-latest
    steps:
      - name: Extract branch name
        shell: bash
        run: echo "##[set-output name=branch;]${GITHUB_REF#refs/heads/}"
        id: extract_branch


      - name: Validate parameters
        id: validate_params
        uses: actions/github-script@v3
        env:
          BRANCH_NAME: ${{ github.event.inputs.branch }}
        with:
          github-token: ${{ secrets.GITHUB_TOKEN }}
          script: |
            const branch_name = process.env.BRANCH_NAME || "${{steps.extract_branch.outputs.branch}}";


            const regex = /[^\/]+$/;
            let clean_branch_name;


            if (branch_name.match(regex)) {
              clean_branch_name = branch_name.match(regex)[0];
            } else {
              clean_branch_name = branch_name;
            }


            if (! /^[a-zA-Z0-9_-]+$/.test(clean_branch_name)) {
              const error = `The branch name contains illegal characters: ${clean_branch_name}`;
              core.error(error);
              core.setFailed(error);
            }
            core.setOutput('branch_name', clean_branch_name);


      - name: Checkout
        uses: actions/checkout@v2


      - name: Create database branch — if asked, please click on displayed link to authenticate
        id: create-db-branch
        timeout-minutes: 3
        env:
          PLANETSCALE_SERVICE_TOKEN_ID: ${{secrets.PLANETSCALE_SERVICE_TOKEN_ID}}
          PLANETSCALE_SERVICE_TOKEN: ${{secrets.PLANETSCALE_SERVICE_TOKEN}}
          ORG_NAME: ${{secrets.ORG_NAME}}
          DB_NAME: ${{secrets.DB_NAME}}
          GITHUB_USER: ${{github.actor}}
          BRANCH_NAME: ${{ steps.validate_params.outputs.branch_name }}
        working-directory: ${{env.pscale_base_directory}}/cli-helper-scripts/
        run: |
          ./create-branch.sh "$BRANCH_NAME"
- Create the shell script file
.pscale/cli-helper-scripts/create-branch.sh. Add the following code to the file:
#!/bin/bash


. use-pscale-docker-image.sh
. wait-for-branch-readiness.sh


. authenticate-ps.sh


BRANCH_NAME="$1"


. ps-create-helper-functions.sh
create-db-branch "$DB_NAME" "$BRANCH_NAME" "$ORG_NAME"
The shell script uses some helper scripts that you will add in the next step. If you are working locally, make sure to git commit and git push after you create this file. You can also create it in the GitHub UI.
- Add the following files, follow the links for a copy of the files:
.pscale/cli-helper-scripts/use-pscale-docker-image.sh- The workflow uses pscale as a Docker image. This shell script file sets up pscale for the following scripts. It will also make sure you are always using the latest version of the pscale CLI and does not need any package manager installed.
.pscale/cli-helper-scripts/wait-for-branch-readiness.sh- When first created, database branches in PlanetScale take a few seconds to be useable. This shell script makes sure it is ready to be used while the workflow is running.
.pscale/cli-helper-scripts/authenticate-ps.sh- This shell script authenticates with PlanetScale using your
PLANETSCALE_SERVICE_TOKEN. If it is not set, it will ask you to authenticate manually as the workflow runs.
- This shell script authenticates with PlanetScale using your
.pscale/cli-helper-scripts/ps-create-helper-functions.shThis is the largest of the shell scripts. It contains scripts you might want to use across multiple different scripts, such as creating a database branch, making a schema change, creating a deploy request, and more. For this workflow, we are only using the
create-db-branchfunction, but you can copy the whole file for later use.Important: If you are working locally, make sure to
git commitandgit pushafter you create this file. You can also create it in the GitHub UI.
- The shell script needs “execute” file system permission set to run. You can update the permissions in the command line by running the following git commands:
git update-index --chmod=+x .pscale/cli-helper-scripts/create-branch.sh
git commit -m ‘update file permissions’
git push
If you want to know more, see the GitHub Community Forum post on the permission denied error. The git update-index command only works if the files have been previously pushed. They will also need to be updated again if you commit any changes locally. If you plan on making a lot of changes to this file locally, you can run git config core.fileMode false to change your git configuration so that git will honor the executable bit of files. Otherwise, you can go onto the next step.
- To authenticate with PlanetScale, we will use GitHub Actions built-in secret store. In GitHub, go to the Settings tab in your code repository, followed by Secrets in the left navigation, then Actions. Select the “New repository secret” button and add each of the following as separate secrets:
PLANETSCALE_SERVICE_TOKEN: In PlanetScale, you will need to create a service token. Go to https://app.planetscale.com and log in. Go to the "Settings" tab for your organization, then "Service tokens", and select the "New service token" button. Give it a name and copy the token that’s returned.PLANETSCALE_SERVICE_TOKEN_ID: Click on "Edit token permissions", which will bring you to the token overview page. Copy the value next to "ID." Make sure to click the "Add database access" button and select your database. Check both the “branch” and “deploy_request” checkboxes. You can decrease permissions later or delete the token after testing.
ORG_NAME: Your organization name in PlanetScale, you can find it in the PlanetScale web application URL:https://app.planetscale.com/<your-organization-name>/demo-db.DB_NAME: Your database name in PlanetScale
- You are ready to run the action! Push (or create) a branch in your GitHub repository that starts with
db/. For example, I want to develop a new feature that will require database changes. I would name my branchdb/new-feature, and my PlanetScale branch will be callednew-feature. Go back to your repo and under "Actions" you’ll see the new workflow running!
Extra credit! (This is an optional step.) Once you have tried automatically creating database branches, what if you wanted to open a deploy request in PlanetScale when the branch is created, so it is ready for when you want to merge a database change?
If you look in ps-create-helper-functions.sh you can find this function:
function create-deploy-request {
    local DB_NAME=$1
    local BRANCH_NAME=$2
    local ORG_NAME=$3


    local raw_output=`pscale deploy-request create "$DB_NAME" "$BRANCH_NAME" --org "$ORG_NAME" --format json`
    if [ $? -ne 0 ]; then
        echo "Deploy request could not be created: $raw_output"
        exit 1
    fi
    local deploy_request_number=`echo $raw_output | jq -r '.number'`
    # if deploy request number is empty, then error
    if [ -z "$deploy_request_number" ]; then
        echo "Could not retrieve deploy request number: $raw_output"
        exit 1
    fi


    local deploy_request="https://app.planetscale.com/${ORG_NAME}/${DB_NAME}/deploy-requests/${deploy_request_number}"
    echo "Check out the deploy request created at $deploy_request"
    # if CI variable is set, export the deploy request URL
    if [ -n "$CI" ]; then
        echo "::set-output name=DEPLOY_REQUEST_URL::$deploy_request"
        echo "::set-output name=DEPLOY_REQUEST_NUMBER::$deploy_request_number"
        create-diff-for-ci "$DB_NAME" "$ORG_NAME" "$deploy_request_number" "$BRANCH_NAME"
    fi
}
This function will create a deploy request in PlanetScale and then export the deploy request URL and deploy request number to the GitHub Action output. If you are running this action in a CI environment, it will also create a diff for the deploy request.
You can add this to your .pscale/cli-helper-scripts/create-branch.sh at the end like this:
create-deploy-request "$DB_NAME" "$BRANCH_NAME" "$ORG_NAME"
If you don’t have your main branch in PlanetScale promoted to production, you need to do this before rerunning the workflow.
And then push (or create) a new db/** branch in GitHub to rerun this.
What GitHub Action workflows would you like to see?
We want to hear from you! Your ideas might appear in a future blog post or example! Now that you have an idea of what it is like to automate workflows with GitHub Actions and the PlanetScale CLI, what are some workflows you would like to see built?
What manual steps do you do with your databases that you wish were automated while benefiting from branching, deploy requests, and non-blocking schema changes?
What workflows do you want to see based on triggers in GitHub issues and pull requests?
We would love to hear your feedback! Tweet at us @planetscale to tell us what you would like to build or see with PlanetScale and automated workflows.