A common strategy of modern development, especially in serverless applications, is to offload user management to third-party authentication services, commonly referred to as Identity Providers (IdP). While this shifts the focus and responsibility of managing your users’ data to another organization, implementing this strategy brings several tradeoffs:
- You don’t have direct access to user data within your own systems.
- You can’t perform secondary actions when a user changes their data in some way.
- Any API calls where the user’s info is used would require you to call the IdP, making the responses take longer.
In this article, you’ll learn how to address each of these issues using webhooks, a pattern where the IdP can send an HTTP call to your API to inform you of any changes made on their end. To do this, you’ll be using a combination of Clerk, Netlify, and PlanetScale.
For the demo, we’ll be using Orbytal.ink, an open-source “link in bio” web application that uses the services listed above. By the end of this guide, Clerk will be configured to send an HTTP request to a Netlify Function designed specifically for accepting these requests whenever a user is created, updated, or deleted.
To follow along, make sure you have the following:
- A PlanetScale account and the PlanetScale CLI installed and configured
- A GitHub account
- A Netlify account
- A Clerk account
Set up the project
Create a PlanetScale database
Start by creating a PlanetScale database using the PlanetScale CLI.
pscale database create orbytalink
Next, create a password for that database. The name is arbitrary but the following command uses “defaultpass”:
pscale password create orbytalink main defaultpass
Note
Take note of the username and password — you’ll be using those values when setting up Netlify.
Now, open a shell session to the new database you just created:
pscale shell orbytalink main
To configure the tables for the database, run the following command in the pscale shell session:
CREATE TABLE `users` (
	`id` bigint unsigned PRIMARY KEY AUTO_INCREMENT,
	`username` varchar(120),
	`tagline` varchar(250),
	`display_name` varchar(250),
	`img_url` varchar(500)
);
CREATE TABLE `blocks` (
	`id` bigint unsigned PRIMARY KEY AUTO_INCREMENT,
	`url` varchar(200),
	`type` int,
	`user_id` int,
	`label` varchar(200)
);
Note
For a high level overview on PlanetScale, check out our Introduction to PlanetScale Tech talk.
Set up a Clerk application
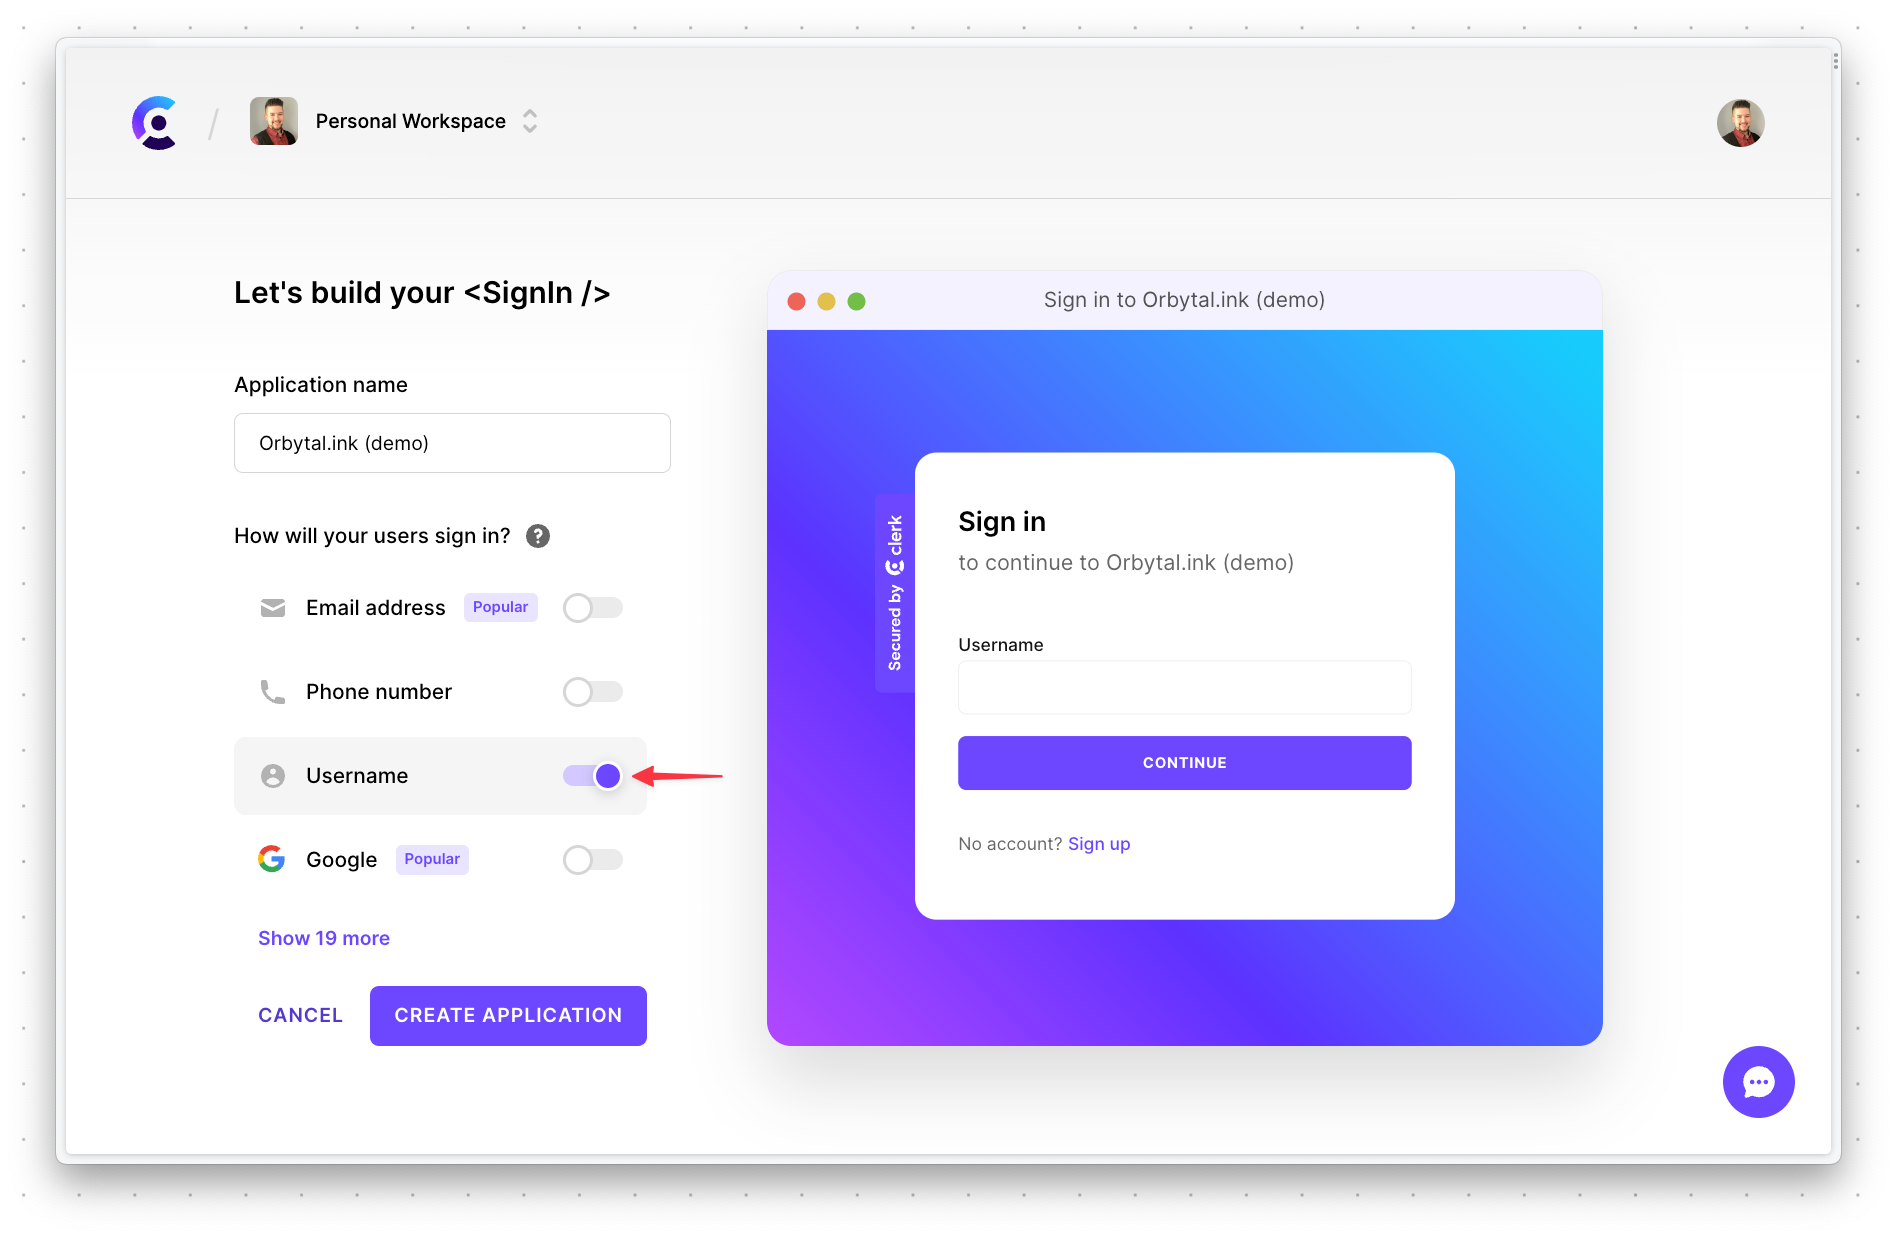
Head over to Clerk and create a new application. Make sure to only check "Username" in the "How will your users sign in?" section, then click "Create application".
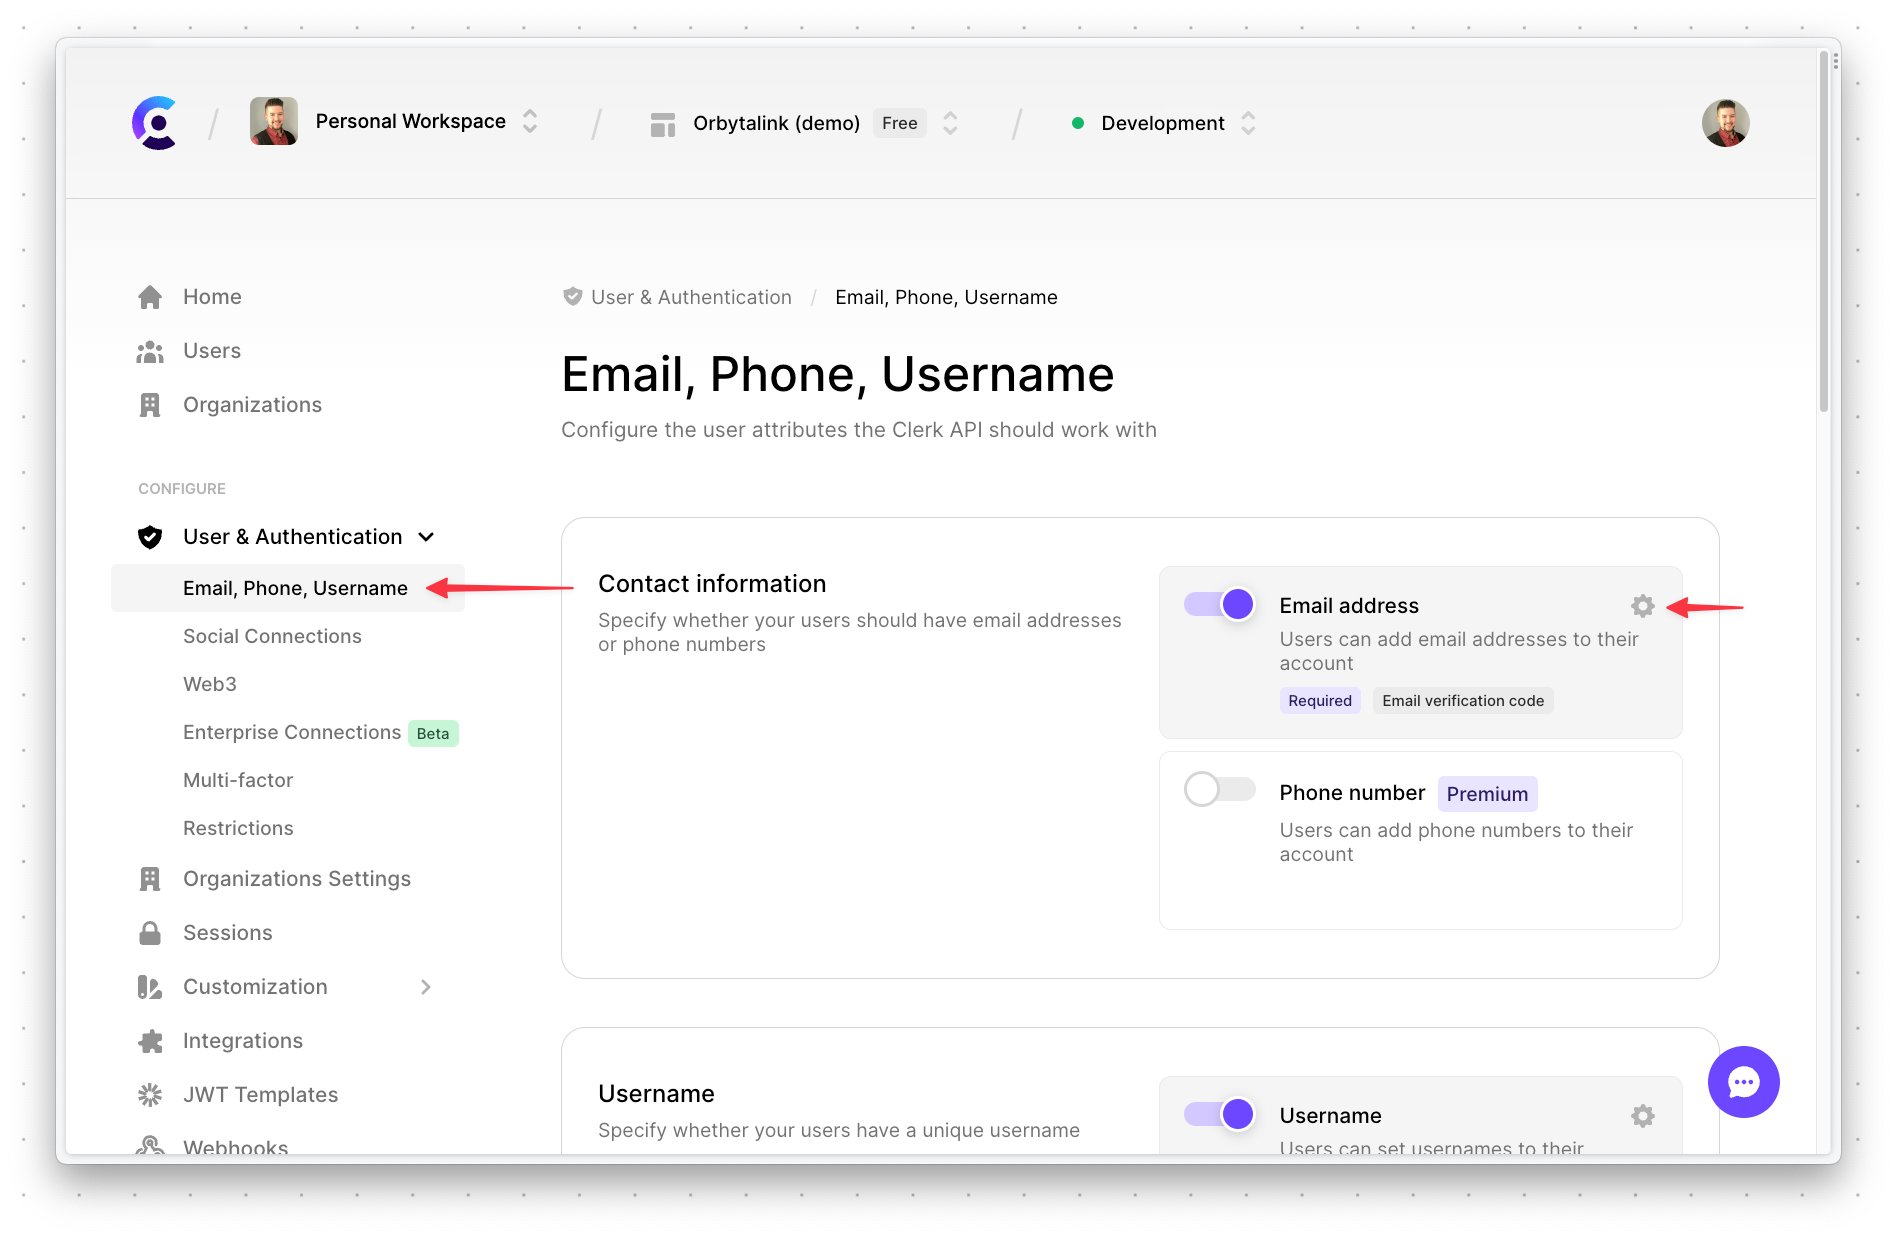
Next, you’ll have to configure a few more options before the project is properly configured. Select "Users & Authentication" > "Email, Phone, Username" on the left side. Then click the "gear" next to "Email address".
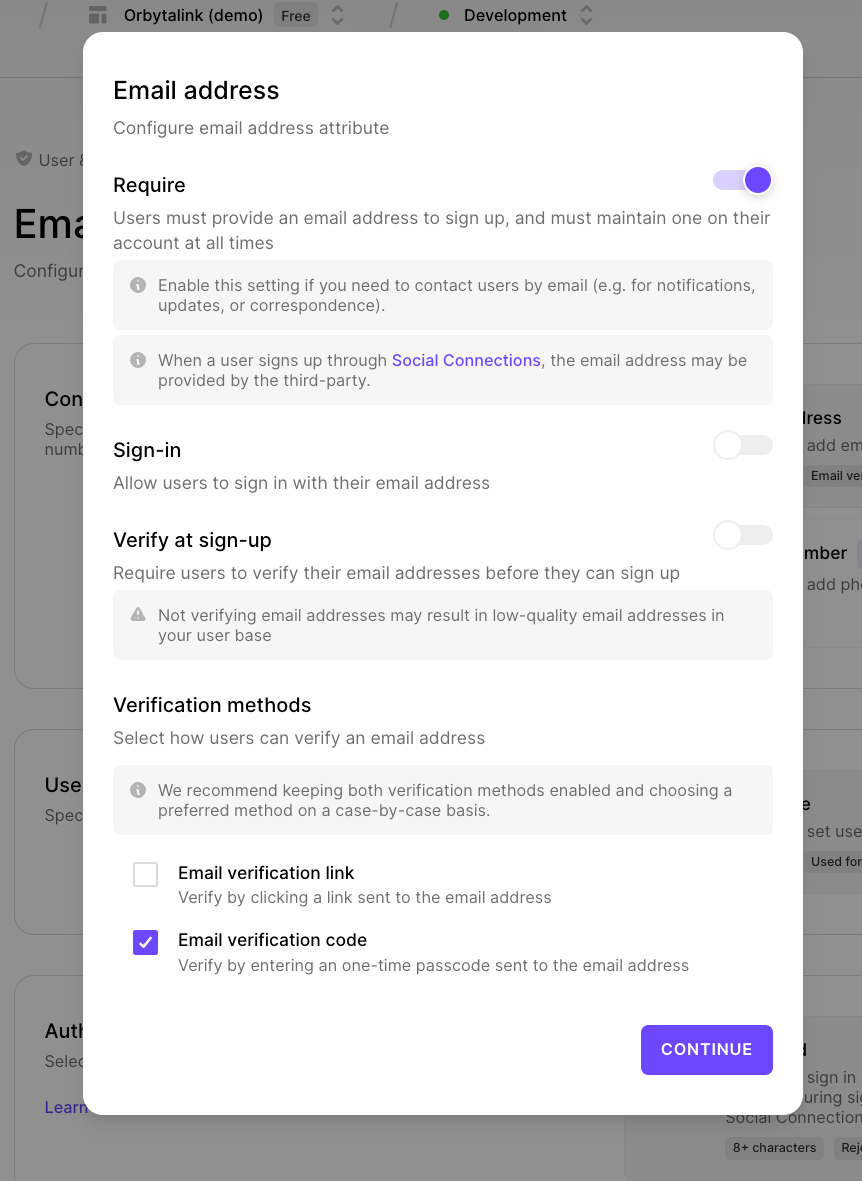
In the modal, enable the "Require" option and make sure "Email verification code" is enabled. Everything else should be disabled. Click "Continue" to accept the settings.
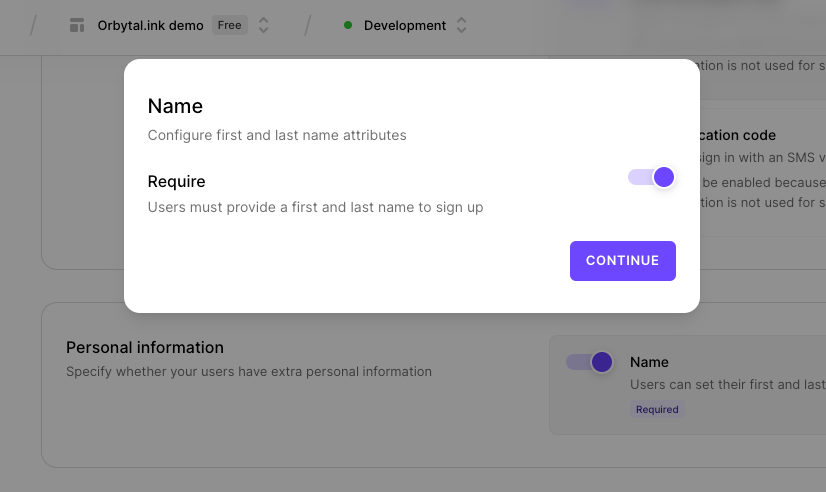
Scroll down a bit and enable "Name", then click the "gear icon".
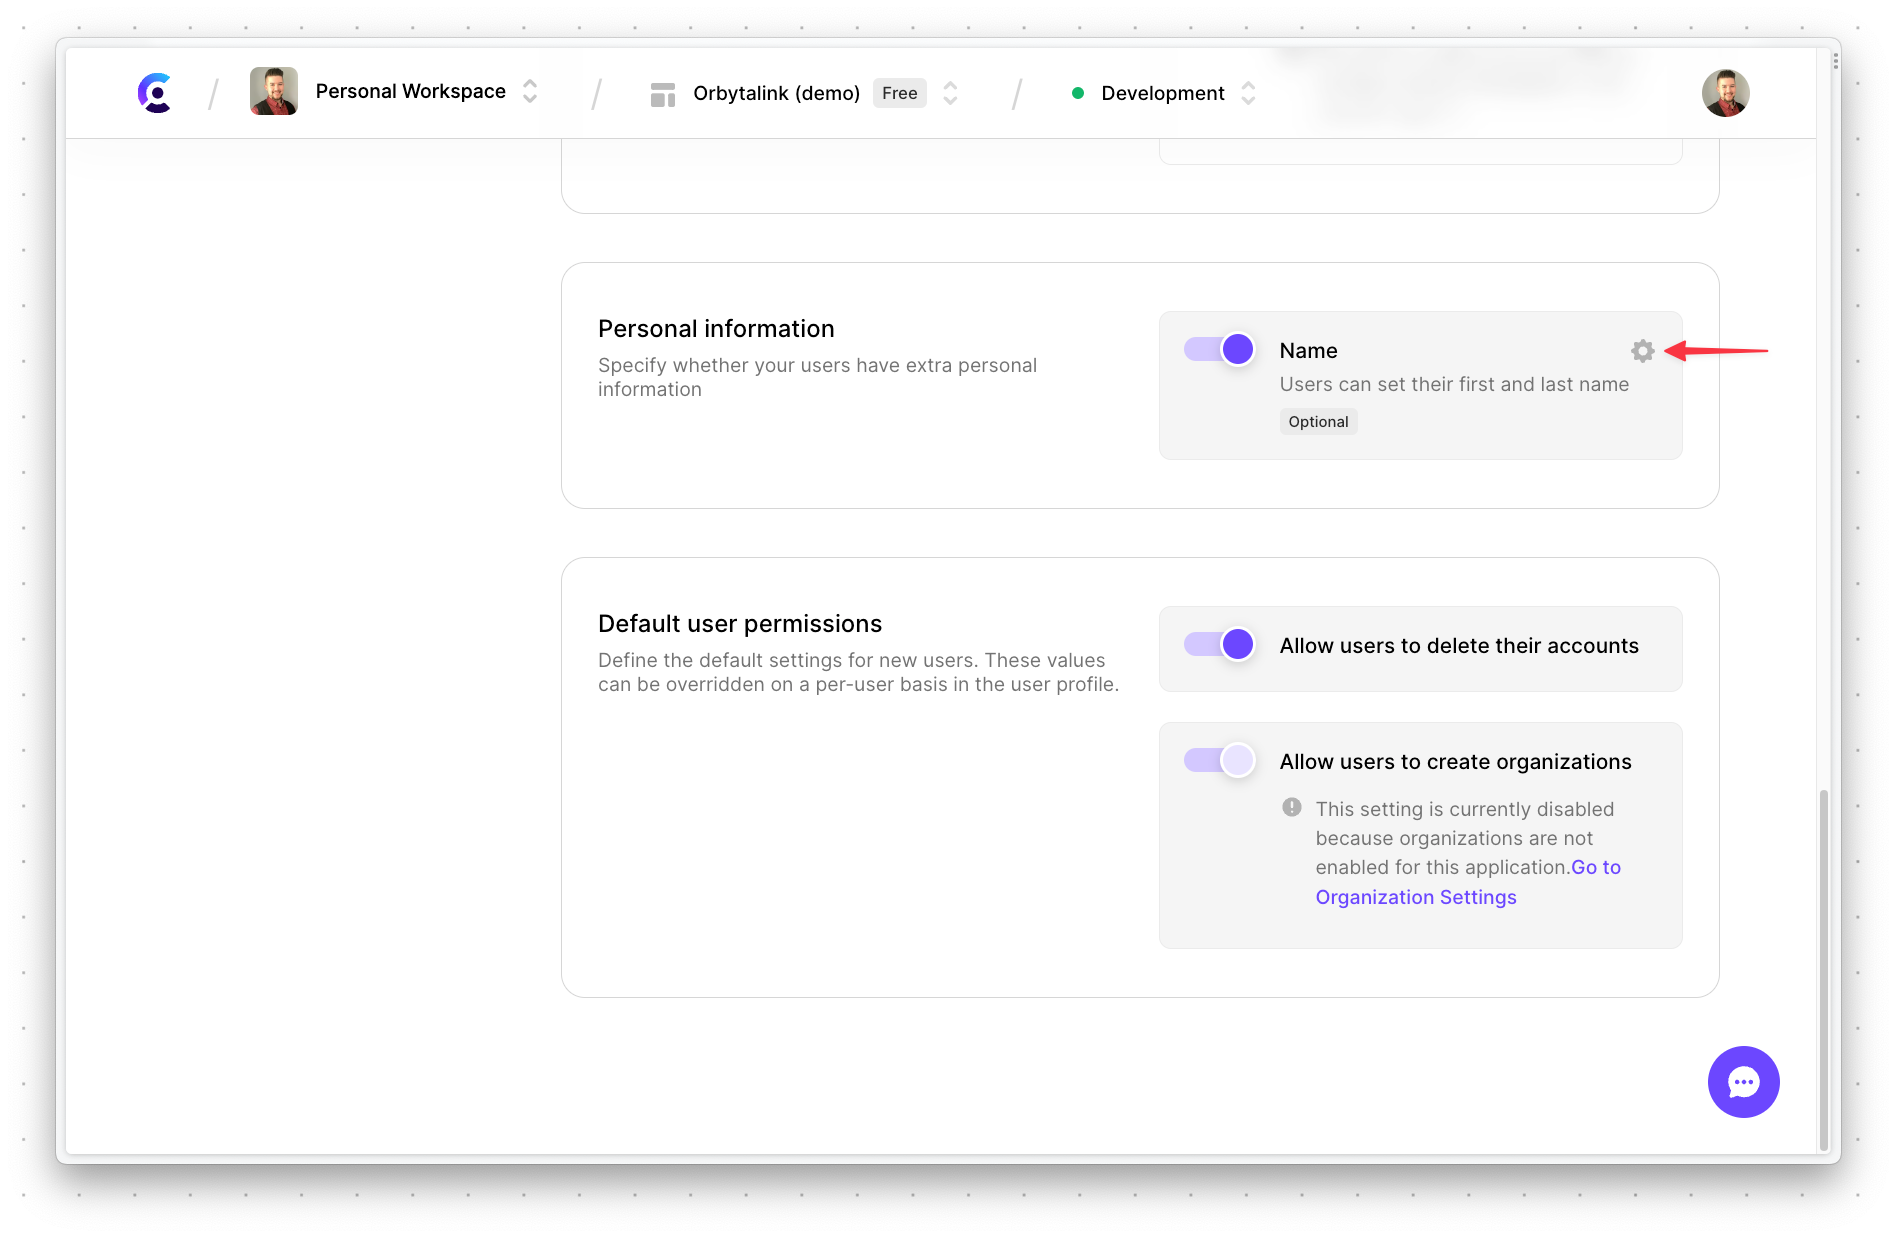
In the modal, toggle "Require" to on and click "Continue".
Scroll to the bottom of the page and click "Apply changes".
Now you’ll need to grab the API keys for the project so the application will work when deployed. Select "API Keys" on the left and take note of both the "Publishable key" and the "Secret key". You’ll need these values as well when setting up Netlify.
Note
Anyone who has these values can access your Clerk project, so make sure to keep these values secret!

Fork the project and deploy to Netlify
Next, log into GitHub and fork the orbytal.ink project to your own account. Make sure "Copy the main branch only" is NOT enabled as you’ll want all branches forked into your account.
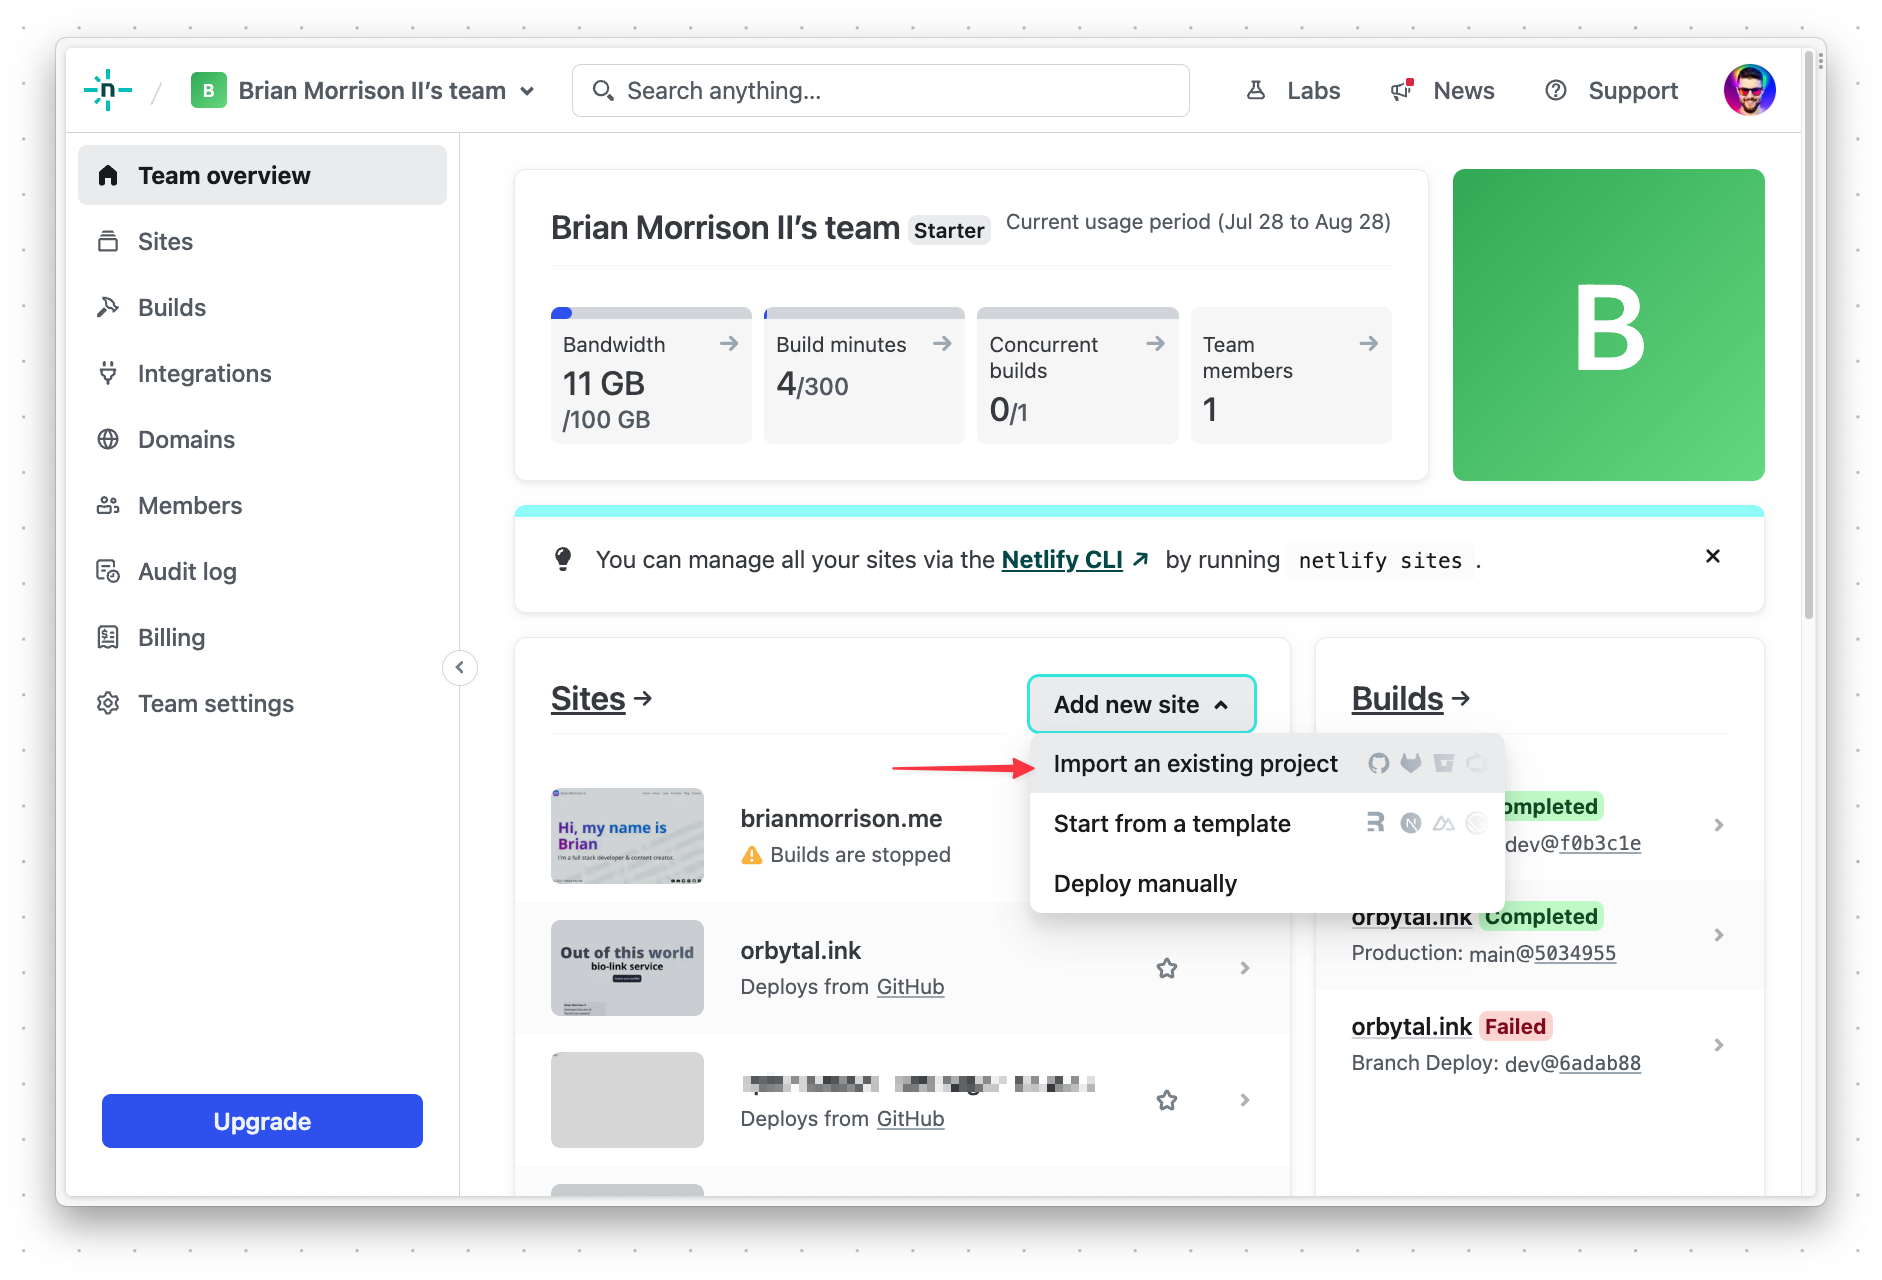
Log into your Netlify account, and click "Add new site" > "Import an existing project".
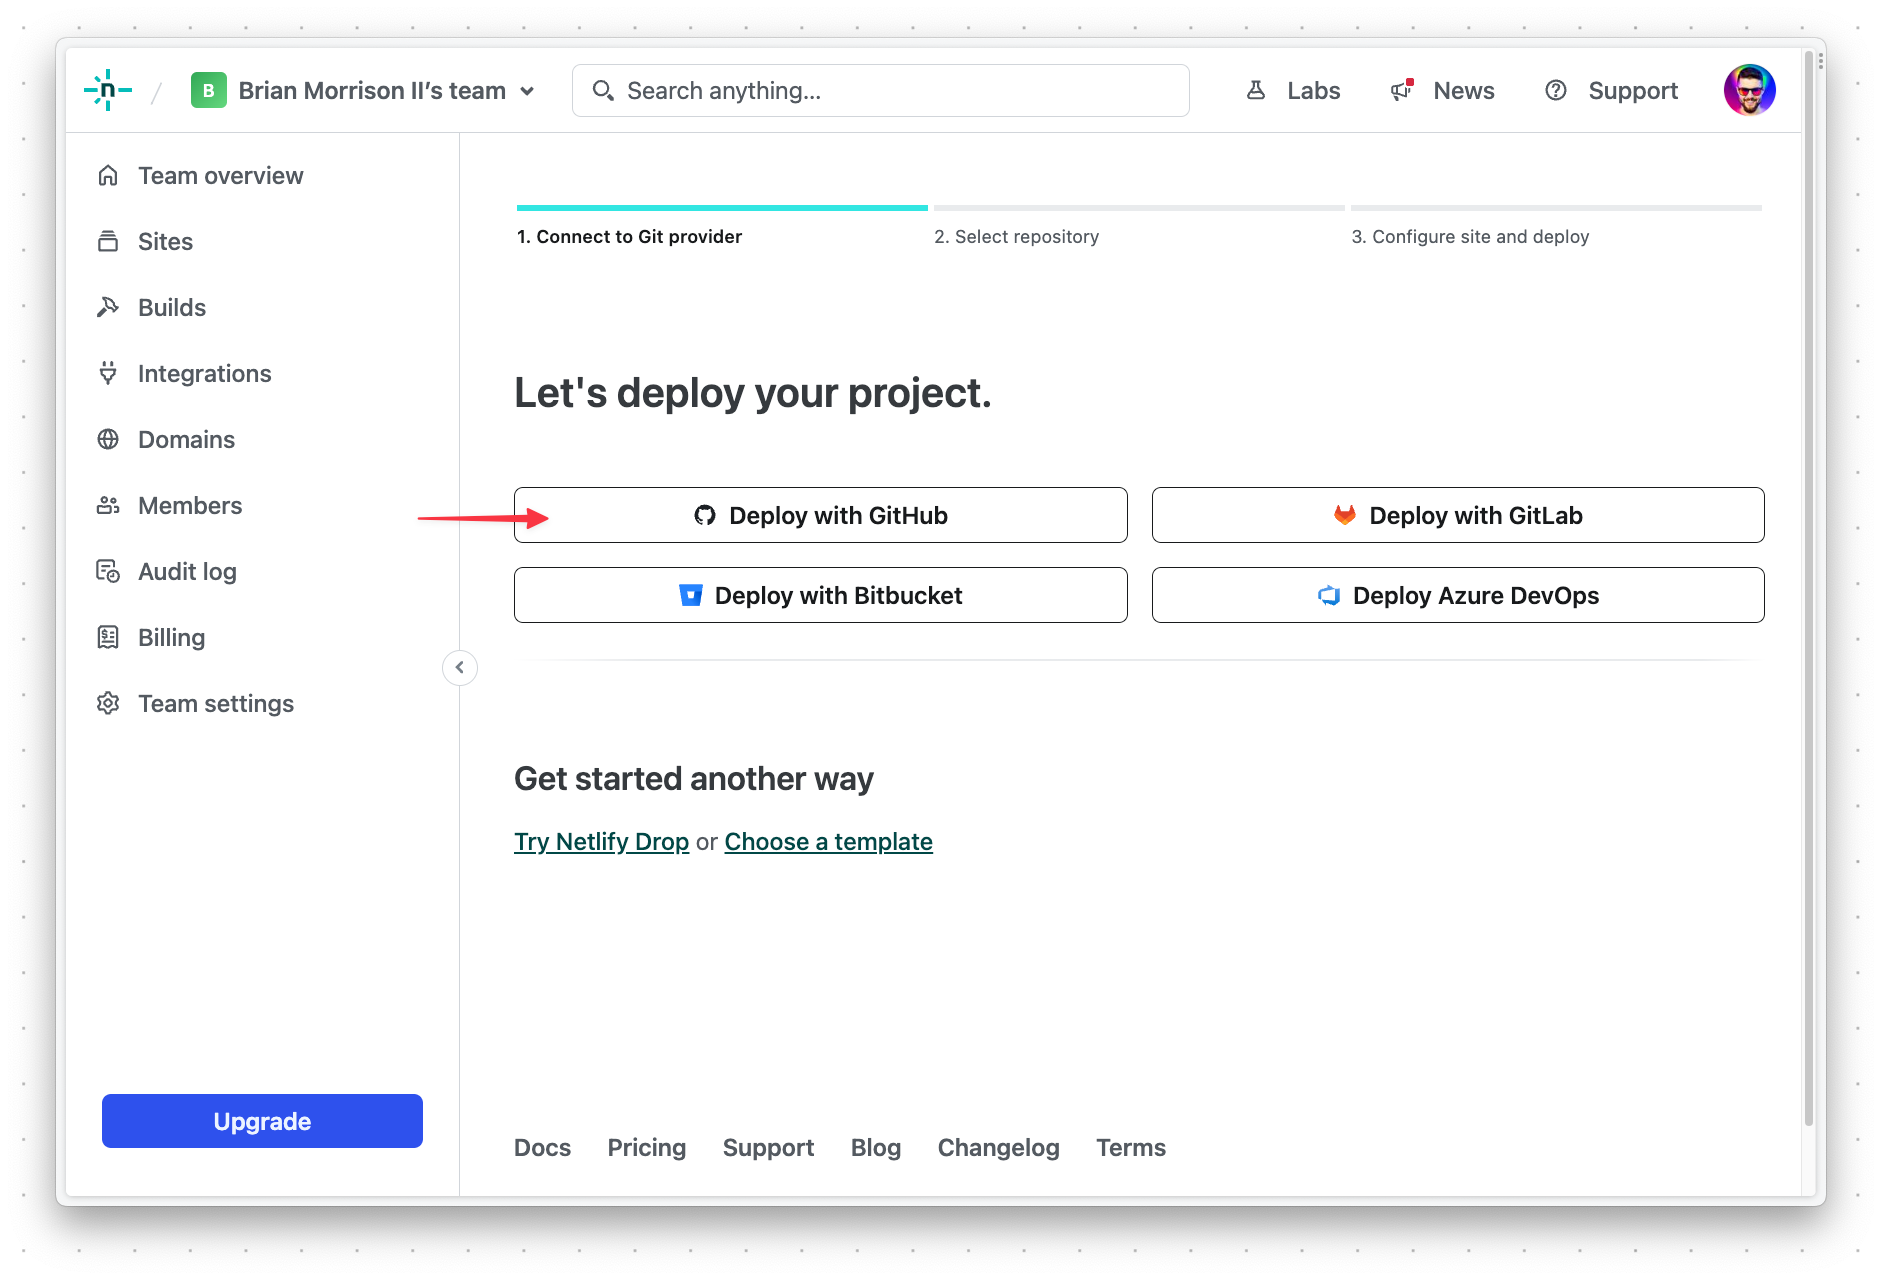
Select "Deploy with GitHub".
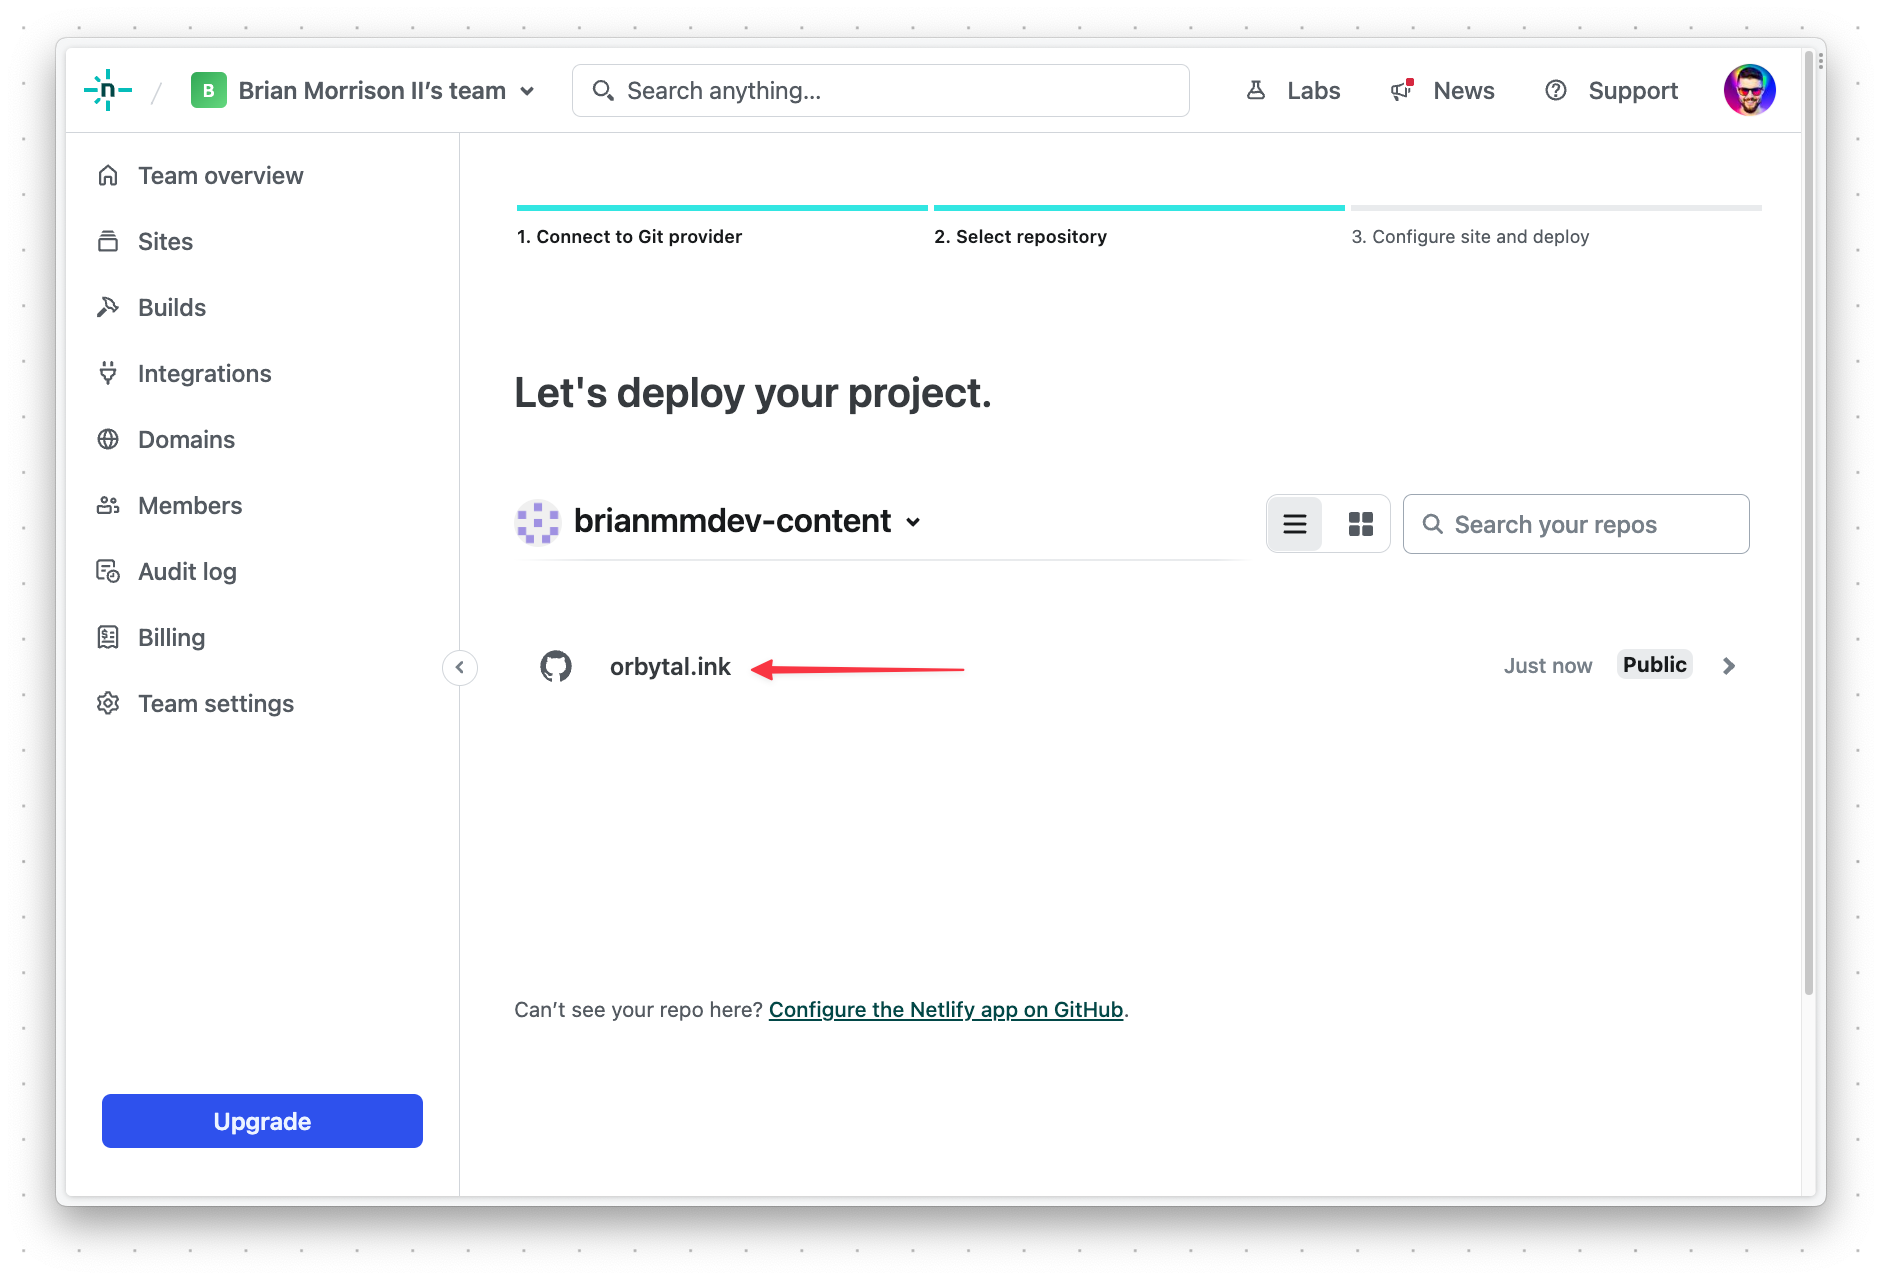
Next, select "Orbytal.ink" from the list of projects in your account.
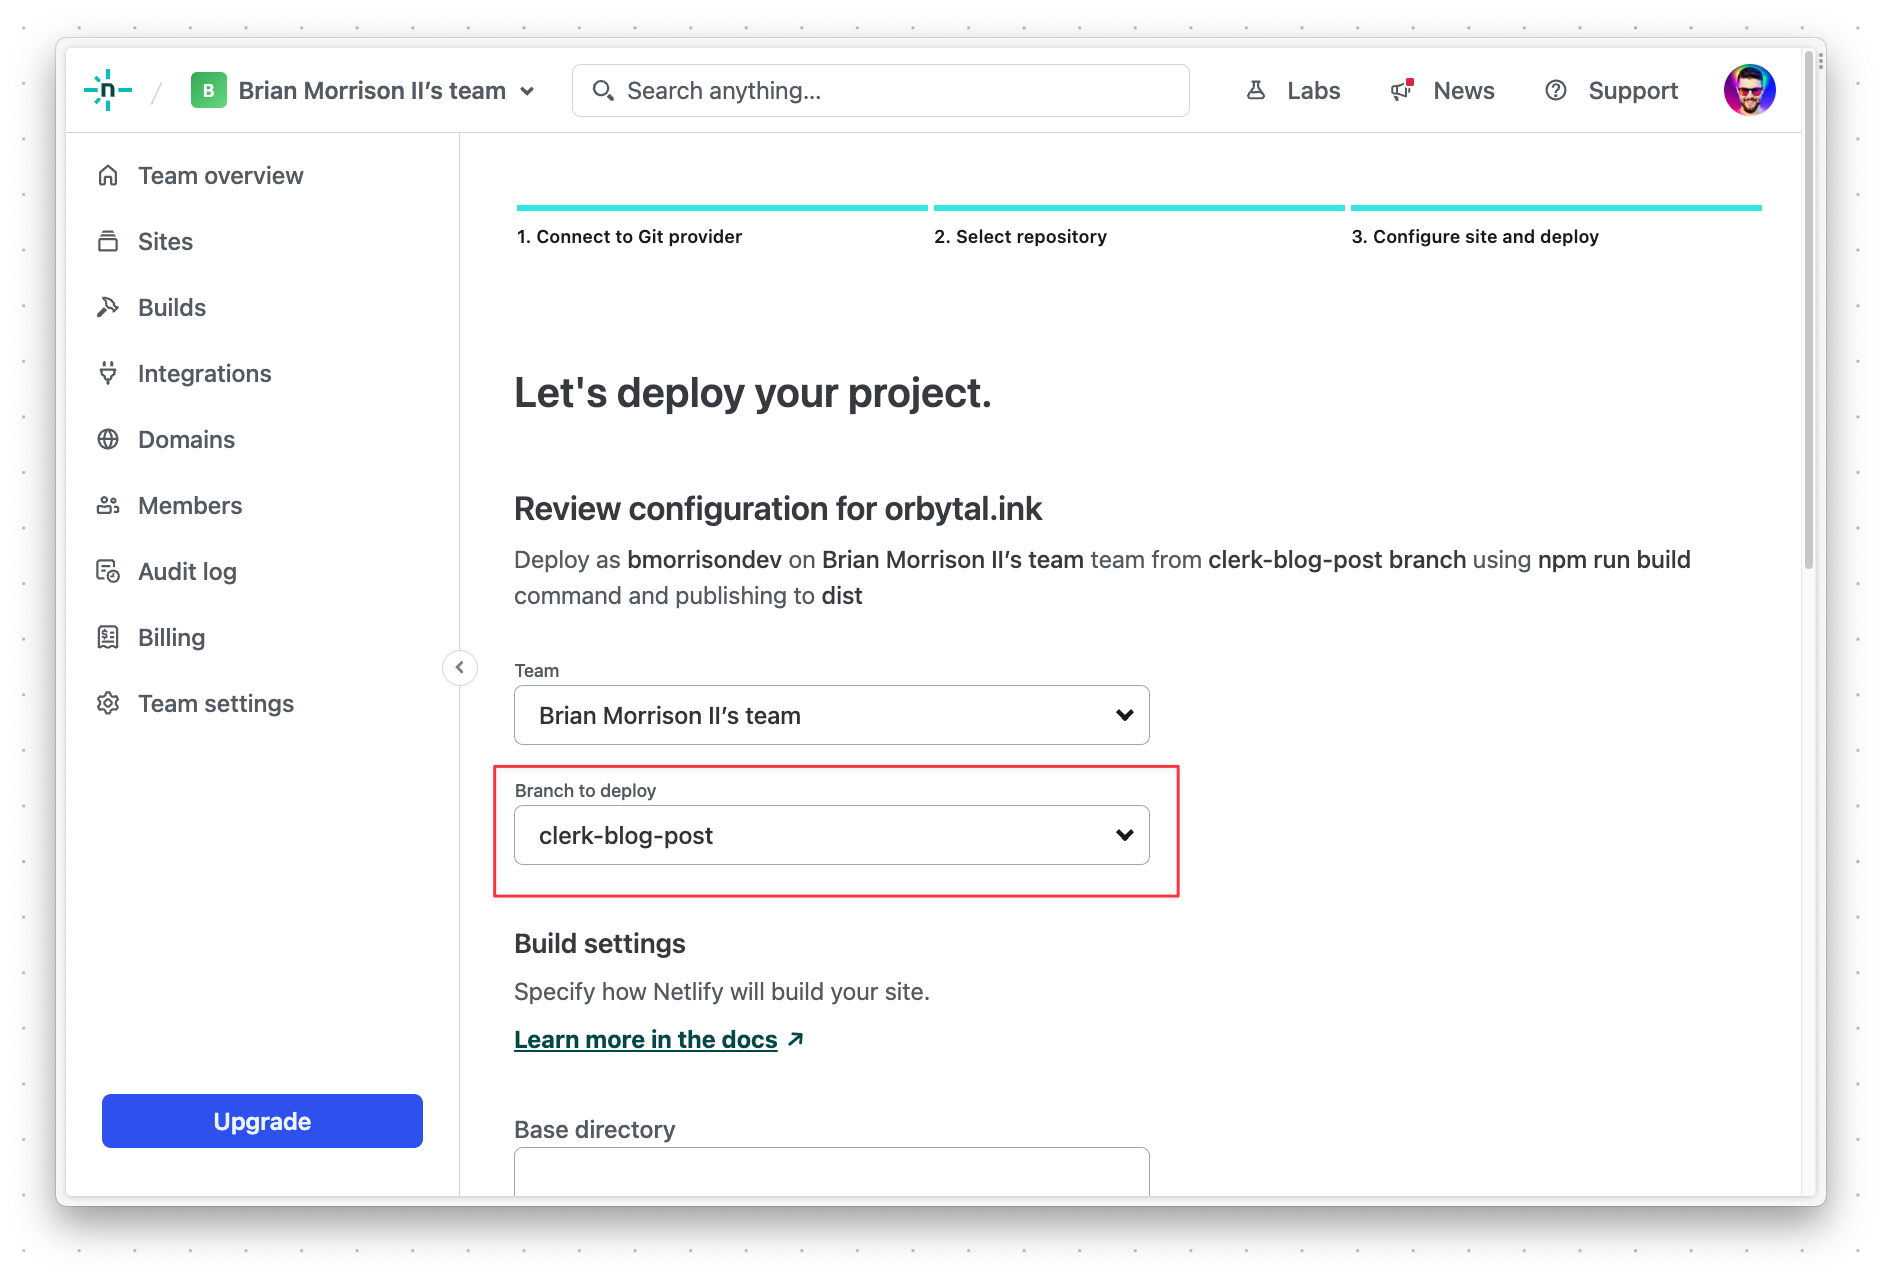
Make sure to select the clerk-blog-post branch under "Branch to deploy". Then, scroll to the bottom and click "Deploy Orbytal.ink".
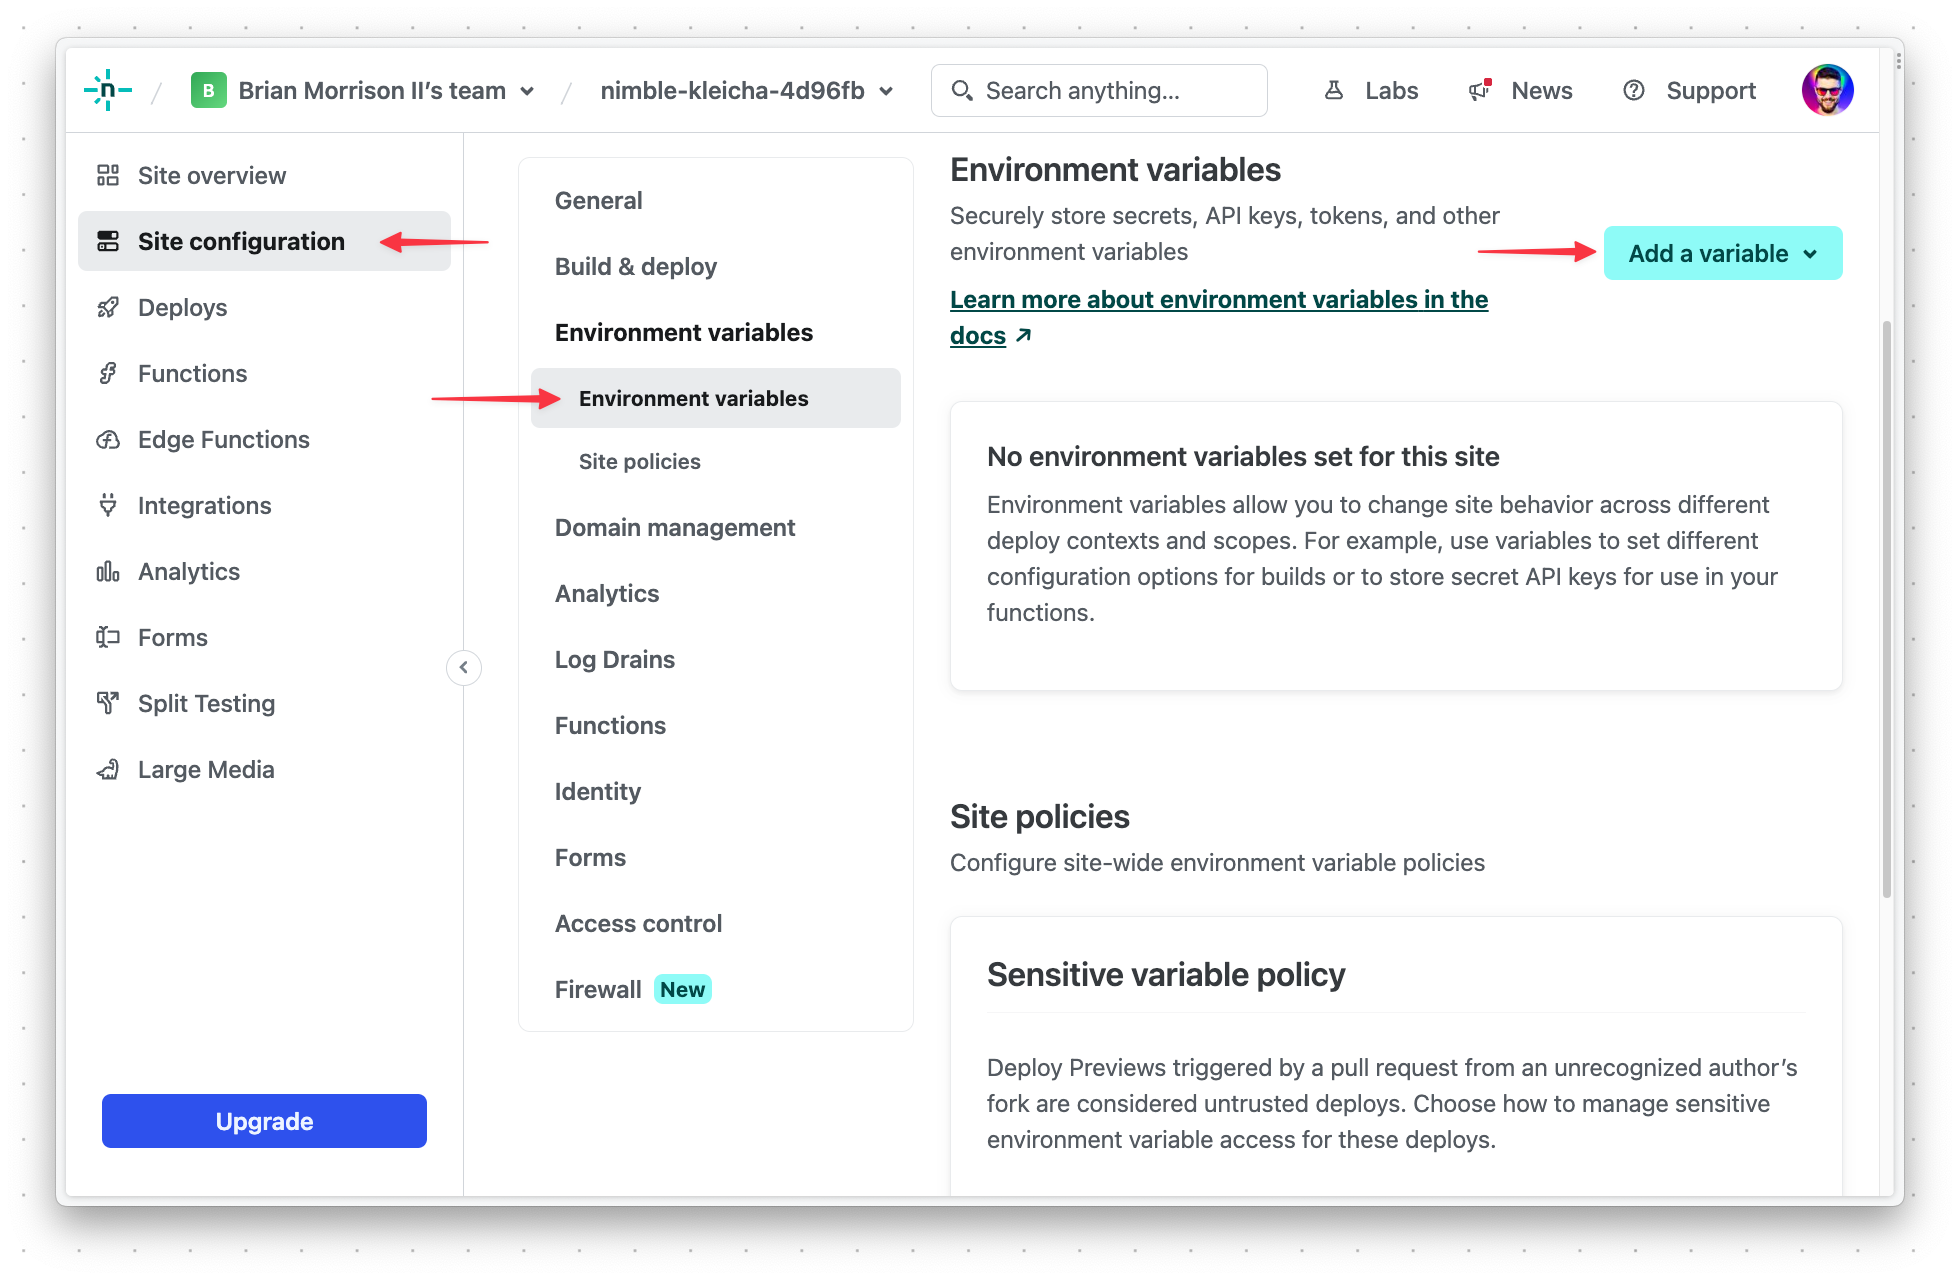
Once the initial deployment is done, you’ll need to configure a few environment variables. Select "Site configuration" from the sidebar, and then "Environment variables". Add the following variables:
DATABASE_URL: The connection string for your PlanetScale database formatted asmysql://<DB_USERNAME>:<DB_PASSWORD>@aws.connect.psdb.cloud/orbytalinkand replaceDB_USERNAMEandDB_PASSWORDwith the values created earlier in the guide.CLERK_API_KEY: The private key acquired when configuring the Clerk project.VITE_CLERK_PUBLISHABLE_KEY: The public key acquired when configuring the Clerk project.
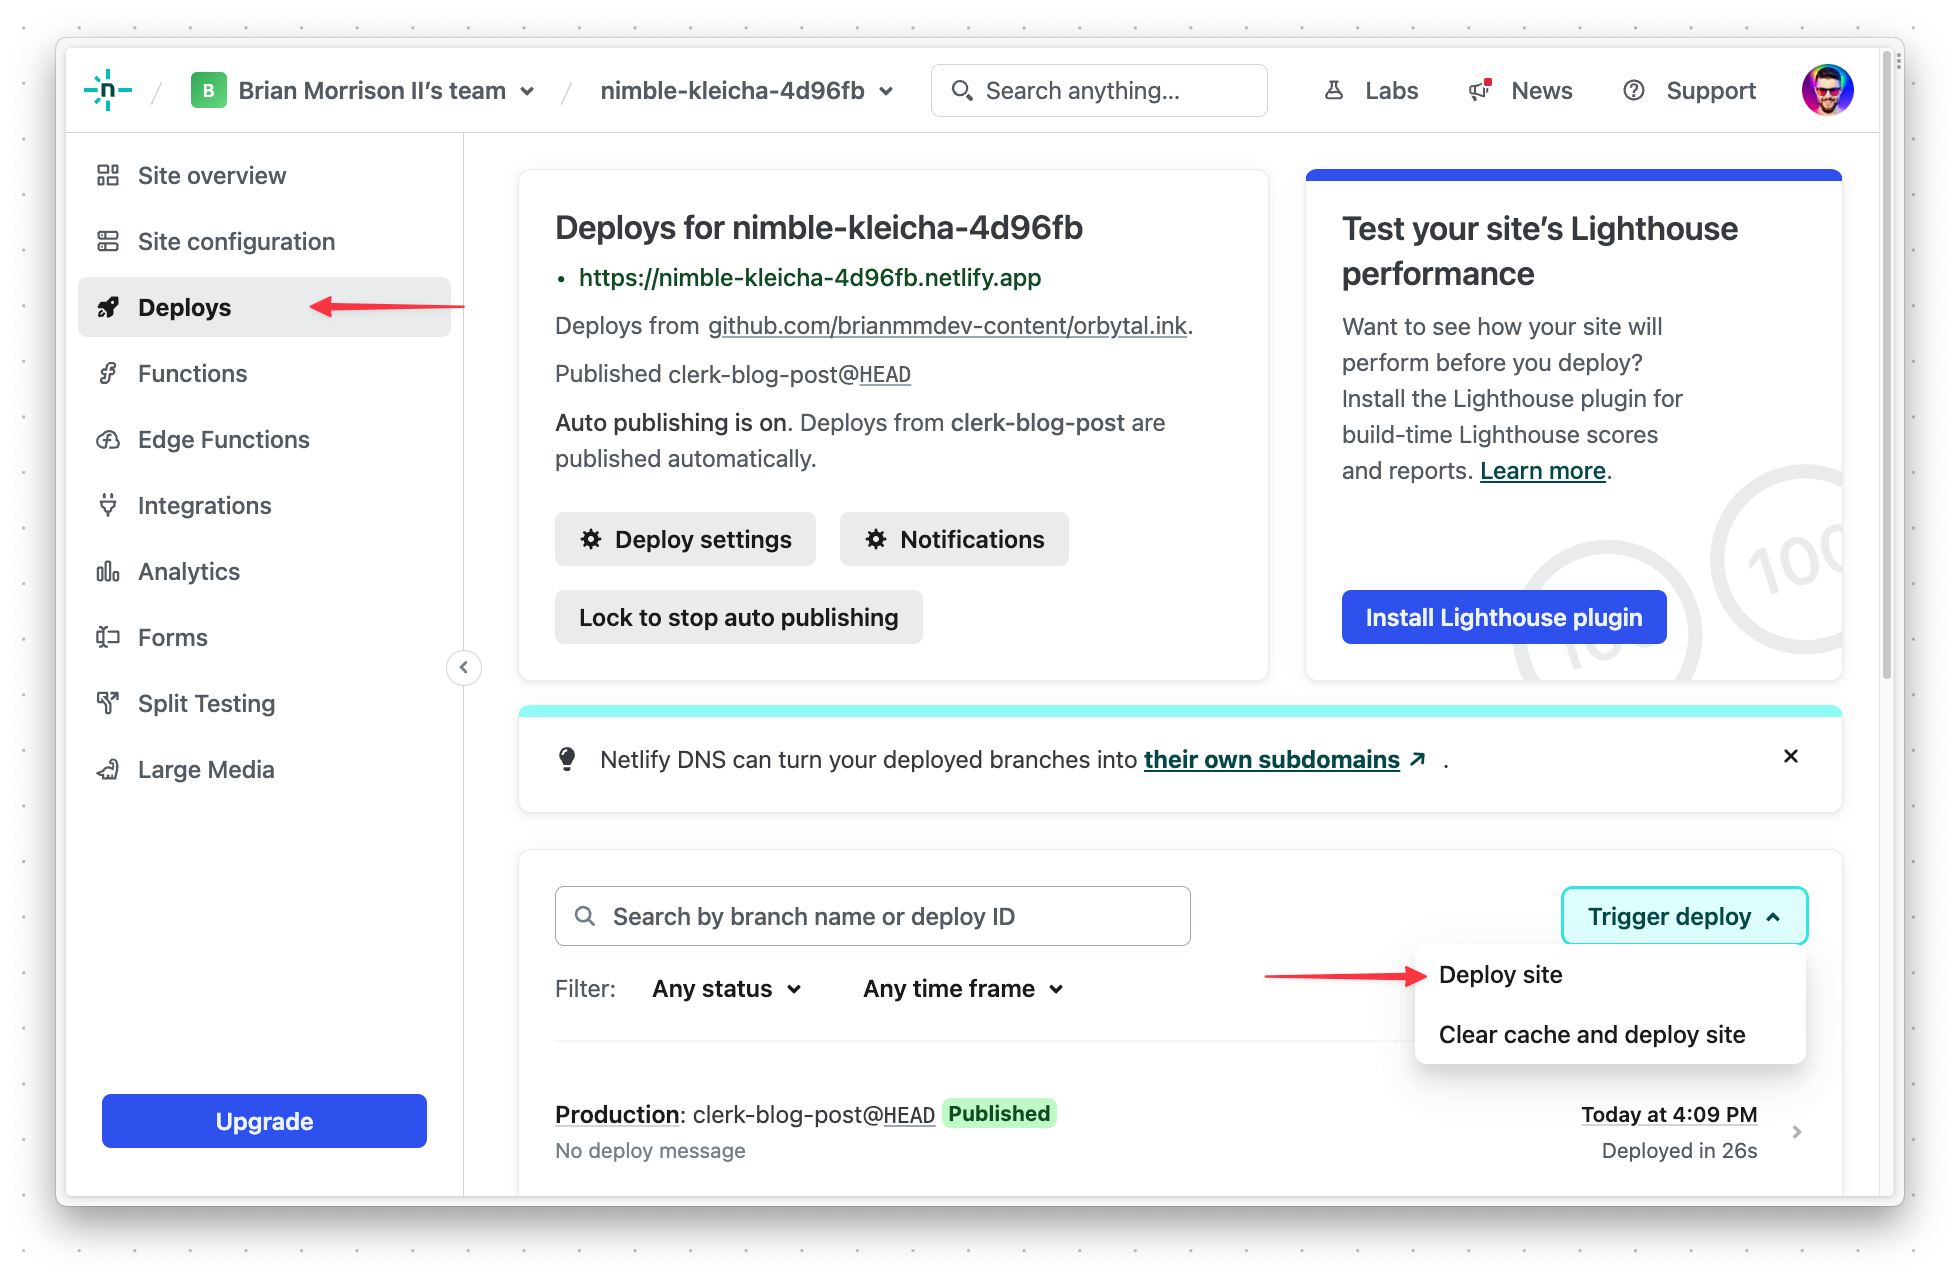
Finally, re-deploy the project with the new settings by going back to "Deploys", and then "Trigger deploy" > "Deploy site".
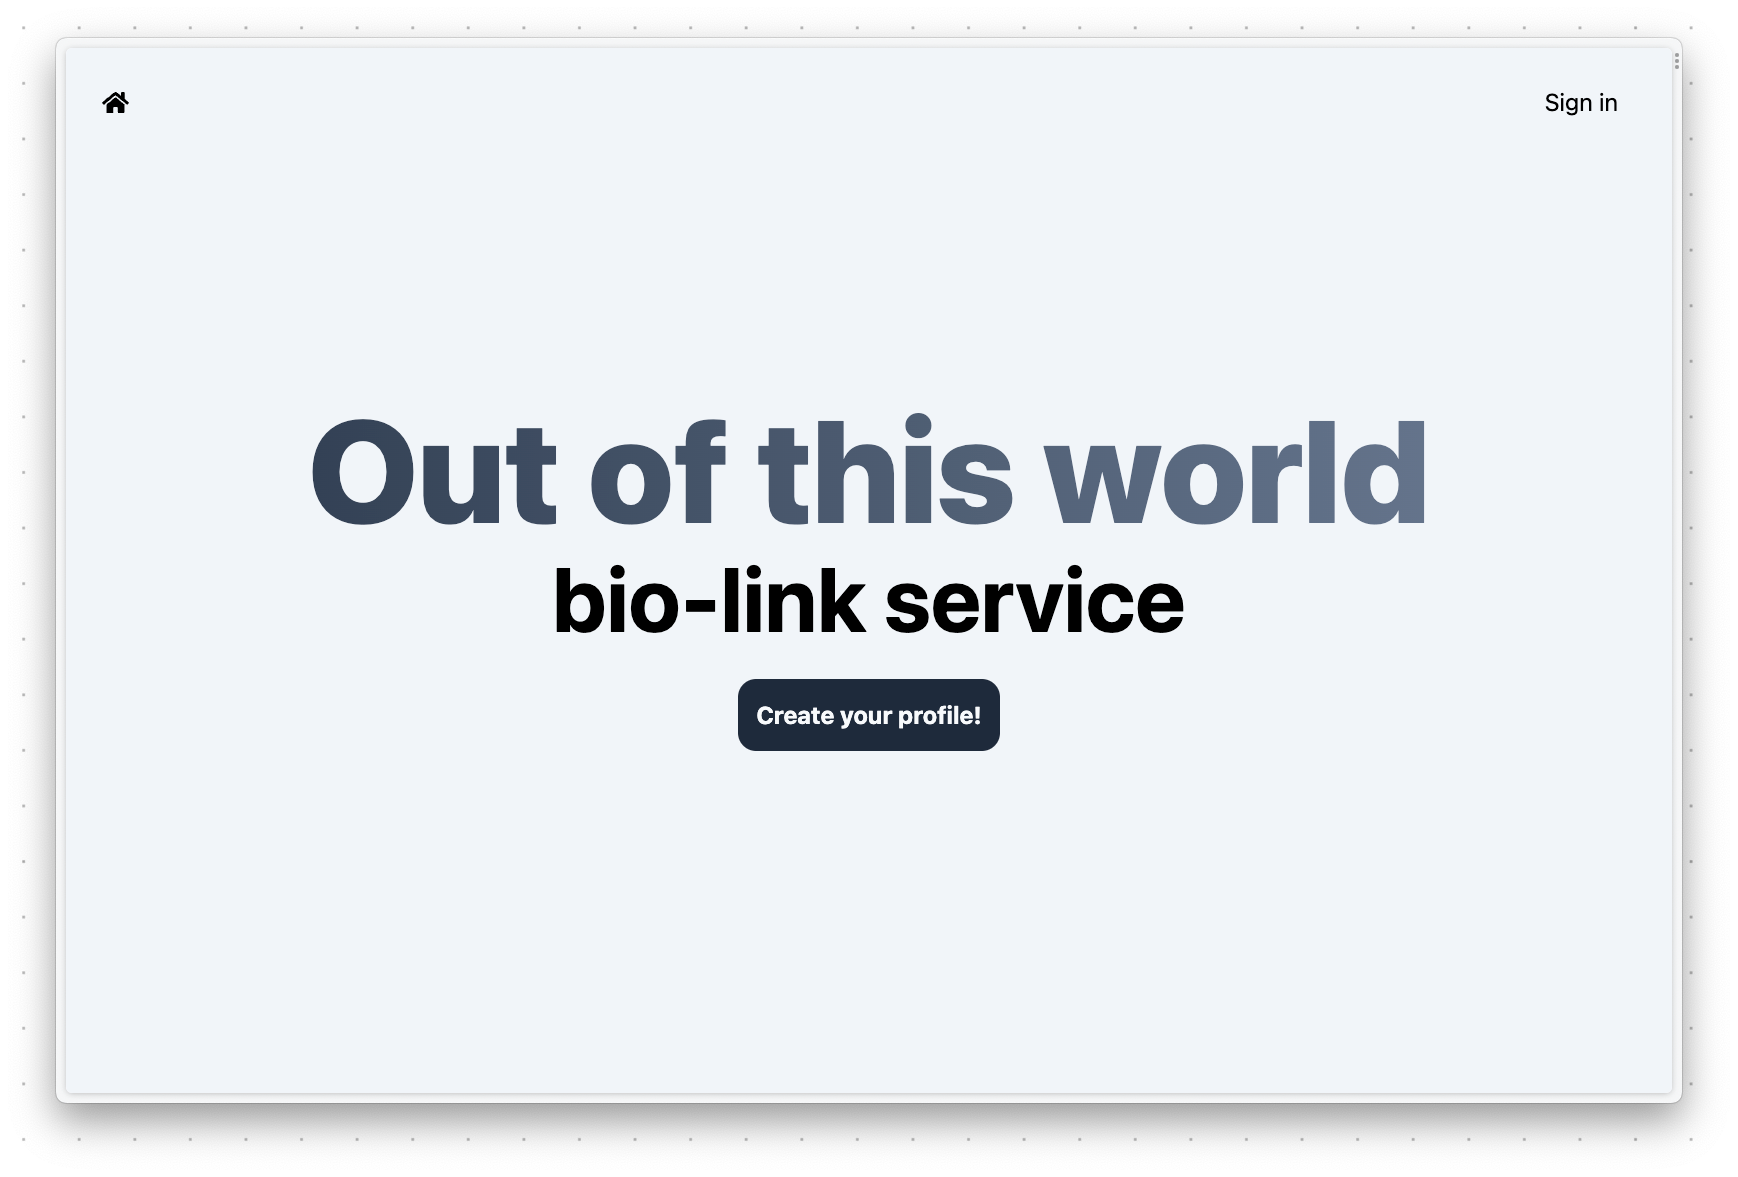
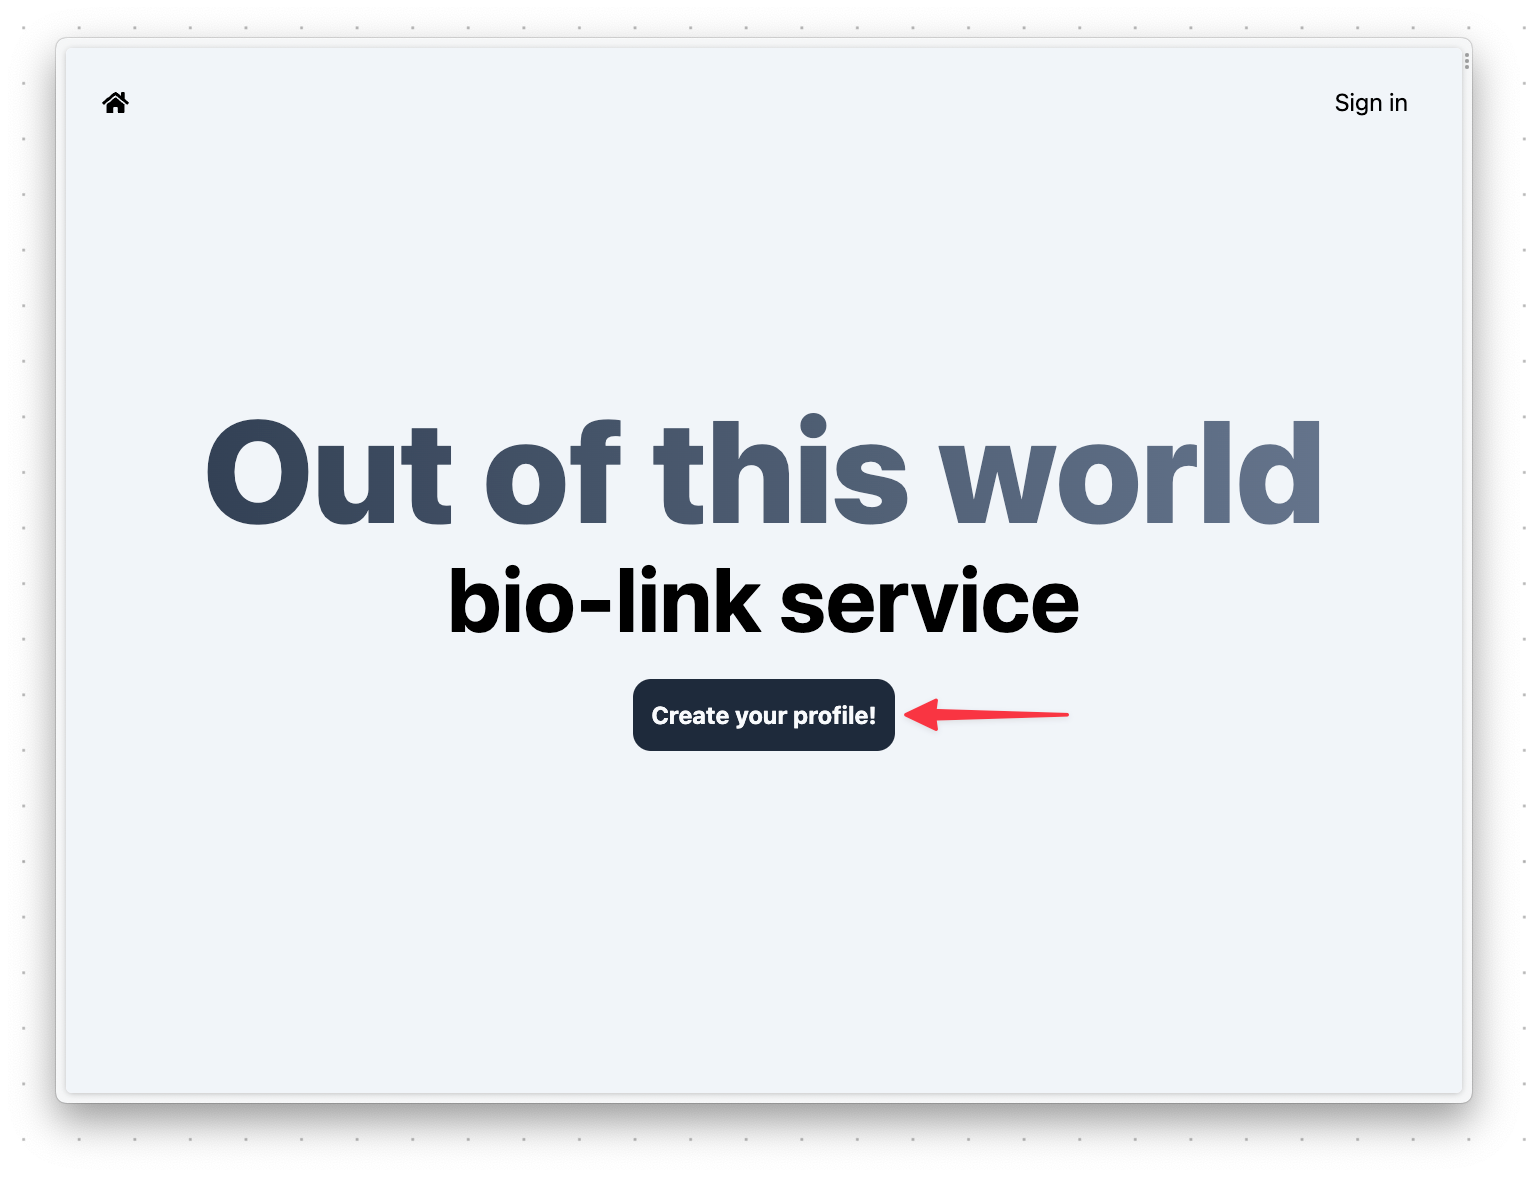
To test that your deployment works, navigate to the URL provided by Netlify and you should see the following if everything was built and deployed correctly.
Add webhooks
Now that your project is up and running, let's add the webhook so we can pass specific user information to the PlanetScale database as users are created or updated.
Configure Clerk webhooks
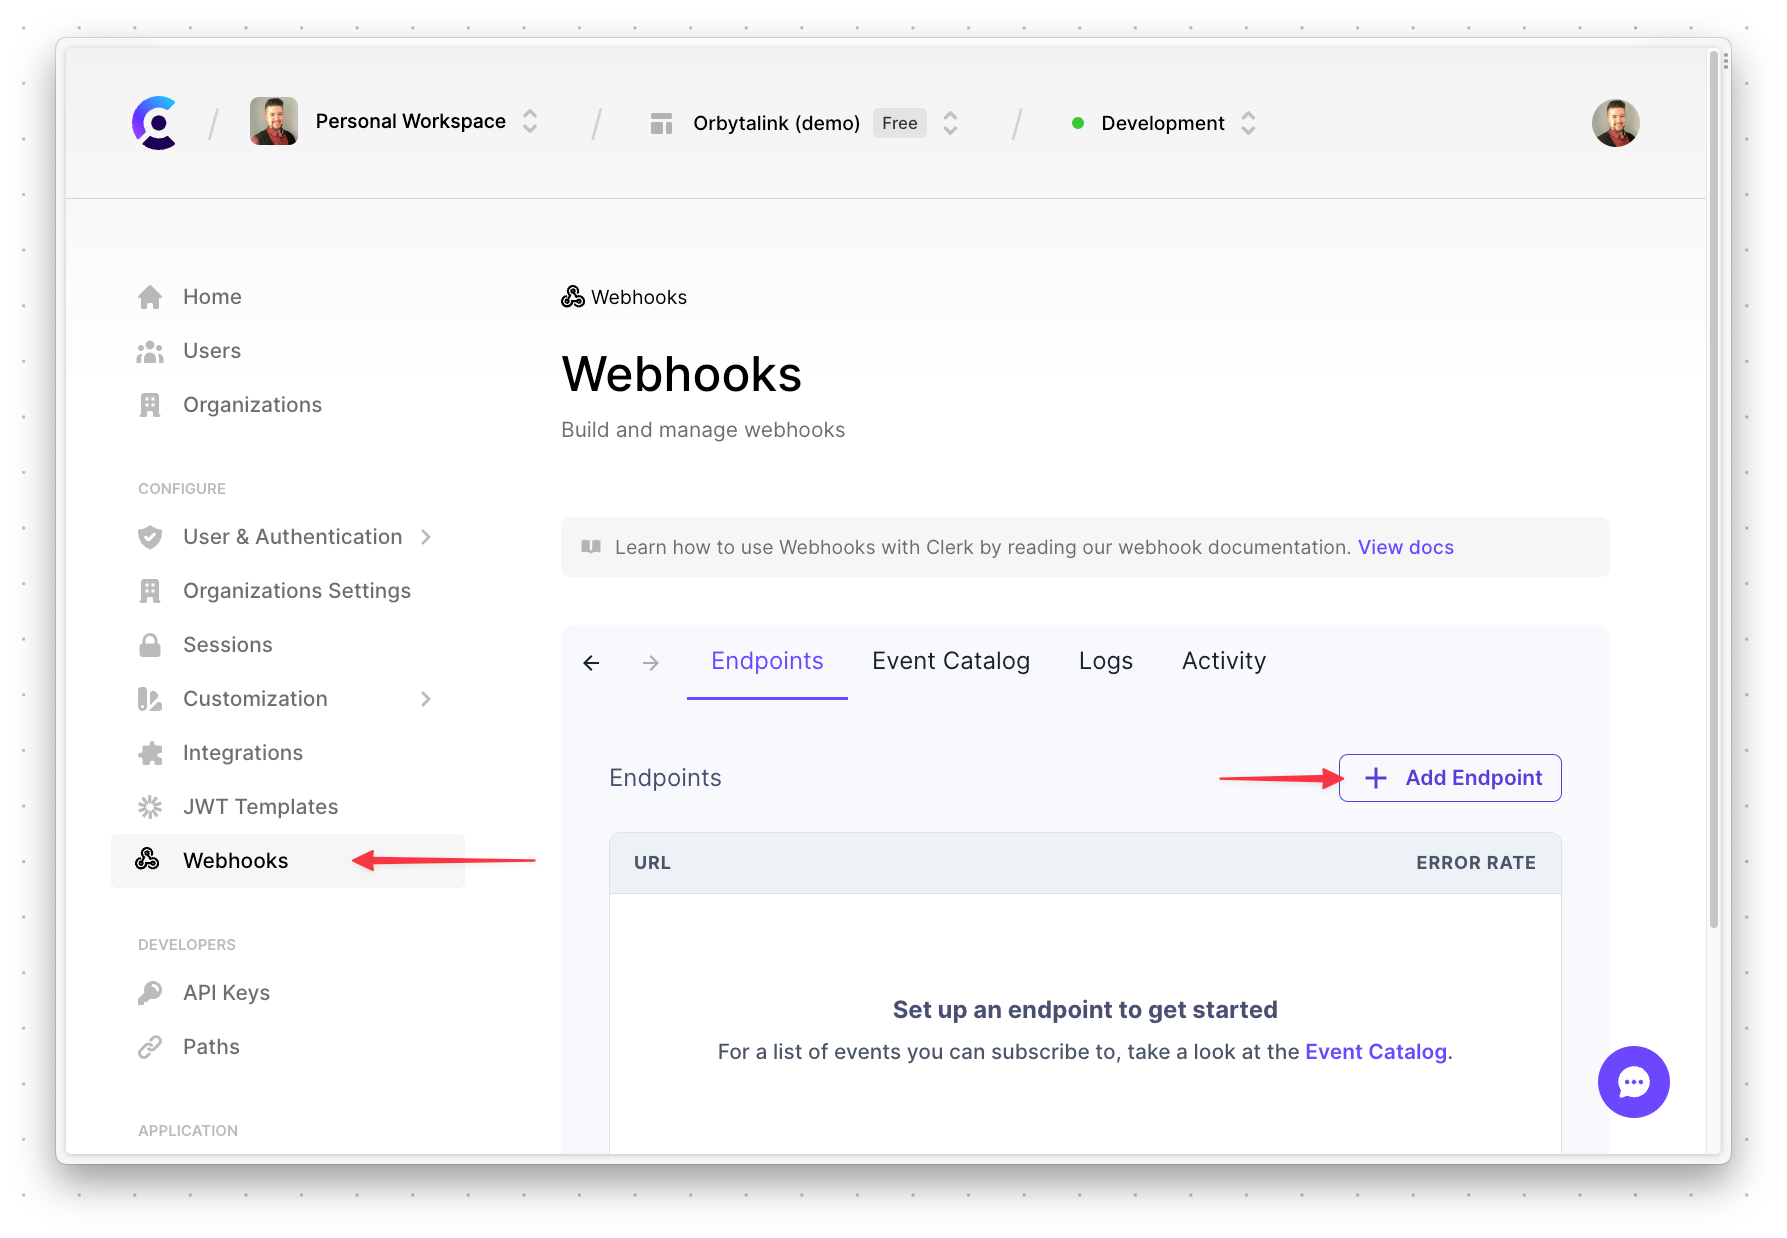
In the overview of the Clerk project, select "Webhooks" from the sidebar, and then "Add endpoint".
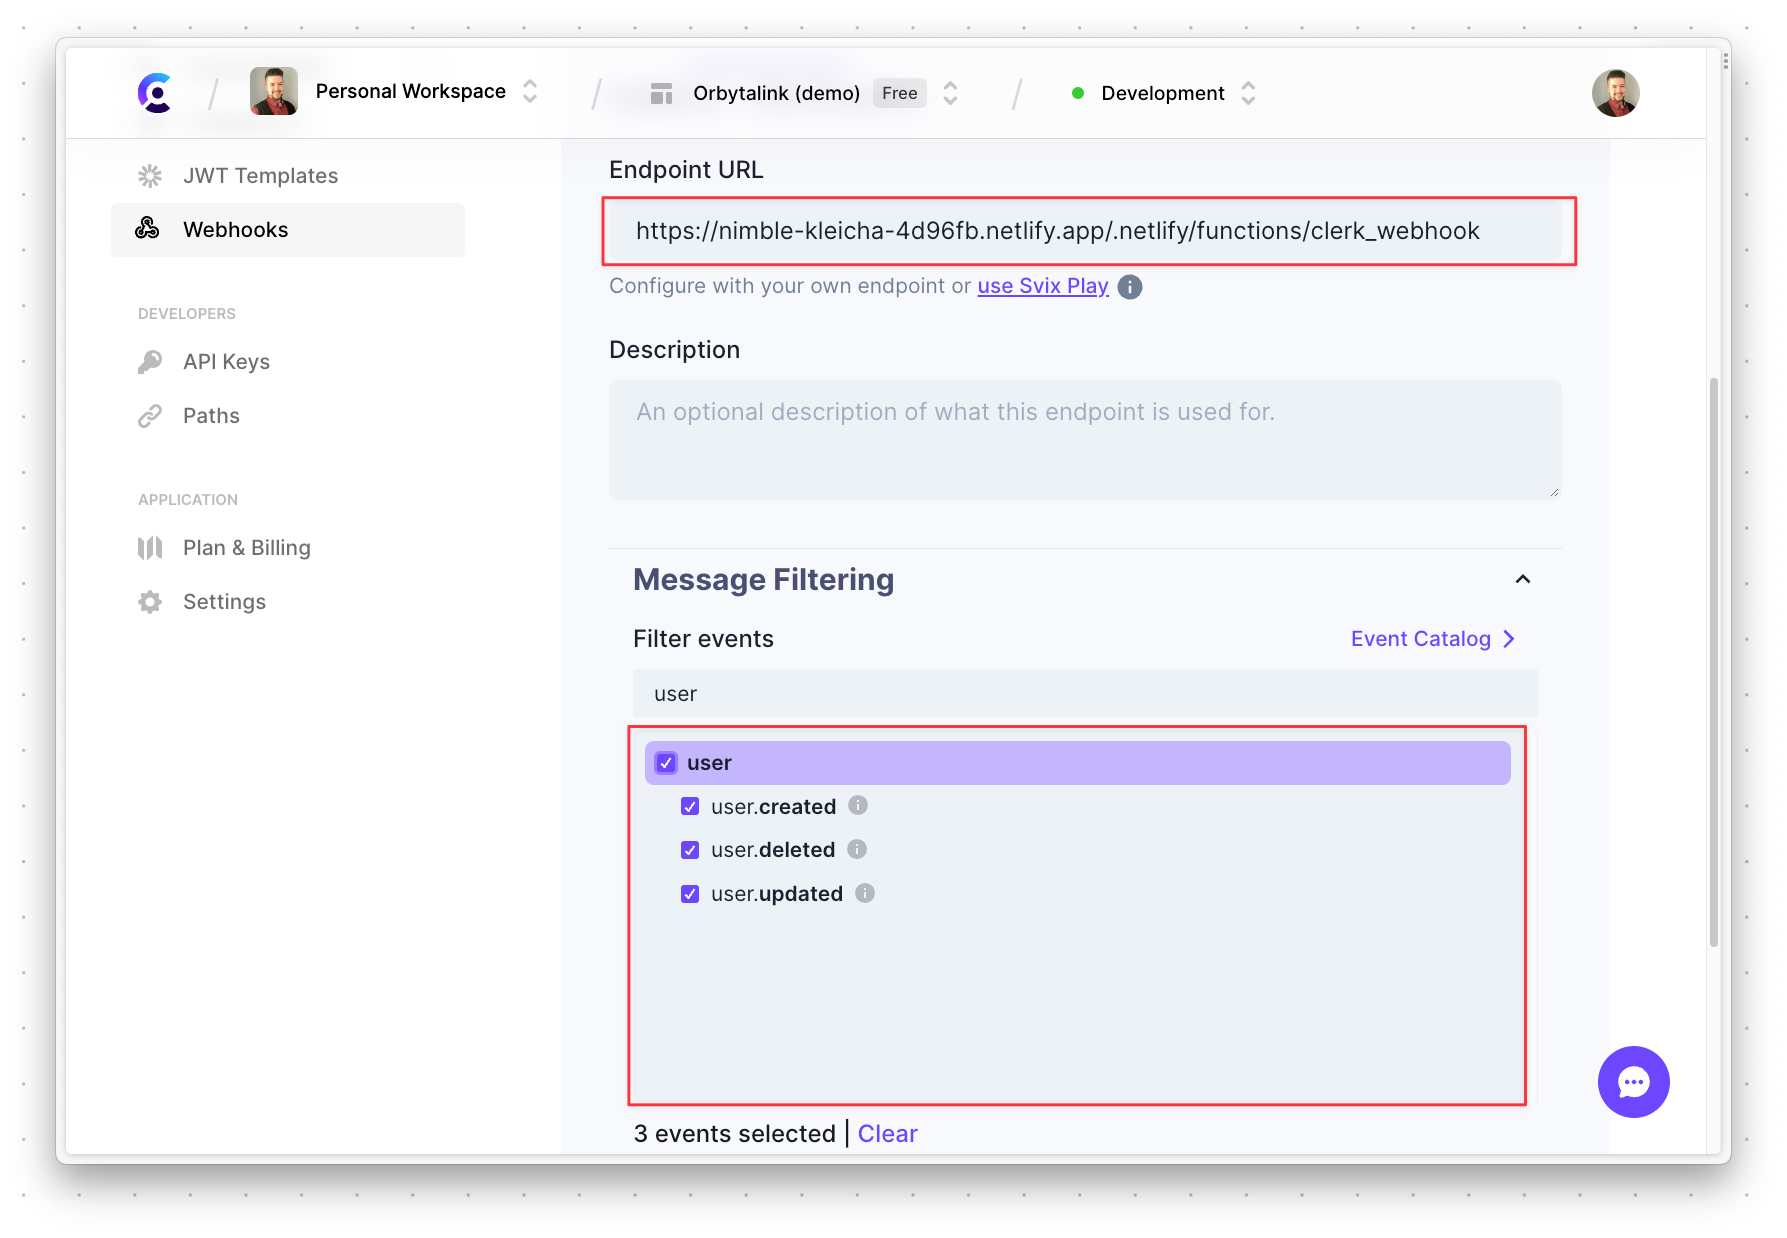
Enter the "Endpoint URL" formatted as <NETLIFY_URL>/.netlify/functions/clerk_webhook, select the topmost user element under "Message Filtering", and scroll to the bottom and click "Create".
Create and deploy the Netlify Function
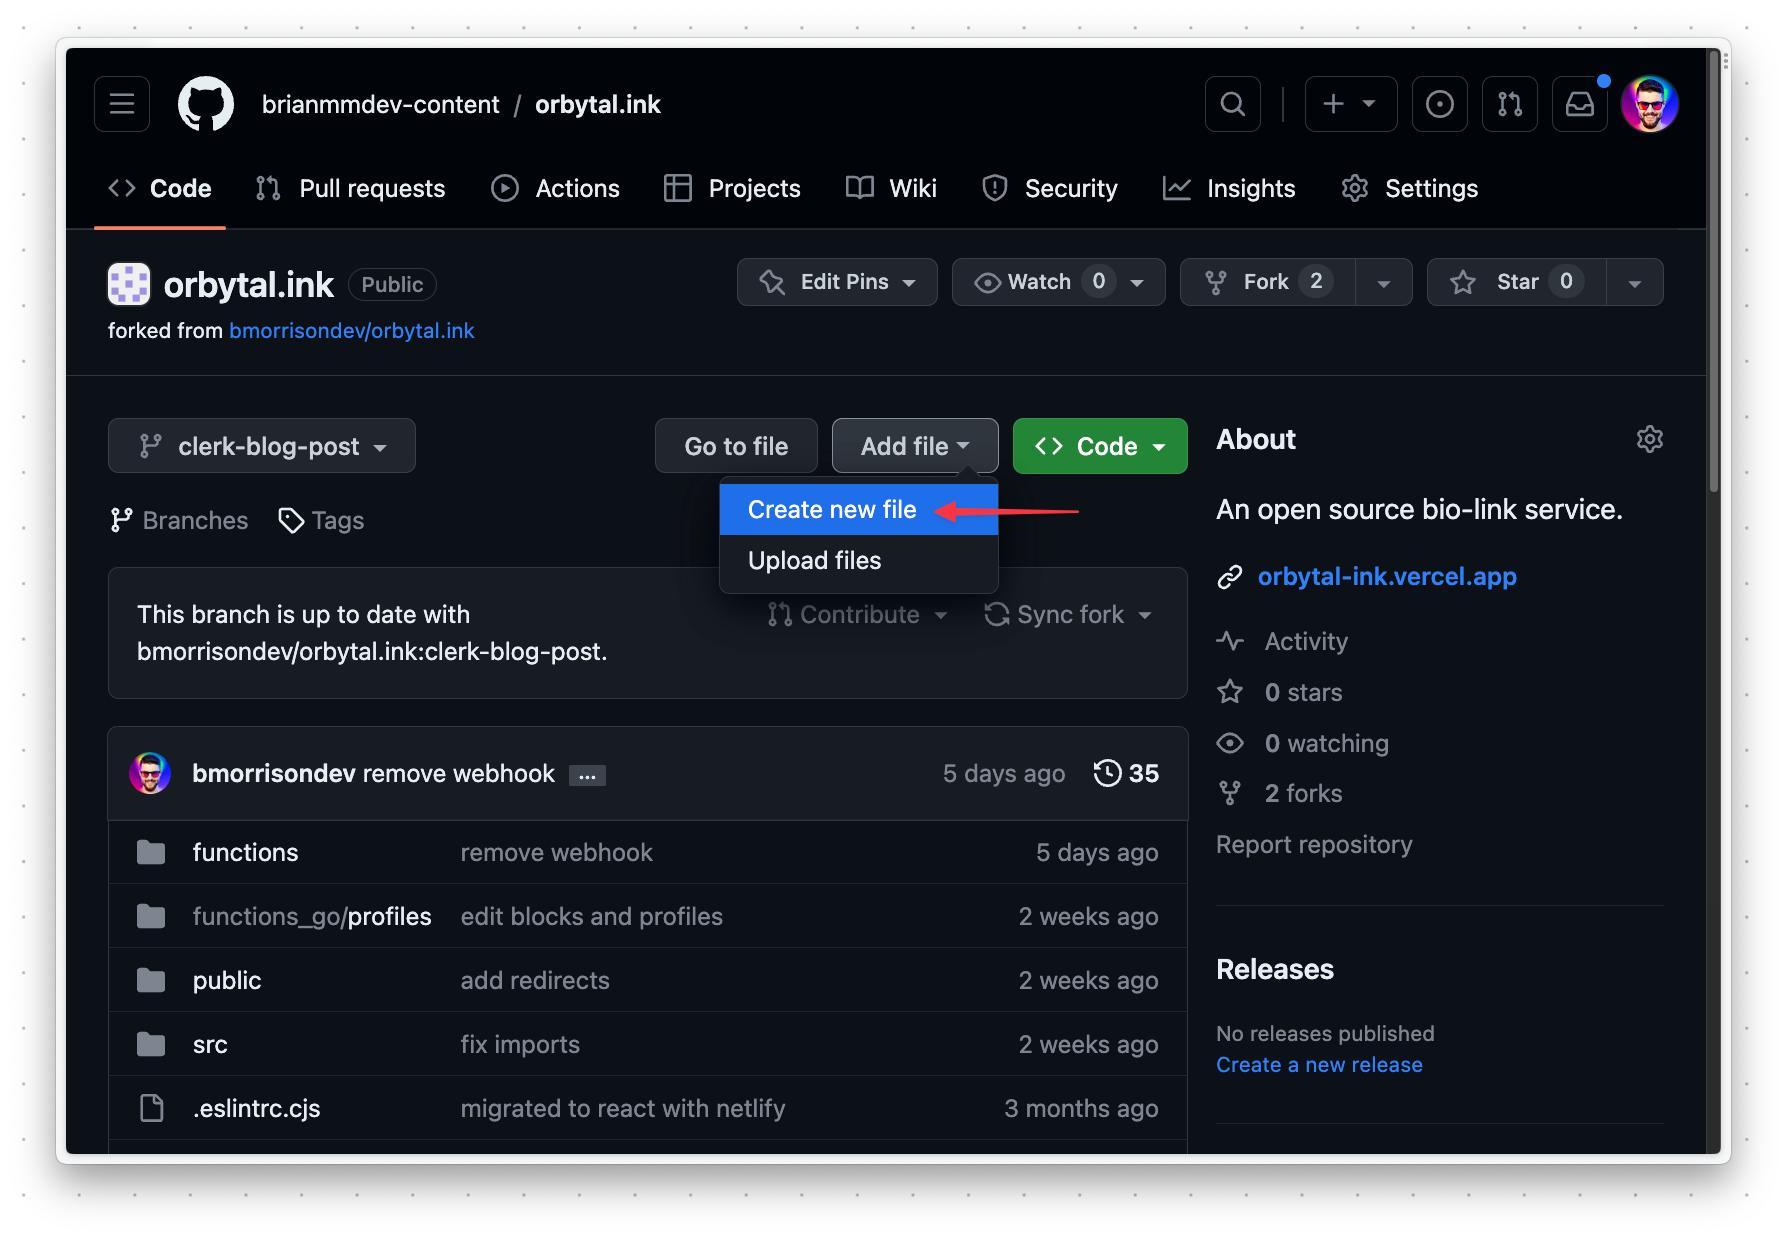
Next, you’ll need to create a Netlify Function that will act as the endpoint to receive messages from our Clerk project. Luckily, all of this work can be done directly within GitHub. With the project open in GitHub, start by switching to the clerk-blog-post branch.

Click "Add file" > "Create new file".
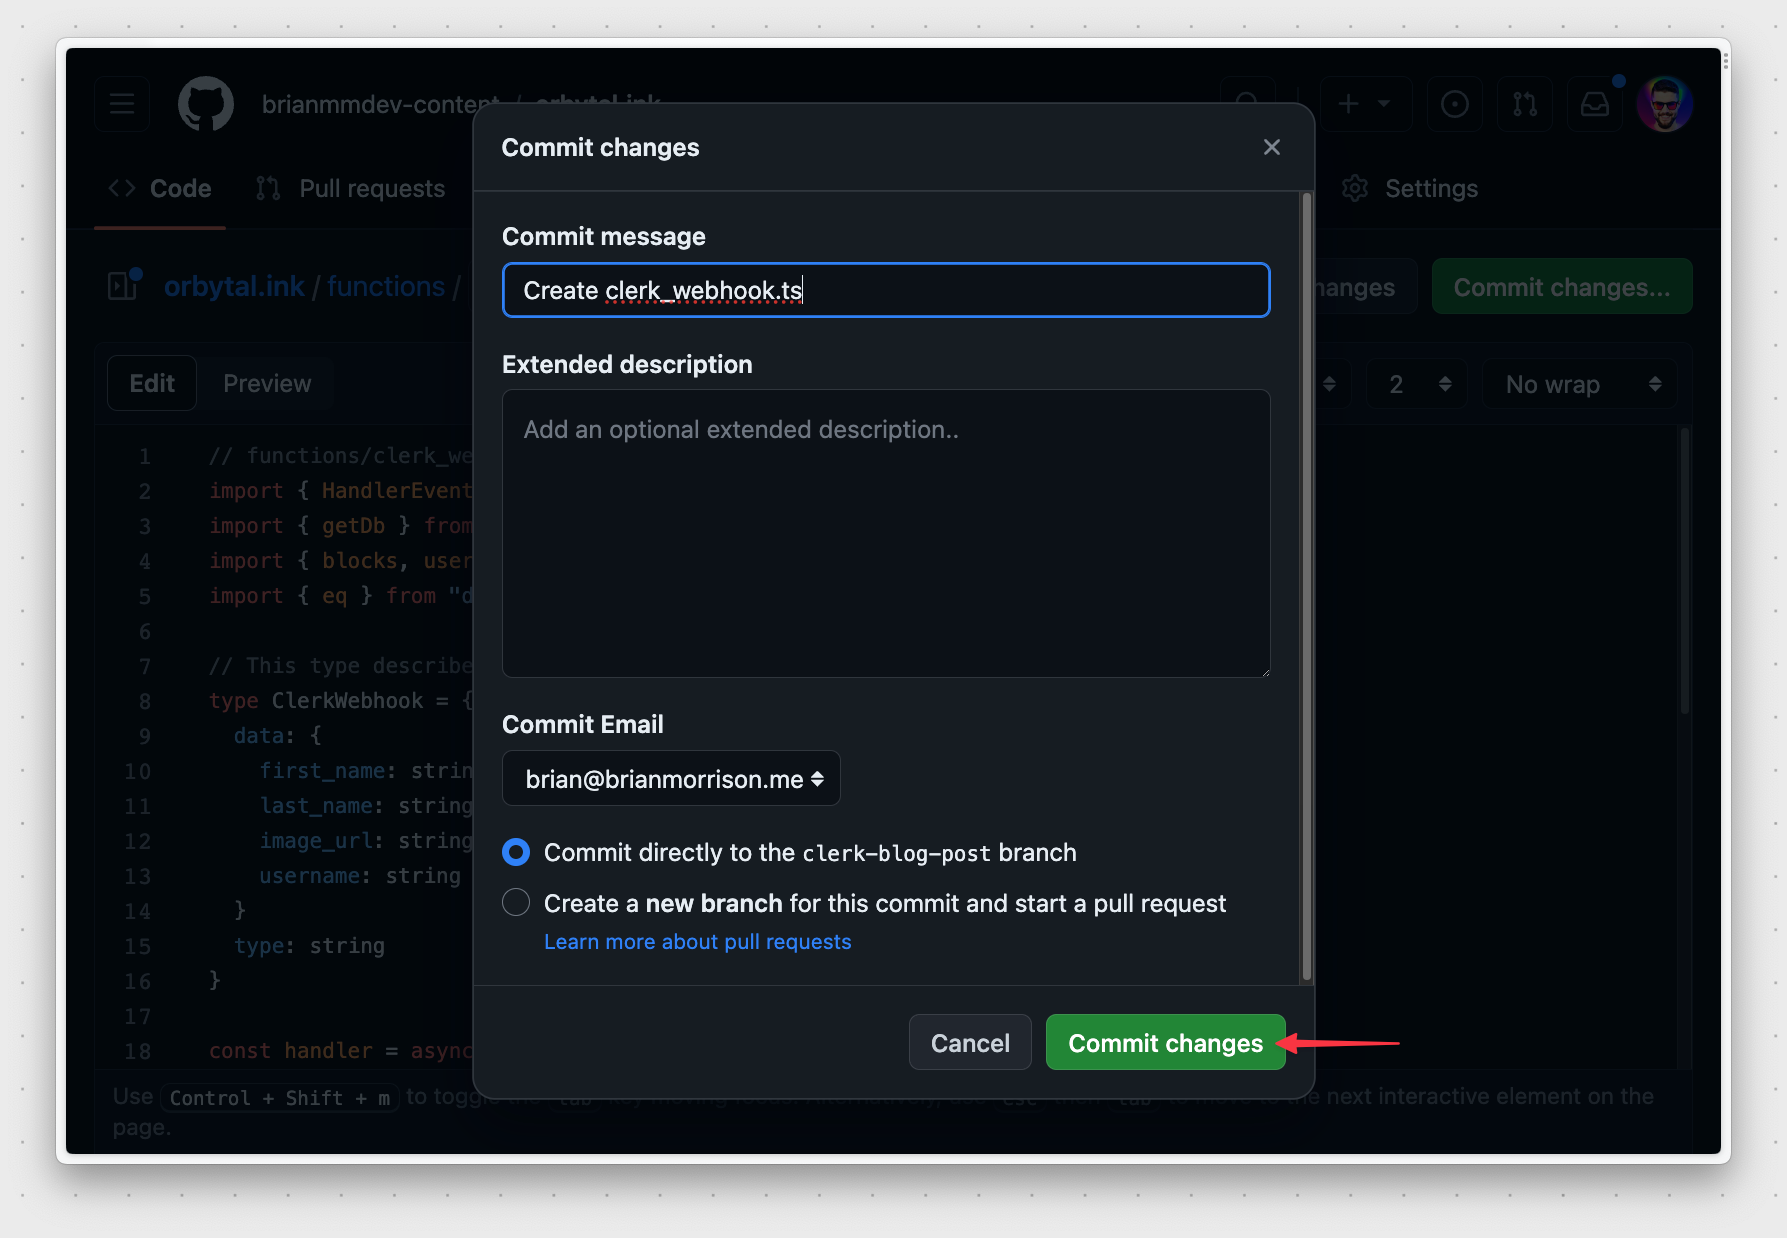
Name the file functions/clerk_webhook.ts and paste the following into that file. Note the comments in the code that describe what the important parts of the function do.
// functions/clerk_webhook.ts
import { HandlerEvent, HandlerContext } from '@netlify/functions'
import { getDb } from './utils/lib'
import { blocks, users } from './utils/db/schema'
import { eq } from 'drizzle-orm'
// This type describes the structure of the incoming webhook
type ClerkWebhook = {
  data: {
    first_name: string
    last_name: string
    image_url: string
    username: string
  }
  type: string
}
const handler = async (event: HandlerEvent, context: HandlerContext) => {
  if (event.body) {
    // 👉 Parse the incomign event body into a ClerkWebhook object
    const webhook = JSON.parse(event.body) as ClerkWebhook
    try {
      const db = getDb()
      // 👉 `webhook.type` is a string value that describes what kind of event we need to handle

      // 👉 If the type is "user.updated" the important values in the database will be updated in the users table
      if (webhook.type === 'user.updated') {
        await db
          .update(users)
          .set({
            display_name: `${webhook.data.first_name} ${webhook.data.last_name}`,
            img_url: webhook.data.image_url
          })
          .where(eq(users.username, webhook.data.username))
      }

      // 👉 If the type is "user.created" create a record in the users table
      if (webhook.type === 'user.created') {
        await db.insert(users).values({
          display_name: `${webhook.data.first_name} ${webhook.data.last_name}`,
          img_url: webhook.data.image_url,
          username: webhook.data.username
        })
      }

      // 👉 If the type is "user.deleted", delete the user record and associated blocks
      if (webhook.type === 'user.deleted') {
        const dbuser = await db.query.users.findFirst({
          where: eq(users.username, webhook.data.username)
        })
        console.log('dbuser', dbuser)
        if (dbuser) {
          await Promise.all([
            db.delete(users).where(eq(users.id, dbuser.id)),
            db.delete(blocks).where(eq(blocks.user_id, dbuser.id))
          ])
        }
      }

      return {
        statusCode: 200
      }
    } catch (err) {
      console.error(err)
      return {
        statusCode: 500
      }
    }
  }
}
export { handler }
Click on "Commit changes" to open a modal. Feel free to add an extended description if you like, and click "Commit changes" in the modal to create the file in the branch.
Once the file is saved, Netlify should automatically deploy the latest version of the web application.
Test the function
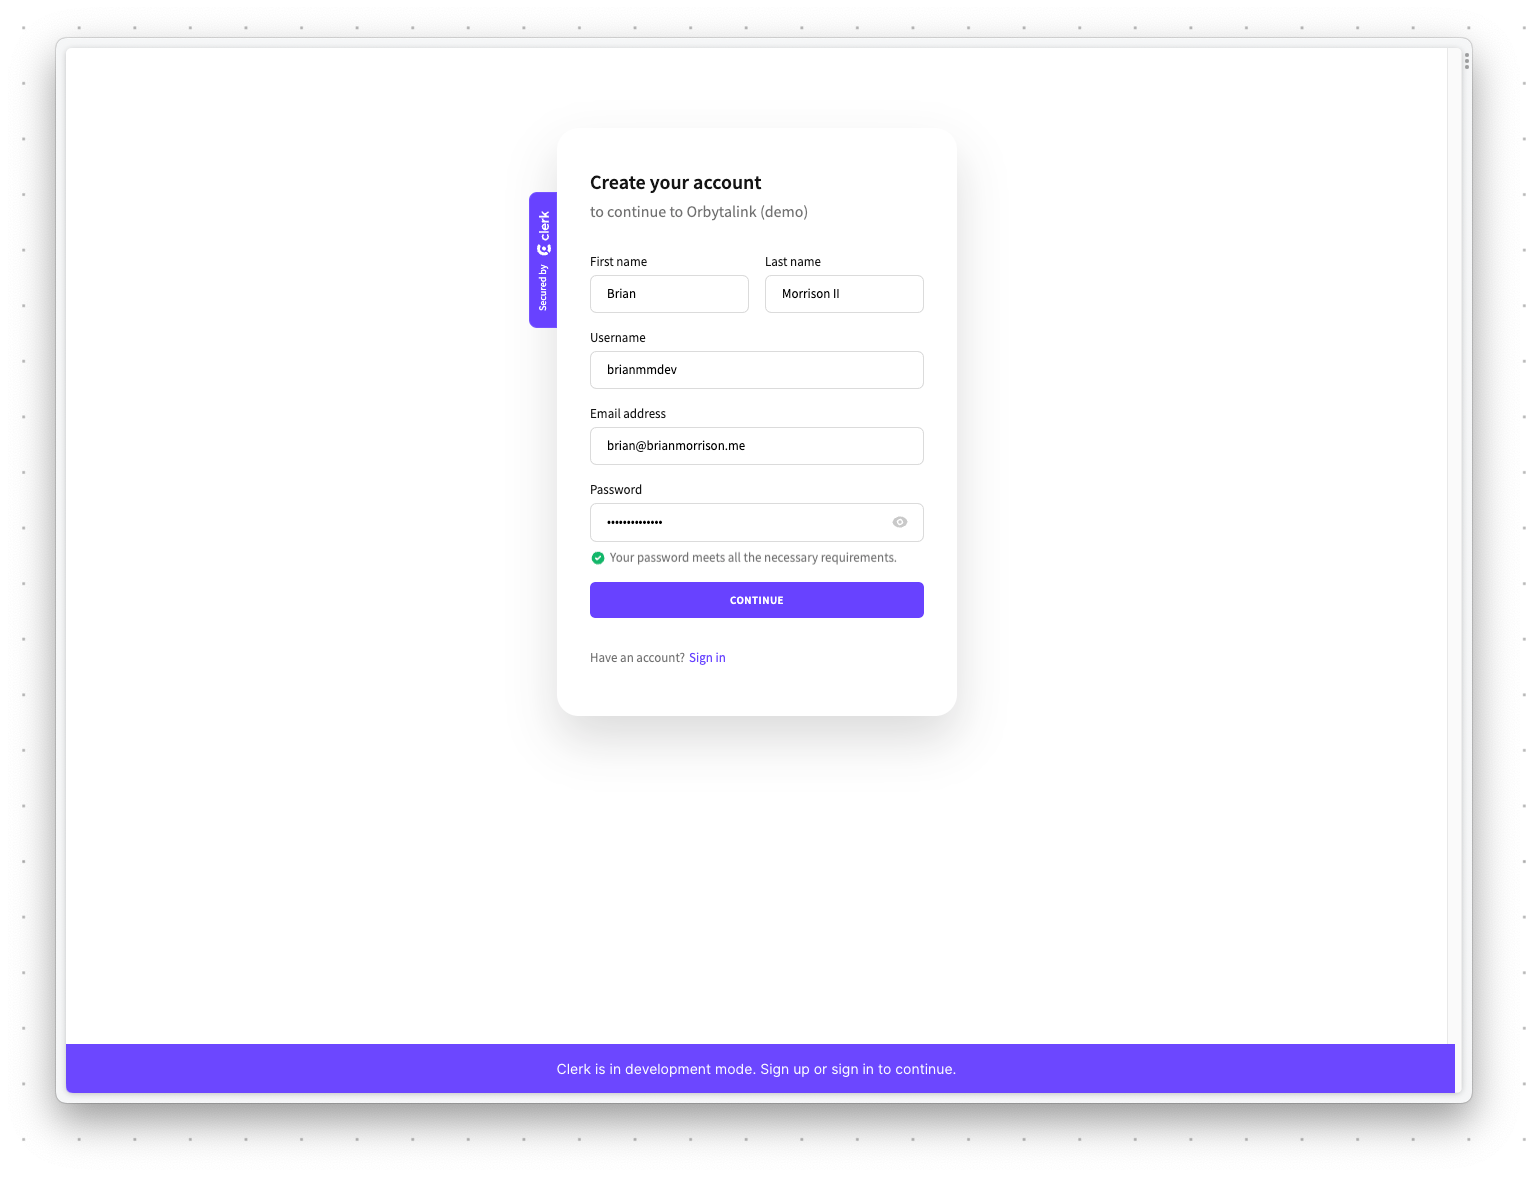
Now that the new code is deployed, we can test the three main operations that were configured in Clerk. Open the web app using the Netlify address and click "Create your profile".
Create an account using your own email address. When prompted for a verification code, grab it from your email and enter it.
Note
If you get a message stating "The authentication settings are invalid", be sure to double check your configuration in Clerk.
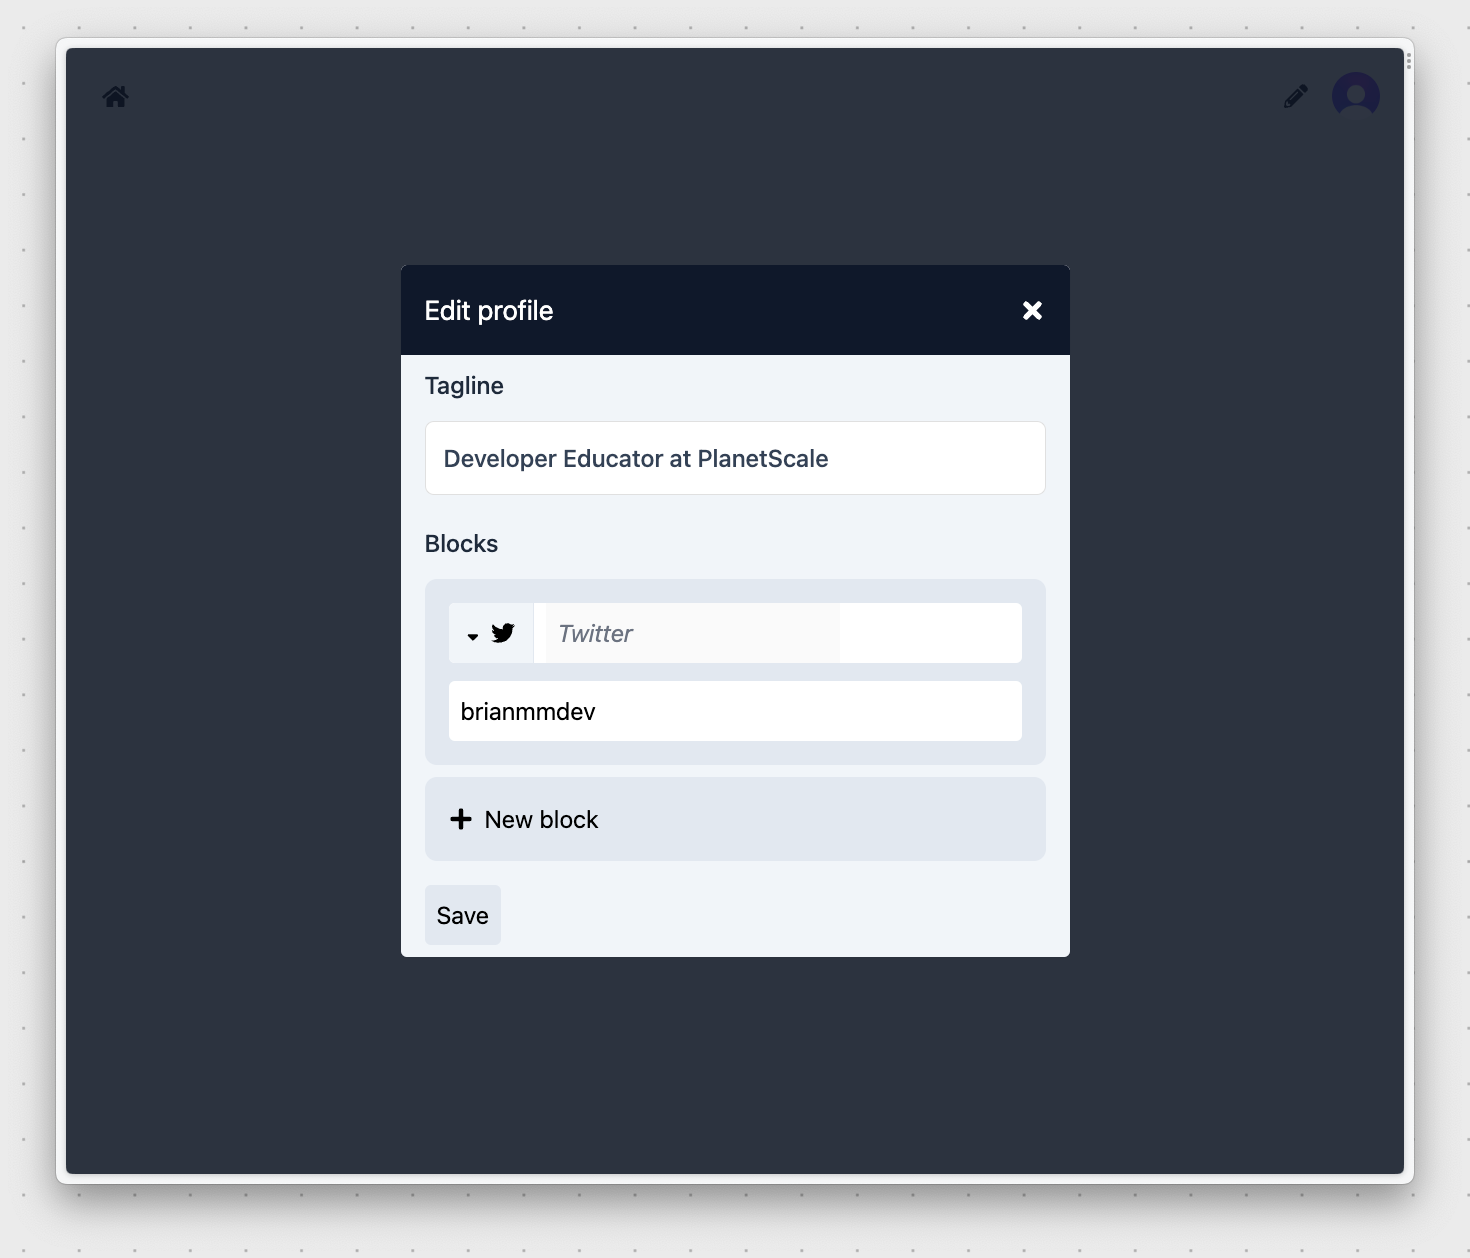
Once the account is created, you should be redirected back to your version of Orbytalink asking for some more details. Add a tagline and click "New block". Select "Twitter" and enter your Twitter username. Finally, click "Save".
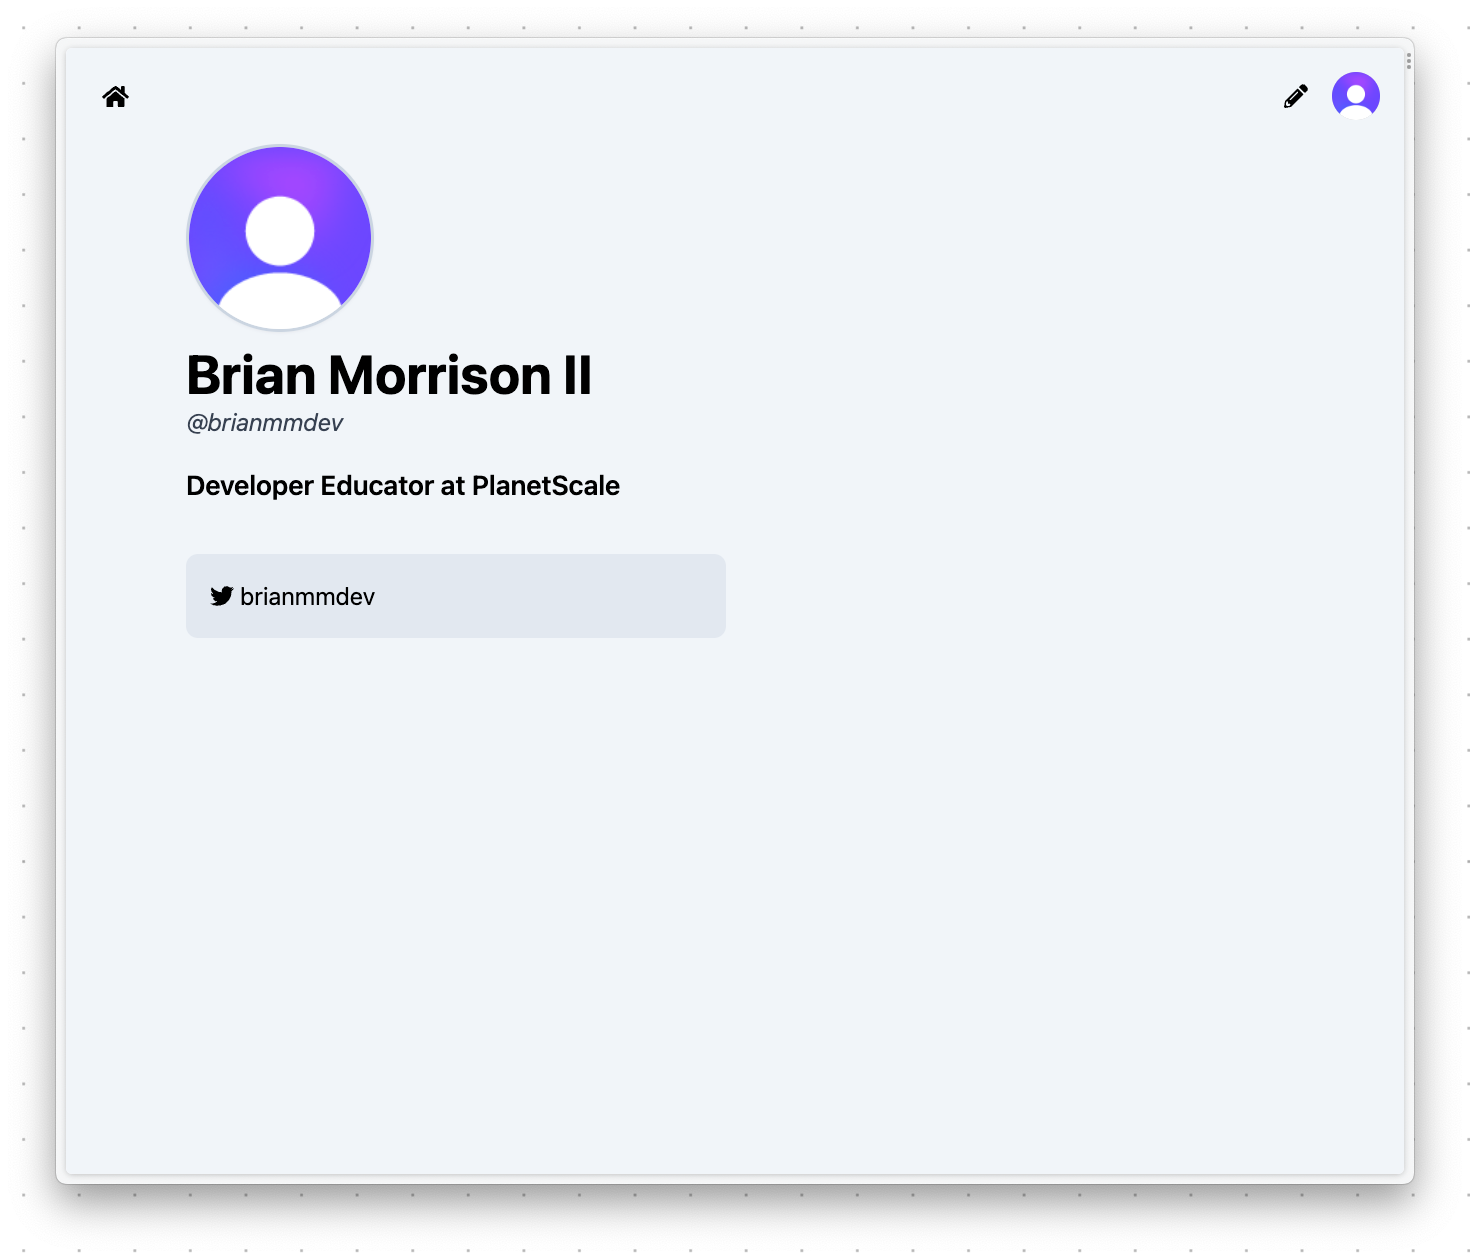
You should be redirected to your profile that not only shows you the tagline and Twitter block but also your name and username you entered into the Clerk sign-up form. That’s because when you created your account, Clerk sent a message to the Netlify Function you created earlier (clerk_webhook.ts) which saved this information into the PlanetScale database.
If you explore the Netlify function that is used by the home page to retrieve user data, you’ll notice that there are no API calls to Clerk. It grabs information directly from the PlanetScale database and returns it to the React front end.
// functions/profiles.ts
import { HandlerEvent, HandlerContext } from '@netlify/functions'
import { users } from './utils/db/schema'
import { eq } from 'drizzle-orm'
import { createResponse } from './utils/netlify_helpers'
import { getDb } from './utils/lib'
const handler = async (event: HandlerEvent, context: HandlerContext) => {
  const { username } = event.queryStringParameters as any
  const db = getDb()
  if (username) {
    const user = await db.query.users.findFirst({
      where: eq(users.username, username),
      with: {
        blocks: true
      }
    })
    return createResponse(200, user)
  } else {
    const user_rows = await db.select().from(users).limit(30)
    return createResponse(200, user_rows)
  }
}
export { handler }
The following sequence diagram explains exactly how this overall system works:
- The user creates an account in Clerk.
- Clerk sends a message to the Netlify function once the user is created.
- Netlify writes that users’ info to the PlanetScale database.
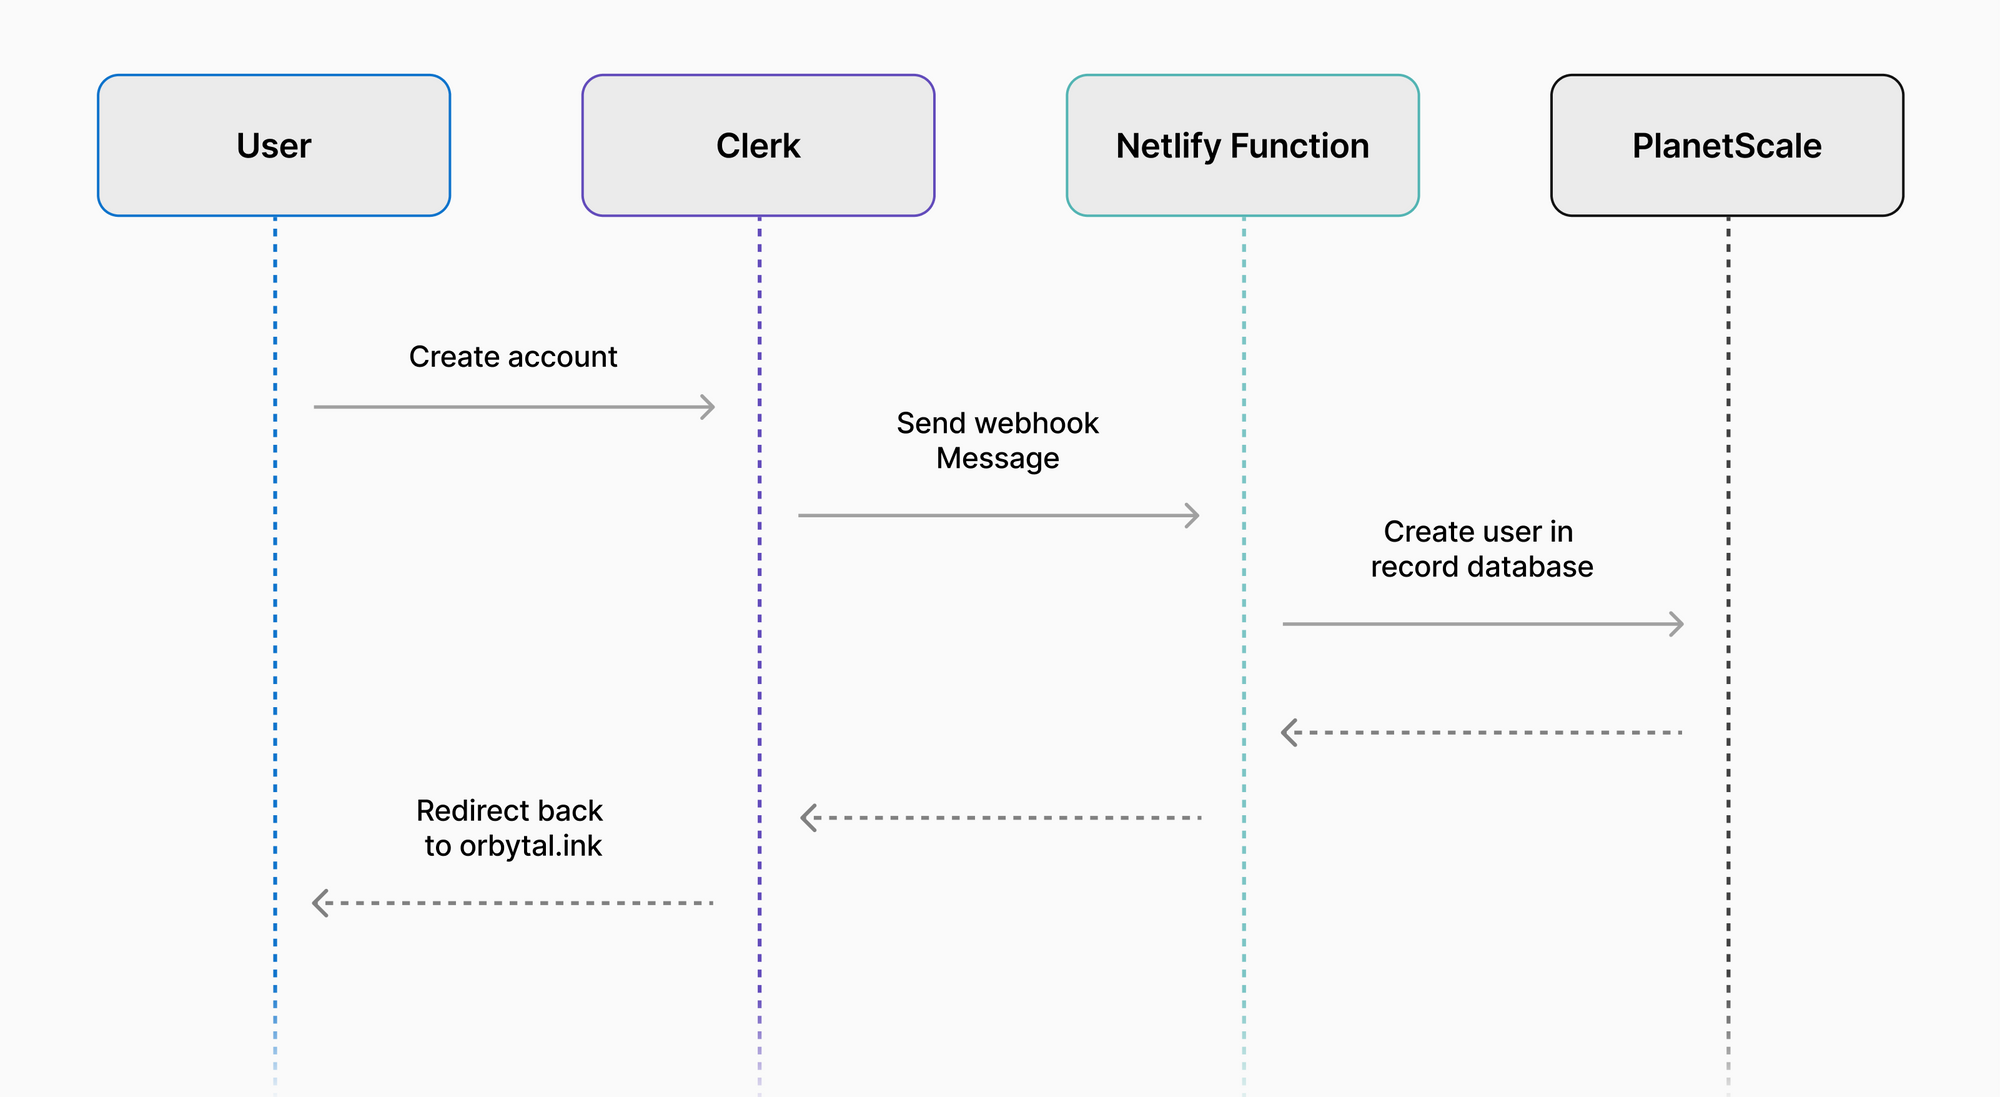
Using this flow, we can utilize Clerk to handle authentication and user management, and still have the users’ information available to us directly in our PlanetScale database!
Conclusion
Webhooks are extremely useful when using third-party systems where you need to be notified if a specific event happens in a place you don’t have full access to. In this guide, I showed you how you can use webhooks to receive user information from an IdP, but that’s only one example where these can be used in a production system.
Have you used webhooks in your own projects? Let us know on Twitter by tagging @planetscale!
Note
If you enjoyed this article, you might also like our comprehensive guide on integrating AWS Lambda functions with PlanetScale.