Documentation Index
Fetch the complete documentation index at: https://planetscale.com/docs/llms.txt
Use this file to discover all available pages before exploring further.
Overview
This document will demonstrate how to migrate a database from Azure Database for MySQL to PlanetScale. We recommend reading through the Database import documentation to learn how our import tool works before proceeding.Prerequisites
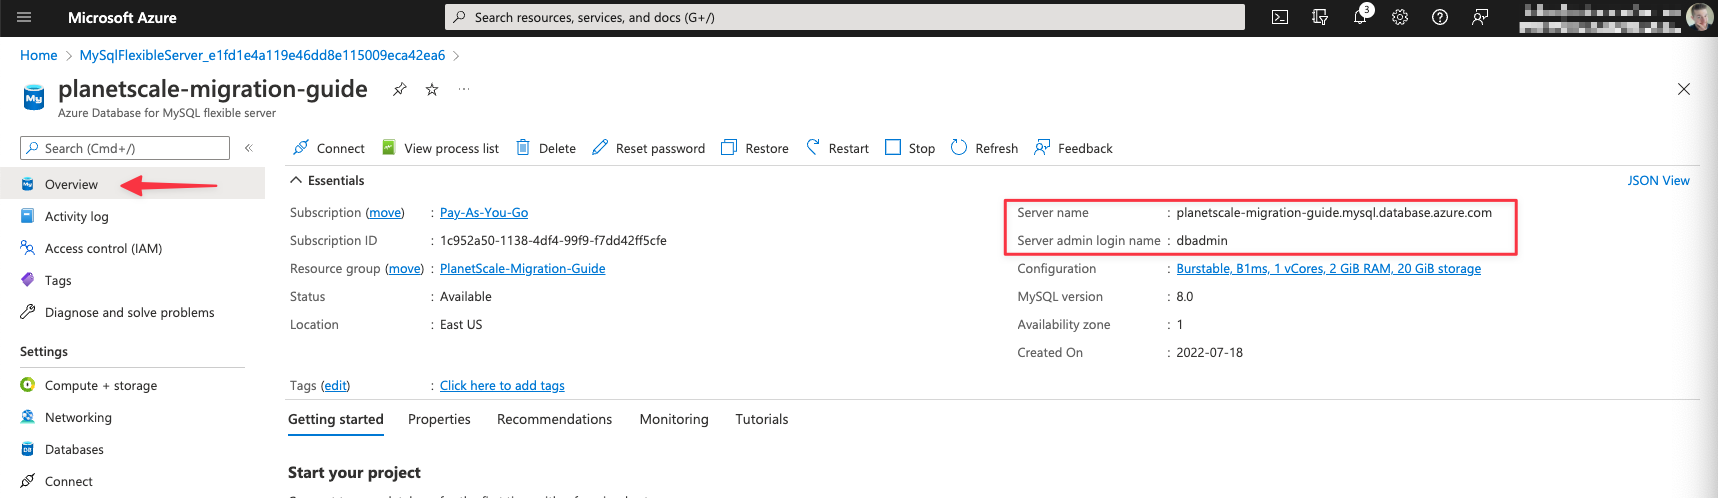
Before you can perform the migration, you’ll need to gather the following information from you MySQL instance in Azure:- Server name
- Server admin login name
- Server admin password
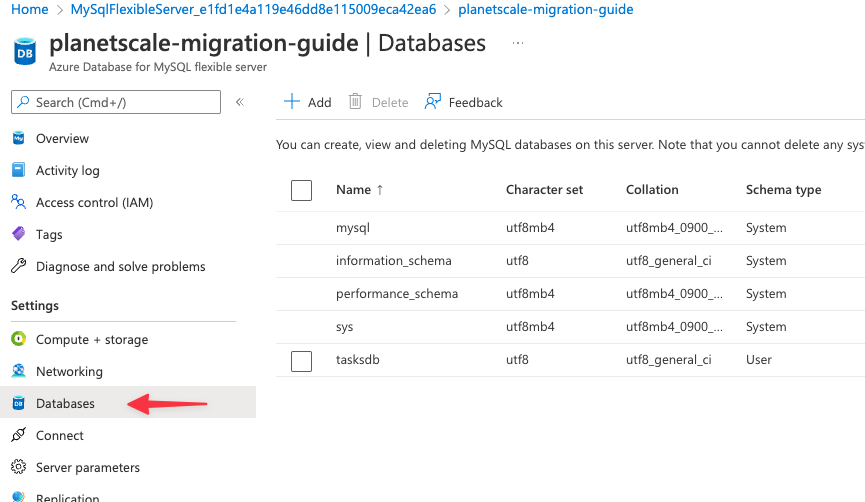
- Database name
Configure firewall rules
In order for PlanetScale to connect to your Azure database, you must allow traffic into the database through the associated security group. The specific IP addresses you will need to allow depend on the region you plan to host your PlanetScale database. Check the Import tool public IP addresses page to determine the IP addresses to allow before continuing. This guide will use the AWS us-east-1 (North Virginia) region so we’ll allow the following addresses: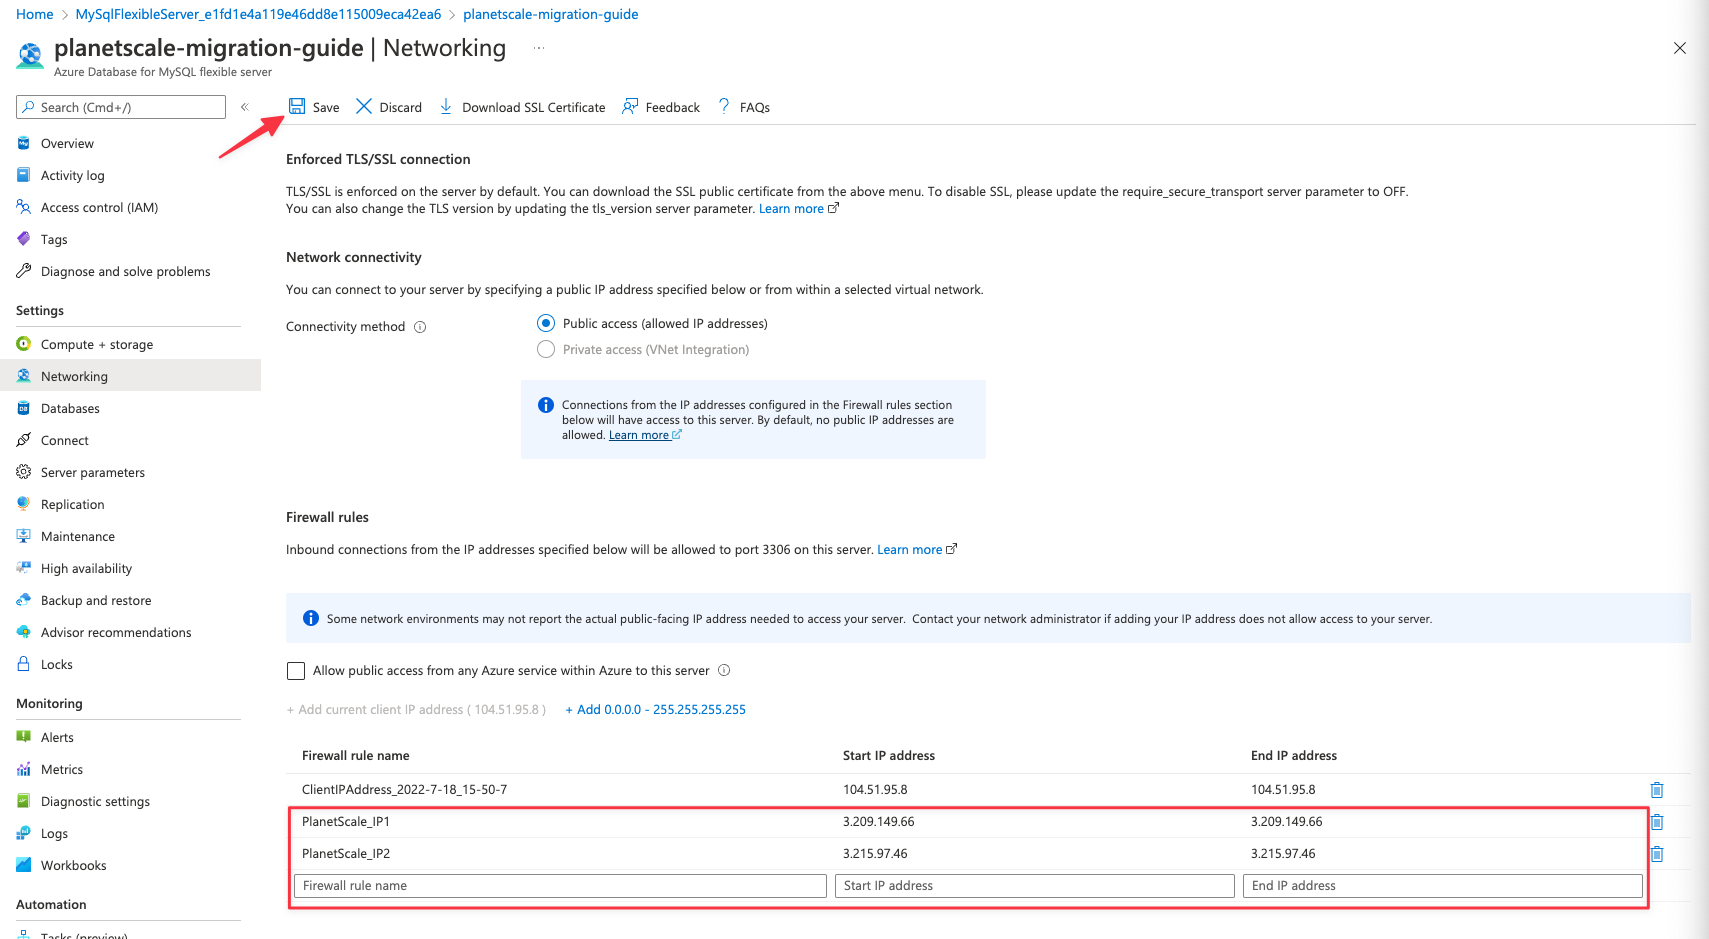
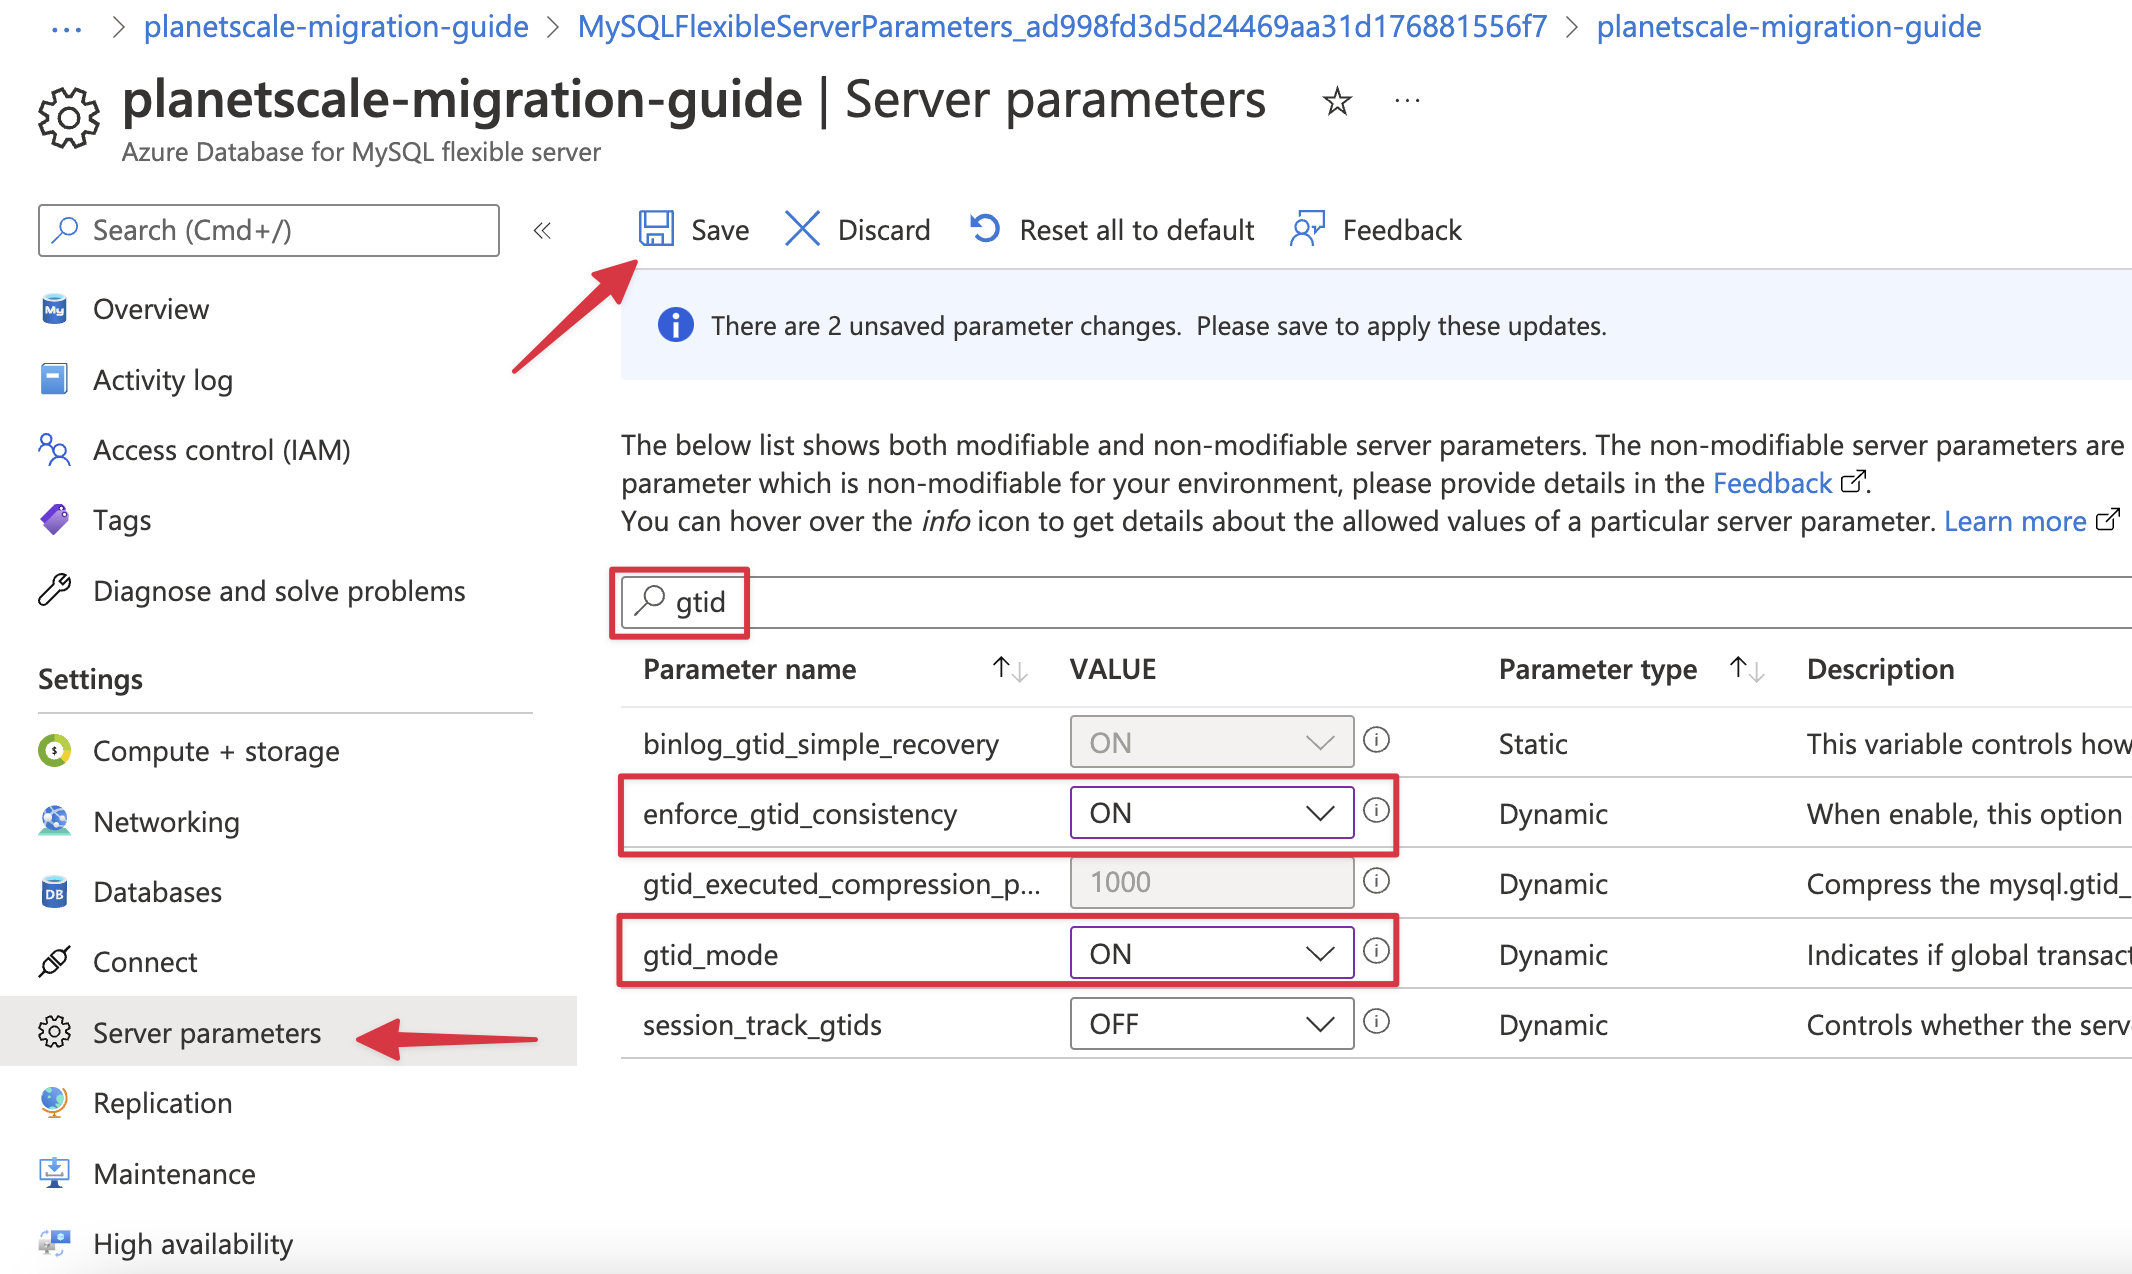
Configure MySQL server settings
There are three settings that need to be configured before you can import your database:- gtid_mode
- enforce_gtid_consistency
- binlog_row_image
For “gtid_mode”, you’ll need to update the value in sequence displayed in the dropdown until it is set to “ON”. For example, if the current setting is “OFF_PERMISSIVE”, you’ll need to first change it to “ON_PERMISSIVE”, save the changes, then set it to “ON” in that order.
Import your database
Now that your Azure Database for MySQL is configured and ready, follow the Database Imports guide to complete your import. When filling out the connection form in the import workflow, use the following information:- Host name - Your Azure server name (from Prerequisites)
- Port - 3306 (default for Azure MySQL)
- Database name - The exact database name to import
- Username - Your server admin login name
- Password - Your server admin password
- SSL verification mode - Select “Verify Identity” (Verify certificate and hostname)
- Creating your PlanetScale database
- Connecting to your Azure MySQL database
- Validating your configuration
- Selecting tables to import
- Monitoring the import progress
- Switching traffic and completing the import