Default role
The defaultpostgres role is similar to the Postgres superuser, but with fewer permissions. It is defined by the following statement:
User-defined roles
When creating custom roles for your application, you can select from a variety of permissions to grant specific capabilities. User-defined roles allow you to implement the principle of least privilege by granting only the permissions necessary for each use case. For examples of common user-defined roles, see User-defined role examples and use cases.Available permissions
Below is a list of available permissions you can set on user-defined roles. Data access permissions-
pg_read_all_data — Read data from all tables, views, and sequences. This permission allows
SELECTqueries across all database objects. -
pg_write_all_data — Write data to all tables, views, and sequences. This permission allows
INSERT,UPDATE,DELETE, andTRUNCATEoperations. Note that write operations typically requirepg_read_all_dataas well to read the data being modified.
- pg_read_all_settings — Read all configuration variables. This allows viewing database configuration parameters.
-
pg_read_all_stats — Read all
pg_stat_*views. This provides access to database statistics and performance metrics. -
pg_stat_scan_tables — Execute monitoring functions that may take
ACCESS SHARElocks on tables. This is useful for running database monitoring and analysis operations. - pg_monitor — Read and execute monitoring views and functions. This is a convenience role that combines several monitoring-related permissions.
- pg_signal_backend — Signal another backend to cancel a query or terminate its session. This is useful for managing long-running queries and terminating problematic connections.
-
pg_checkpoint — Execute the
CHECKPOINTcommand. Checkpoints ensure that all data is written to disk and are important for database recovery. -
pg_maintain — Execute maintenance operations including
VACUUM,ANALYZE,CLUSTER,REFRESH MATERIALIZED VIEW,REINDEX, andLOCK TABLE. These operations are essential for database performance and maintenance. -
pg_use_reserved_connections — Use connection slots reserved via
reserved_connections. This allows connecting to the database even when all regular connection slots are in use. -
pg_create_subscription — Allow users with
CREATEpermission on the database to issueCREATE SUBSCRIPTION. This is used for logical replication scenarios.
- postgres — The default near-superuser role with extensive permissions. This role can create, modify, and drop databases, users, roles, tables, schemas, and all other objects. Use this permission carefully, as it grants broad administrative capabilities.
Creating new user-defined roles
There are several ways to create a new role:- Using the “Connect” button in your dashboard
- Using “Roles” section in your database settings
- Using the
CREATE ROLEcommand as the default role (which has elevated privileges). - Using the Postgres Roles API
- Using the PlanetScale CLI pscale role commands
Creating roles in the dashboard
To create a new role in the dashboard, you can either click the “Connect” button on the database overview page, or navigate to “Settings” > “Roles” and click “New role”.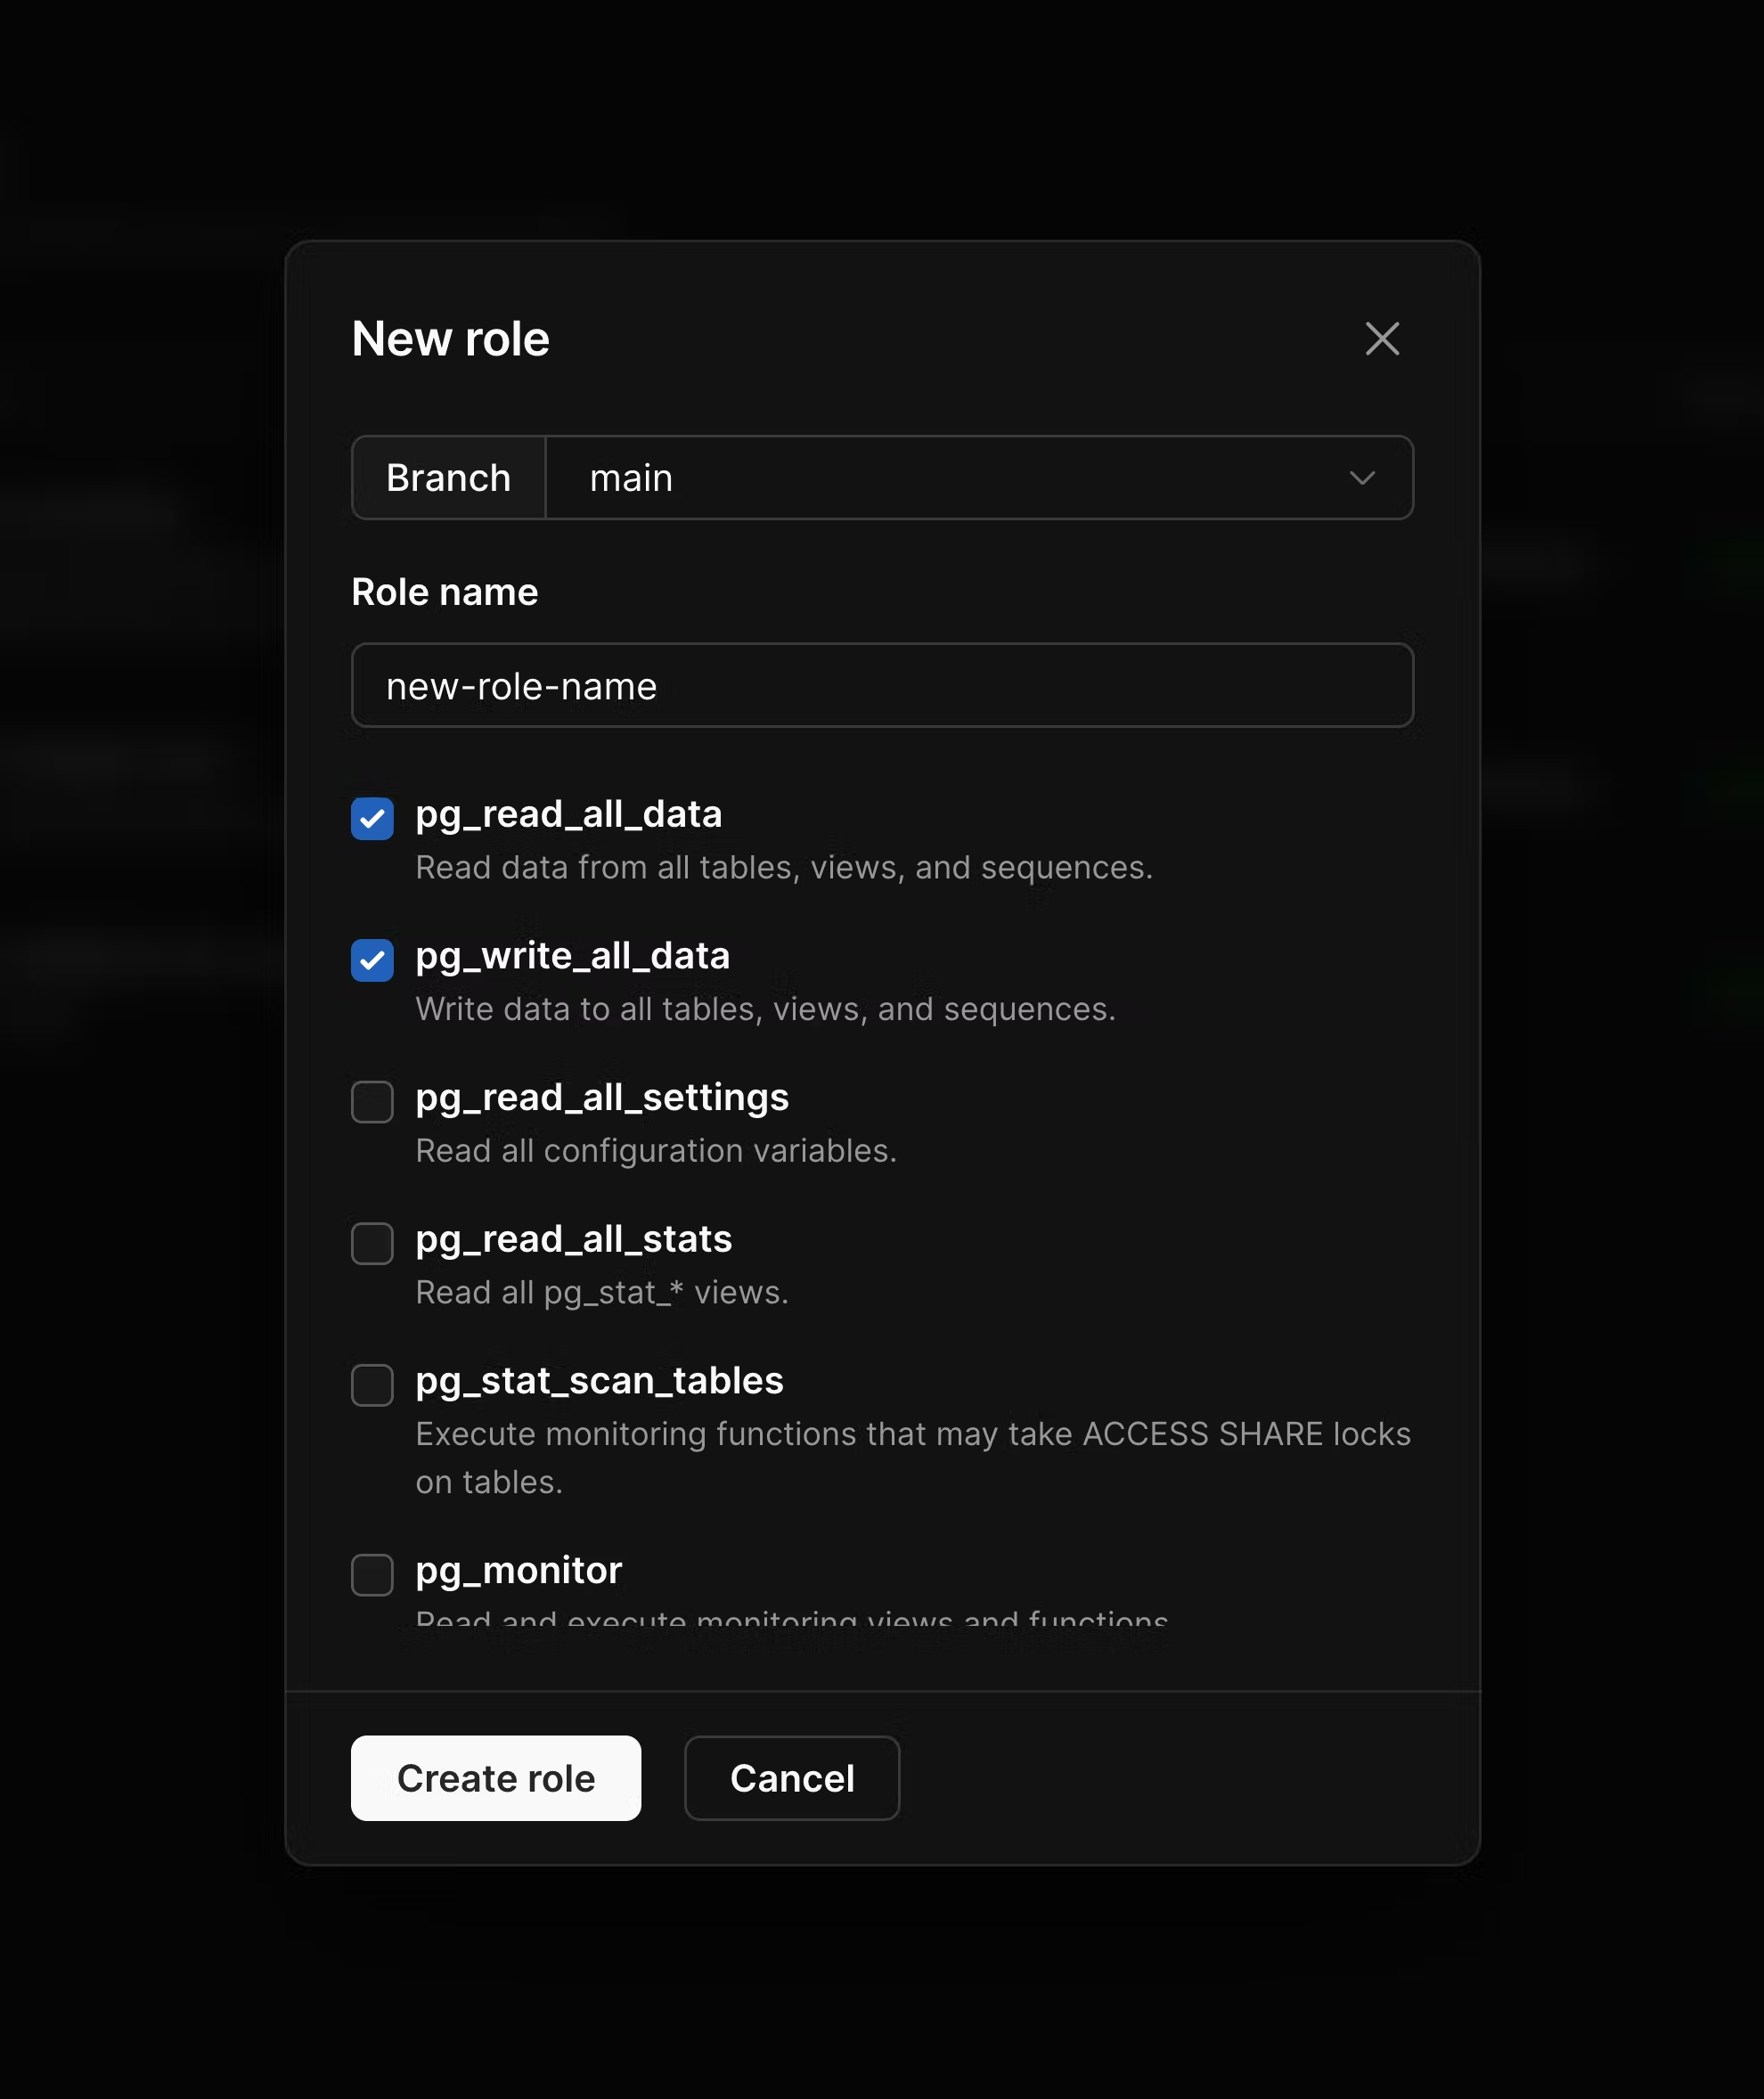
Creating roles via the CLI
You can also manage roles directly from the command line using the PlanetScalepscale role CLI. This provides a convenient way to create, list, and manage roles as part of your development workflow or automation scripts.
Make sure you have the PlanetScale CLI installed
Available commands
Create a new role:Creating roles via CREATE ROLE
Use this path when you need fine-grained permissions that the managed role builder doesn’t expose (for example, table- or column-level GRANTs). For most use cases, prefer the dashboard, pscale role, or the Roles API, which produce managed roles that appear in the dashboard and handle credential and lifecycle management for you.
When you create a role via the Postgres CREATE ROLE command, these will not display on your database settings. It is up to you to manage these via the psql CLI.
PlanetScale’s routing layer uses the user to identify which database or branch we are sending queries to. For example, the user matt.nk35mx55qq routes to the PlanetScale database with branch id nk35mx55qq. When you create a new role, you do not need to specify the branch id on the user. You can simply set the user to matt.
However, when you connect, you must append the branch id to the user so we know which branch to route to.
1
From the PlanetScale organization dashboard, select the desired database
2
Select the desired branch from the dropdown
3
Click “Connect”
4
Copy the branch id
5
Append it to your user with
.branch_idViewing, deleting, and renaming roles
On the roles page, you will see all roles created via the dashboard, API, and thepscale role CLI. However, we will not display roles created manually via CREATE ROLE commands.
You can rename a role by clicking the ”…” button for the role on the Roles page at “Settings” > “Roles”.
Deleting a role
To delete a role, click the ”…” for the role on the database Roles page at “Settings” > “Roles”.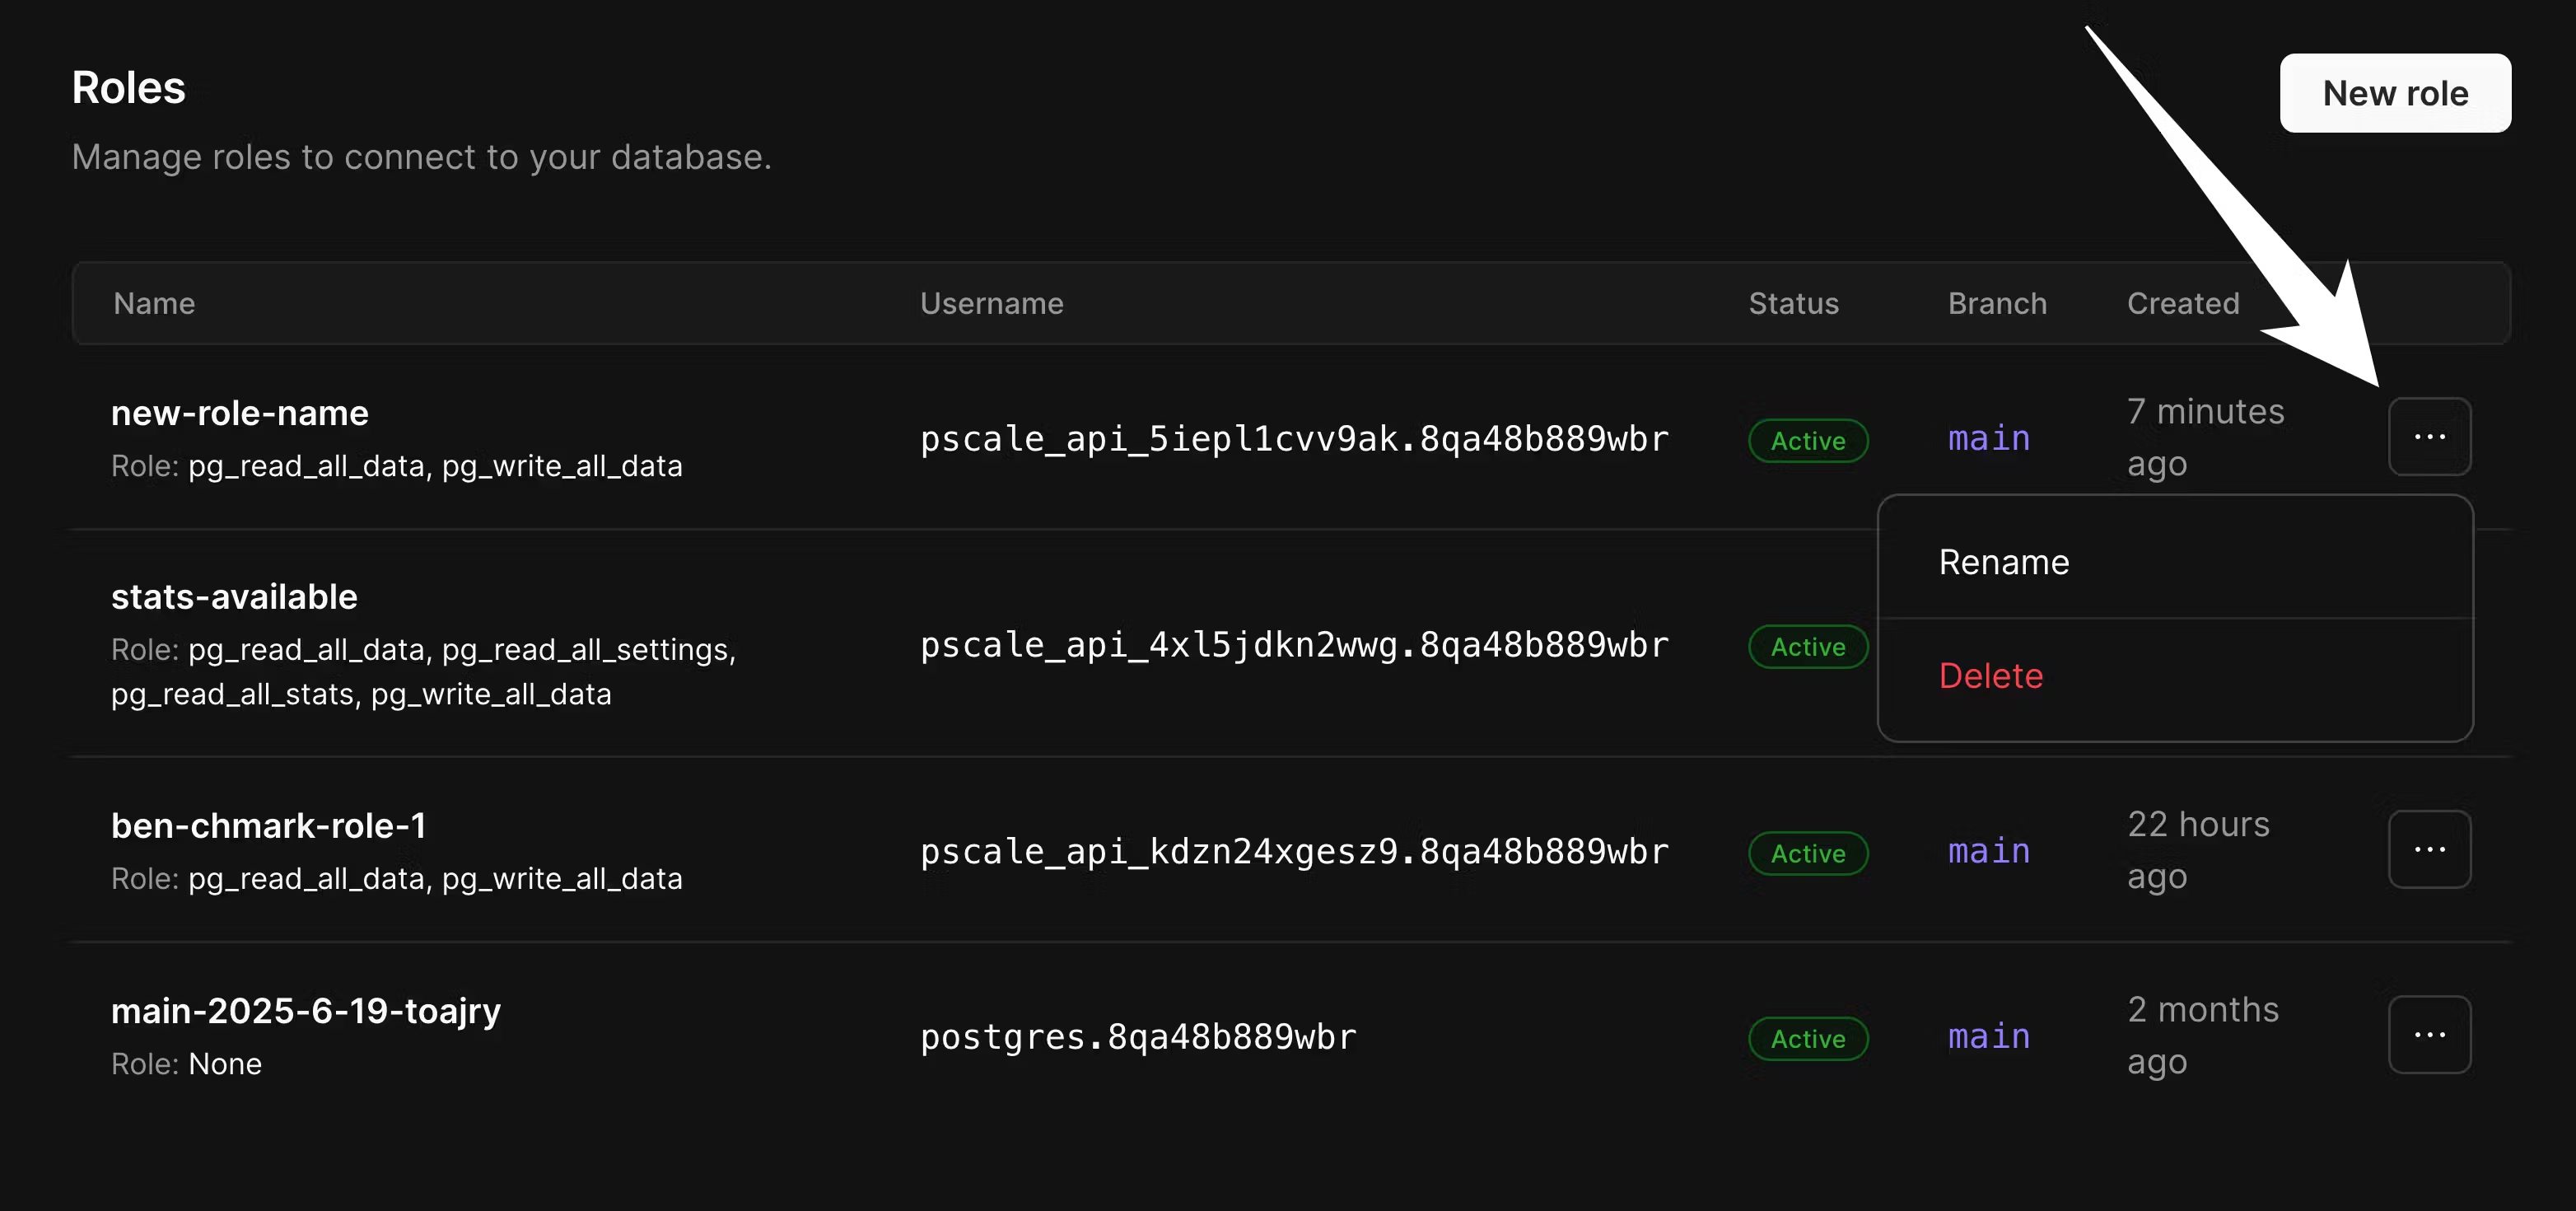
Role is still referenced and cannot be dropped..
Such roles must designate a successor role, to which allowed objects are reassigned. Additional granted permissions are dropped as part of the transfer process. The usual successor role is postgres, which you can indicate in the “Delete role” modal.
You can reassign owned objects when deleting a role directly in the dashboard. When you click “Delete role”, check the “Reassign owned objects” box on the modal.
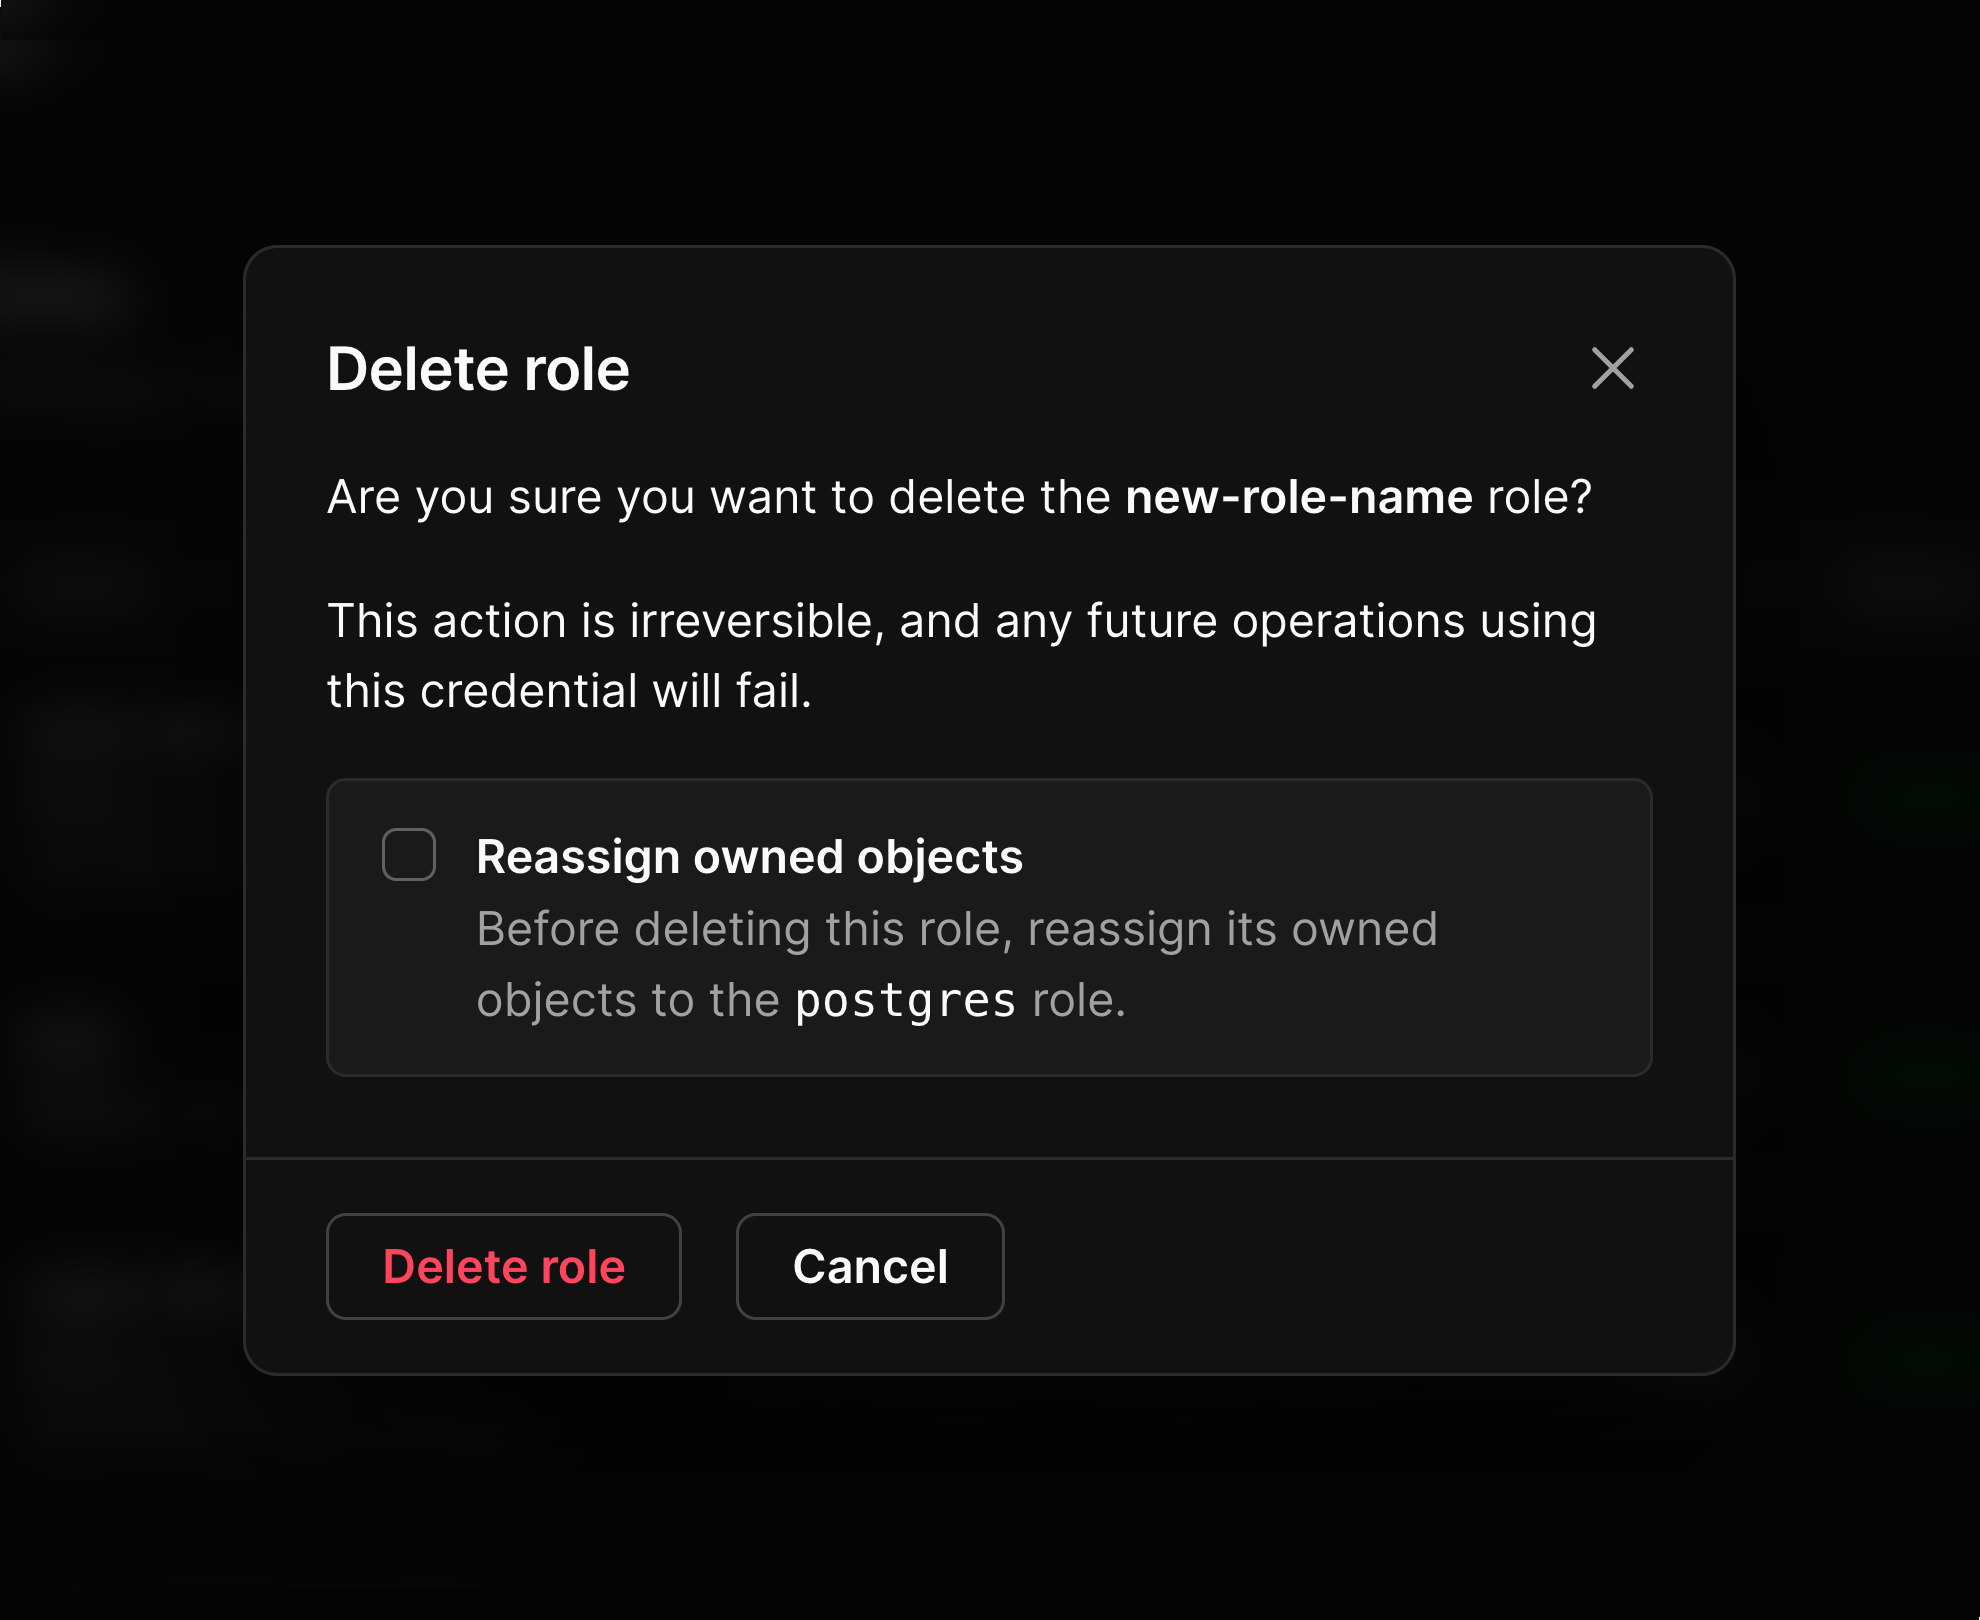
postgres, but only by using the API or the pscale role CLI. Deleting a role that owns objects, has additional permissions, or has created other roles will fail if no successor is specified.
You can delete a role using the pscale role CLI with:
Reassigning objects owned by a role
If you need to transfer ownership of database objects from one role to another without deleting the role, you can reassign the objects from the dashboard or the CLI. In the dashboard, click the ”…” button for the role on the Roles page at “Settings” > “Roles”, then select “Reassign objects”. This will transfer all objects owned by the role to thepostgres role. Reassigning objects to a recipient other than postgres is only possible through the API and the CLI.
Using the CLI, you can reassign objects with:
Resetting role credentials
If you need to reset a role’s password, you can do so from the dashboard or the CLI. In the dashboard, click the ”…” button for the role on the Roles page at “Settings” > “Roles”, then select “Reset credentials”. This will generate a new password for the role. Using the CLI, you can reset a role’s password with:User-defined role examples and use cases
Understanding when to use user-defined roles versus the default role is essential for maintaining secure and maintainable database access patterns. This section provides practical examples of role configurations for common scenarios.When to use user-defined roles vs. the default role
Use user-defined roles when:- Connecting from application servers: Application connections should never use the default role. This allows you to rotate the default role credentials without application downtime.
- Principle of least privilege: Different parts of your application or different services may need different levels of access. Create specific roles for each use case.
- Managing team access: Different team members may need different permissions (e.g., developers vs. data analysts vs. DBAs).
- Integrating third-party tools: External tools and services should have their own roles with limited permissions appropriate to their function.
- Performing administrative tasks: Creating schemas, managing database structure, or performing major database migrations.
- Initial database setup: Setting up the initial database structure and creating the first set of user-defined roles.
Example role configurations
The following are some example permission configurations that you may use for user-defined roles. Your use cases may vary, but these are generic examples. Application read-write role For a typical web application that needs to read and write data, you may consider these permissions:pg_read_all_datapg_write_all_data
pg_read_all_datapg_read_all_settingspg_read_all_stats
pg_monitorpg_read_all_statspg_read_all_settingspg_stat_scan_tables