When to use this
Use this flow when you want a PlanetScale database for Cloudflare Workers and Hyperdrive with billing unified in Cloudflare. If you already have a PlanetScale database, or prefer to manage billing on PlanetScale directly, see Connect an existing database below.Before you begin
Before you can create a Cloudflare-billed PlanetScale database, you’ll need:- A Cloudflare account
- A PlanetScale account (you can create one during setup)
Create a database from Cloudflare
1
Log in to the Cloudflare dashboard and navigate to Storage & databases > Postgres & MySQL (Hyperdrive).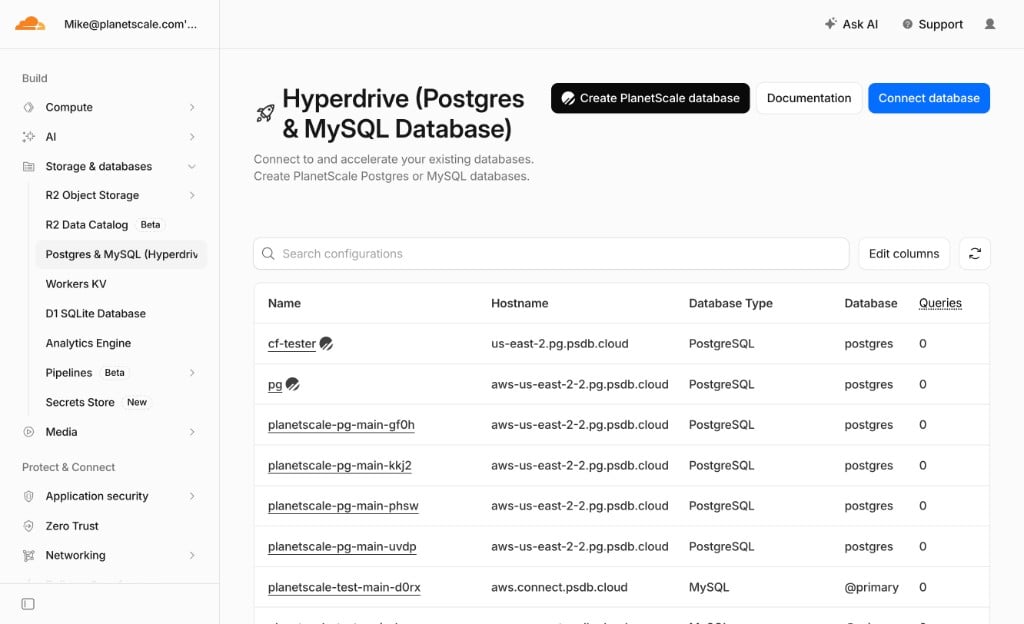
2
Click Create PlanetScale database.
3
Under New PlanetScale database, select your PlanetScale organization.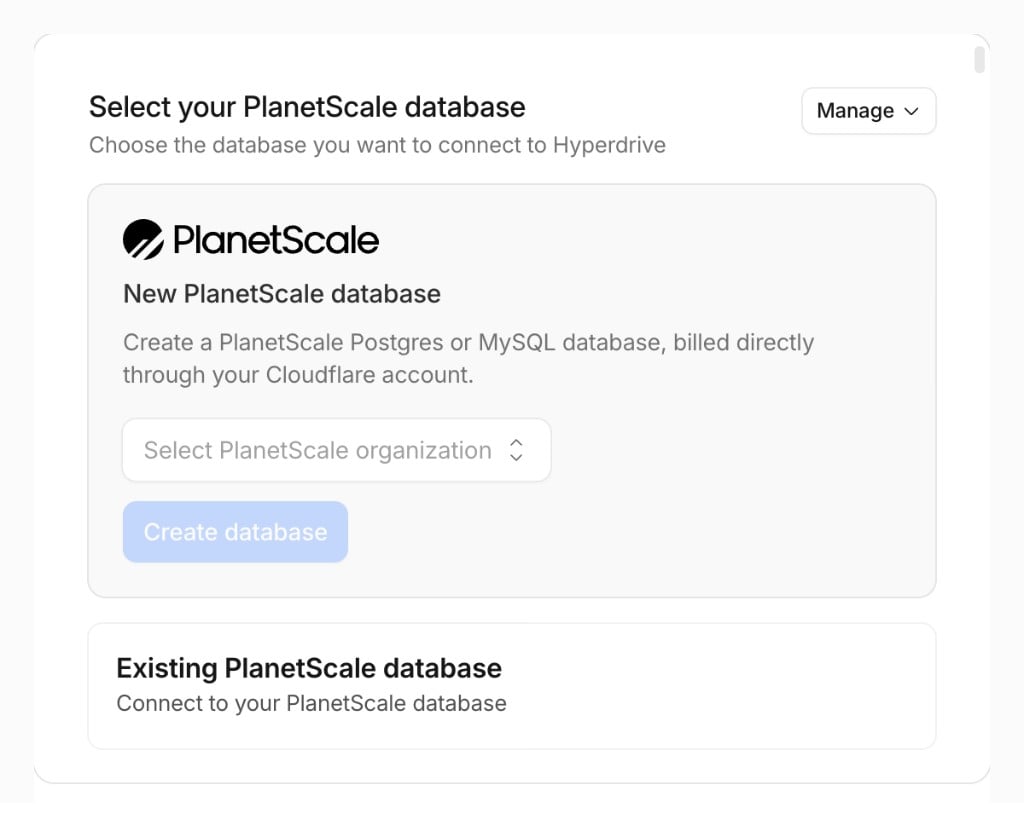
4
Click Create database to be redirected to the PlanetScale dashboard to finish configuration.
Finish setup on PlanetScale
After Cloudflare redirects you to PlanetScale, configure your database:- Database name
- Engine (Postgres or MySQL/Vitess)
- Region
- Cluster size
Billing
PlanetScale usage for databases created through Cloudflare is billed at standard PlanetScale pricing through your Cloudflare account. To confirm billing is routed through Cloudflare, go to your PlanetScale organization Settings > Billing. You’ll see a banner indicating that some billing is handled through Cloudflare, with a link to your Cloudflare billing page.

Connect Hyperdrive
Once your database is ready, a banner at the top of the PlanetScale dashboard directs you back to the Cloudflare dashboard to set up Hyperdrive.

Connect an existing database
You can still connect an existing PlanetScale database to Hyperdrive without using Cloudflare billing. This is the right path if you have already created a database on PlanetScale and want to link it to a Hyperdrive configuration. In the Cloudflare Hyperdrive wizard, choose Connect to PlanetScale database and sign in to your existing PlanetScale account. See the integration guides for full setup instructions:Further reading
- PlanetScale for Cloudflare users — overview of the PlanetScale + Cloudflare stack
- Cloudflare Hyperdrive documentation
- Faster PlanetScale Postgres connections with Cloudflare Hyperdrive — build a real-time application with PlanetScale and the Cloudflare global network