> ## Documentation Index
> Fetch the complete documentation index at: https://planetscale.com/docs/llms.txt
> Use this file to discover all available pages before exploring further.
# Deploy a Django app to Heroku
## Overview
This article will describe how to deploy a Django app to Heroku, which includes the necessary setup in Heroku’s dashboard.
## Prerequisites
* A PlanetScale database — If you haven't created a database, refer to our [PlanetScale quickstart guide](/vitess/tutorials/planetscale-quick-start-guide) to get started.
* A Heroku account.
* A project deployed to Heroku — If you're just poking around and don't already have an application to deploy, you can use our [Django sample](https://github.com/planetscale/django-example).
## Set up the project for Heroku
There are a few requirements for running a Django application in Heroku:
* The `gunicorn` and `django-heroku` packages as requirements.
* A properly setup [Procfile](https://devcenter.heroku.com/articles/procfile).
* Proper Config Var setup in Heroku.
This article will make use of the [django-example GitHub repository](https://github.com/planetscale/django-example) that is built for the [Connect a Django application to PlanetScale document](/vitess/tutorials/connect-django-app)
### Set up the Heroku Config Vars
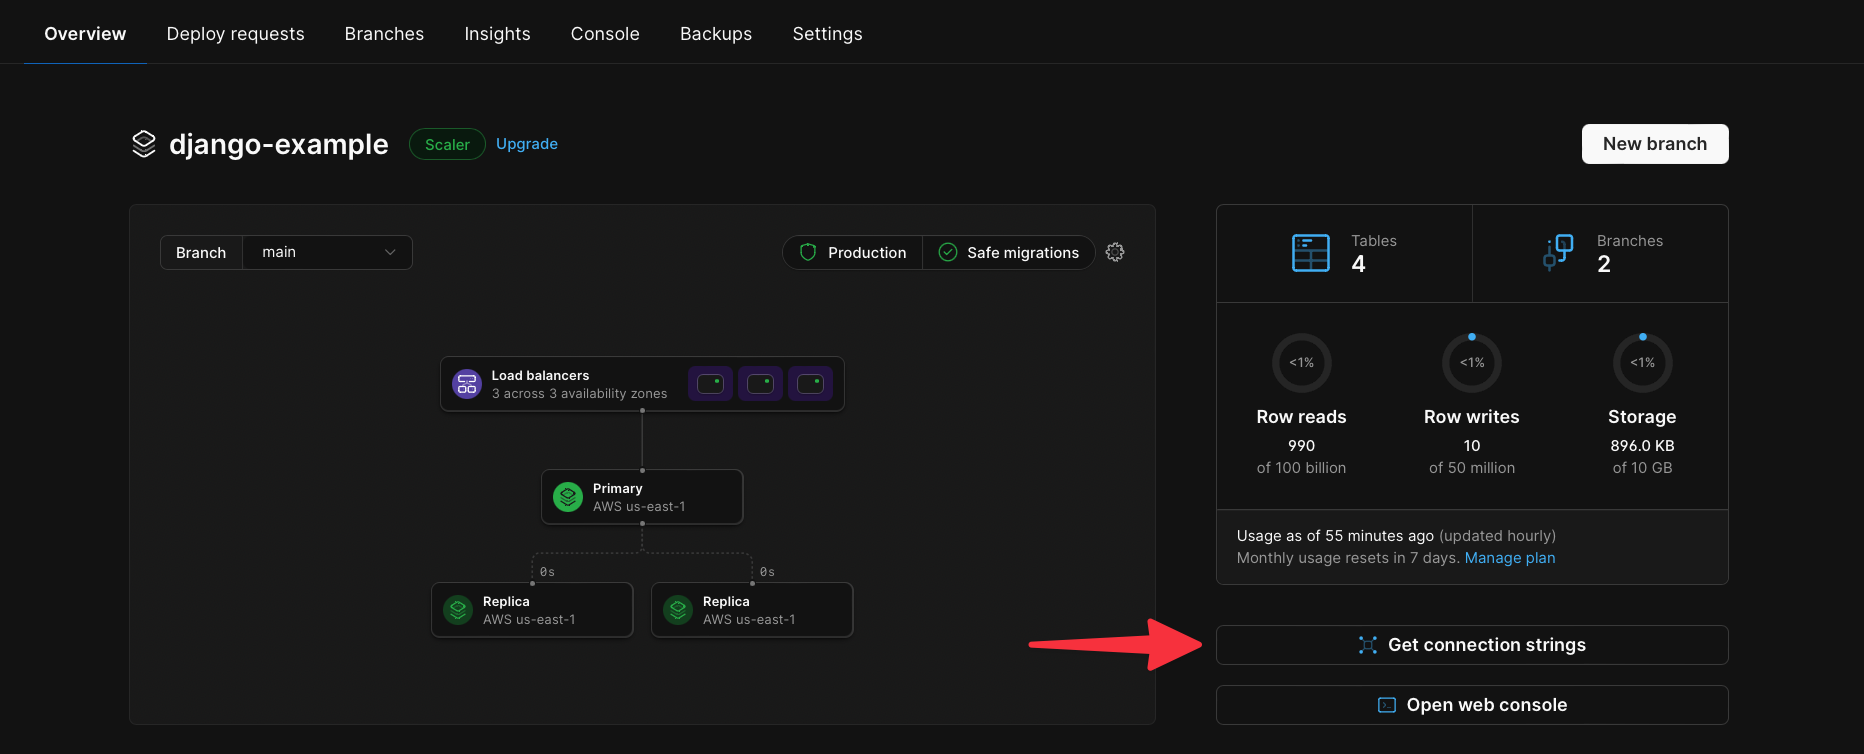
It’s important to store the connection details for the PlanetScale database in **Config Vars** in Heroku so they are properly secured. These details can be obtained from the PlanetScale dashboard by clicking the "**Connect**" button.
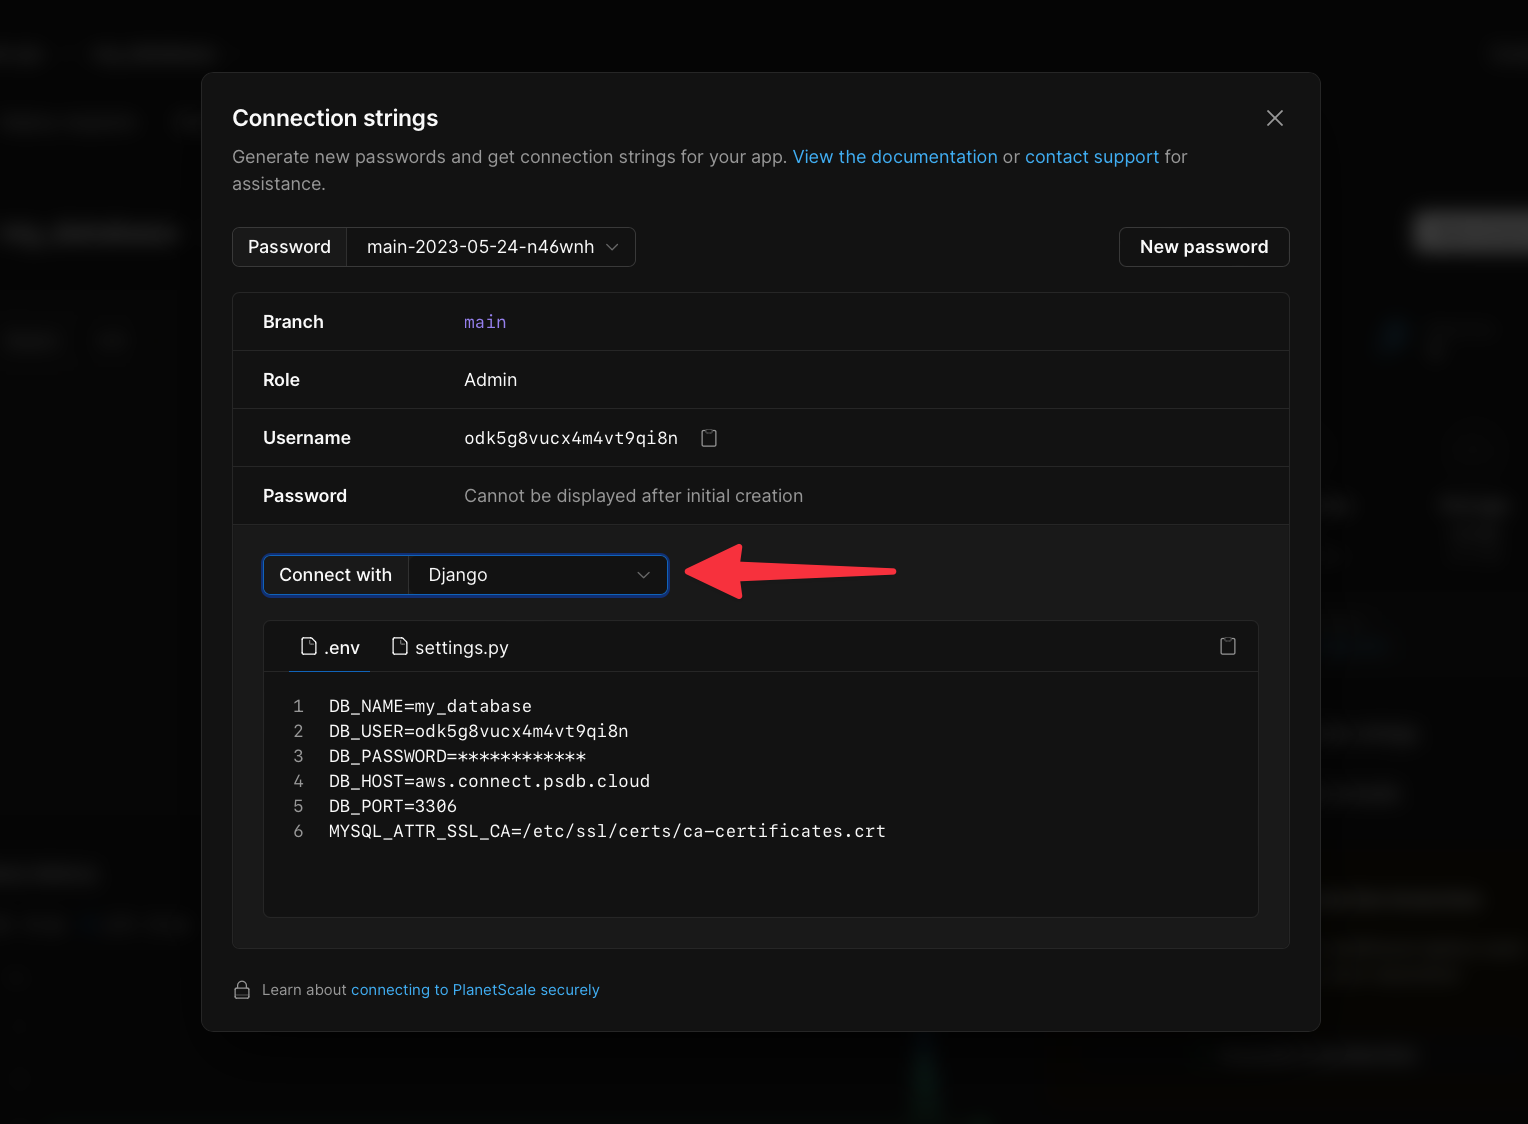
 In the following modal, choose Django from the “Connect with” dropdown. The .env tab will show all of the Config vars that need to be set up in Heroku. Take note of these and head to the Heroku dashboard.
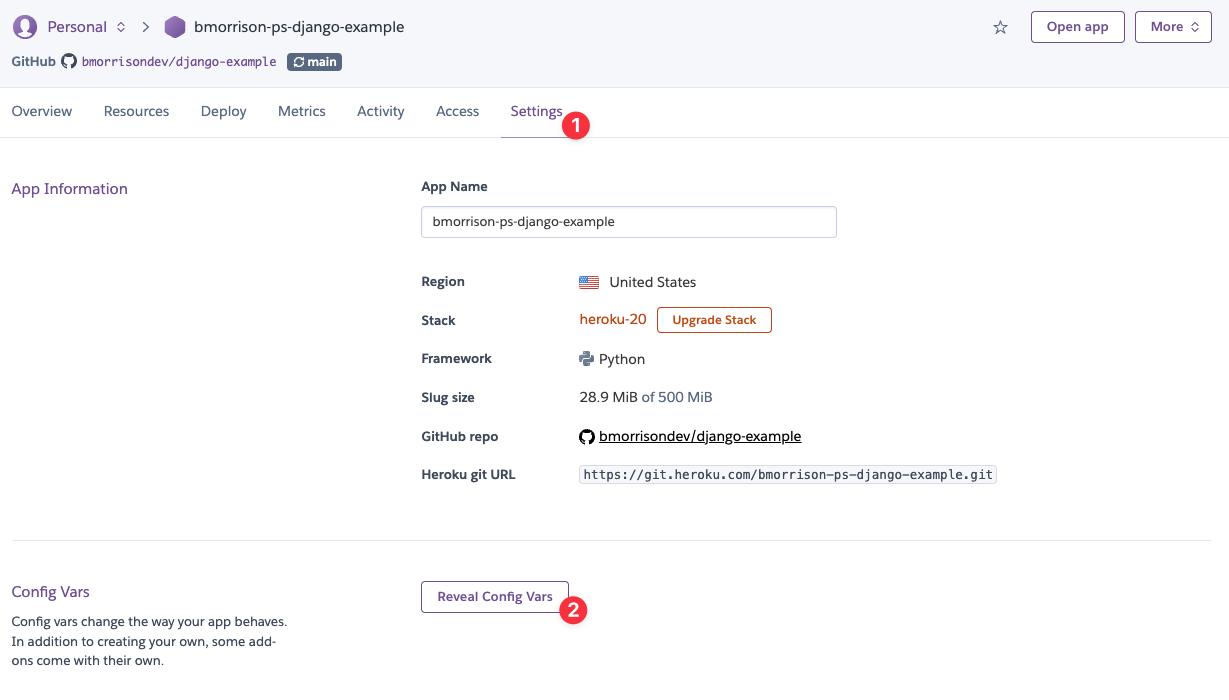
 Select the **Settings** tab of your Heroku project and then “**Reveal Config Vars”** from the Config **Vars** section. You should see your current Config Vars or an empty set of inputs if there are none configured yet.
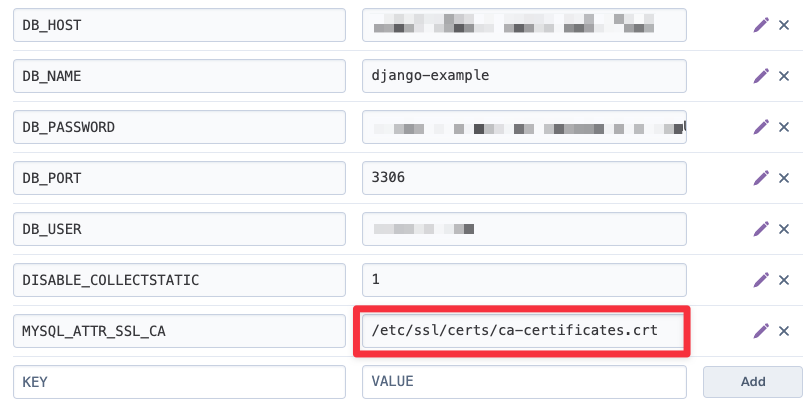
 Set up a separate **Config Var** for each line you captured from the PlanetScale dashboard. The one exception is the `MYSQL_ATTR_SSL_CA`, which should be set to `/etc/ssl/certs/ca-certificates.crt`
Heroku uses Ubuntu by default to run applications deployed to their systems, which is why the `MYSQL_ATTR_SSL_CA` value needs to be different than the default values provided by PlanetScale
Set up a separate **Config Var** for each line you captured from the PlanetScale dashboard. The one exception is the `MYSQL_ATTR_SSL_CA`, which should be set to `/etc/ssl/certs/ca-certificates.crt`
Heroku uses Ubuntu by default to run applications deployed to their systems, which is why the `MYSQL_ATTR_SSL_CA` value needs to be different than the default values provided by PlanetScale
 ### Update the requirements
Add `gunicorn` and `django-heroku` to your `requirements.txt` file. This will install the necessary packages when deploying to Heroku. If you are following along using the example provided, here is the updated `requirements.txt` file:
```
asgiref==3.4.1
Django==4.0.1
djangorestframework==3.13.1
mysqlclient==2.1.0
python-dotenv==0.19.2
pytz==2021.3
sqlparse==0.4.2
gunicorn
django-heroku
```
### Add a Procfile
The **Procfile** in your project tells Heroku how it should start up the project. The file must be in the root of the project and not in a subdirectory. Here is the **Procfile** used to deploy the **django-example** project to Heroku:
```
web: gunicorn --chdir ./mysite mysite.wsgi --log-file -
```
After these steps have been completed, you may redeploy your application to Heroku. To view a complete example, please refer to the [heroku-deployment branch](https://github.com/planetscale/django-example/tree/heroku-deployment) of the sample repository. This concludes the guide on deploying a Django application to Heroku.
## Need help?
Get help from [the PlanetScale Support team](https://planetscale.com/contact?initial=support), or join our [Discord community](https://pscale.link/community) to see how others are using PlanetScale.
### Update the requirements
Add `gunicorn` and `django-heroku` to your `requirements.txt` file. This will install the necessary packages when deploying to Heroku. If you are following along using the example provided, here is the updated `requirements.txt` file:
```
asgiref==3.4.1
Django==4.0.1
djangorestframework==3.13.1
mysqlclient==2.1.0
python-dotenv==0.19.2
pytz==2021.3
sqlparse==0.4.2
gunicorn
django-heroku
```
### Add a Procfile
The **Procfile** in your project tells Heroku how it should start up the project. The file must be in the root of the project and not in a subdirectory. Here is the **Procfile** used to deploy the **django-example** project to Heroku:
```
web: gunicorn --chdir ./mysite mysite.wsgi --log-file -
```
After these steps have been completed, you may redeploy your application to Heroku. To view a complete example, please refer to the [heroku-deployment branch](https://github.com/planetscale/django-example/tree/heroku-deployment) of the sample repository. This concludes the guide on deploying a Django application to Heroku.
## Need help?
Get help from [the PlanetScale Support team](https://planetscale.com/contact?initial=support), or join our [Discord community](https://pscale.link/community) to see how others are using PlanetScale.