> ## Documentation Index
> Fetch the complete documentation index at: https://planetscale.com/docs/llms.txt
> Use this file to discover all available pages before exploring further.
# Connect a Laravel application to PlanetScale
> In this tutorial, you'll learn how to connect a Laravel 12 application to a PlanetScale MySQL database using a sample Laravel starter app.
## Prerequisites
* [PHP](https://www.php.net/manual/en/install.php) — This tutorial uses `v8.2`
* [Composer](https://getcomposer.org/)
* A [PlanetScale account](https://auth.planetscale.com/sign-up)
## Set up the Laravel app
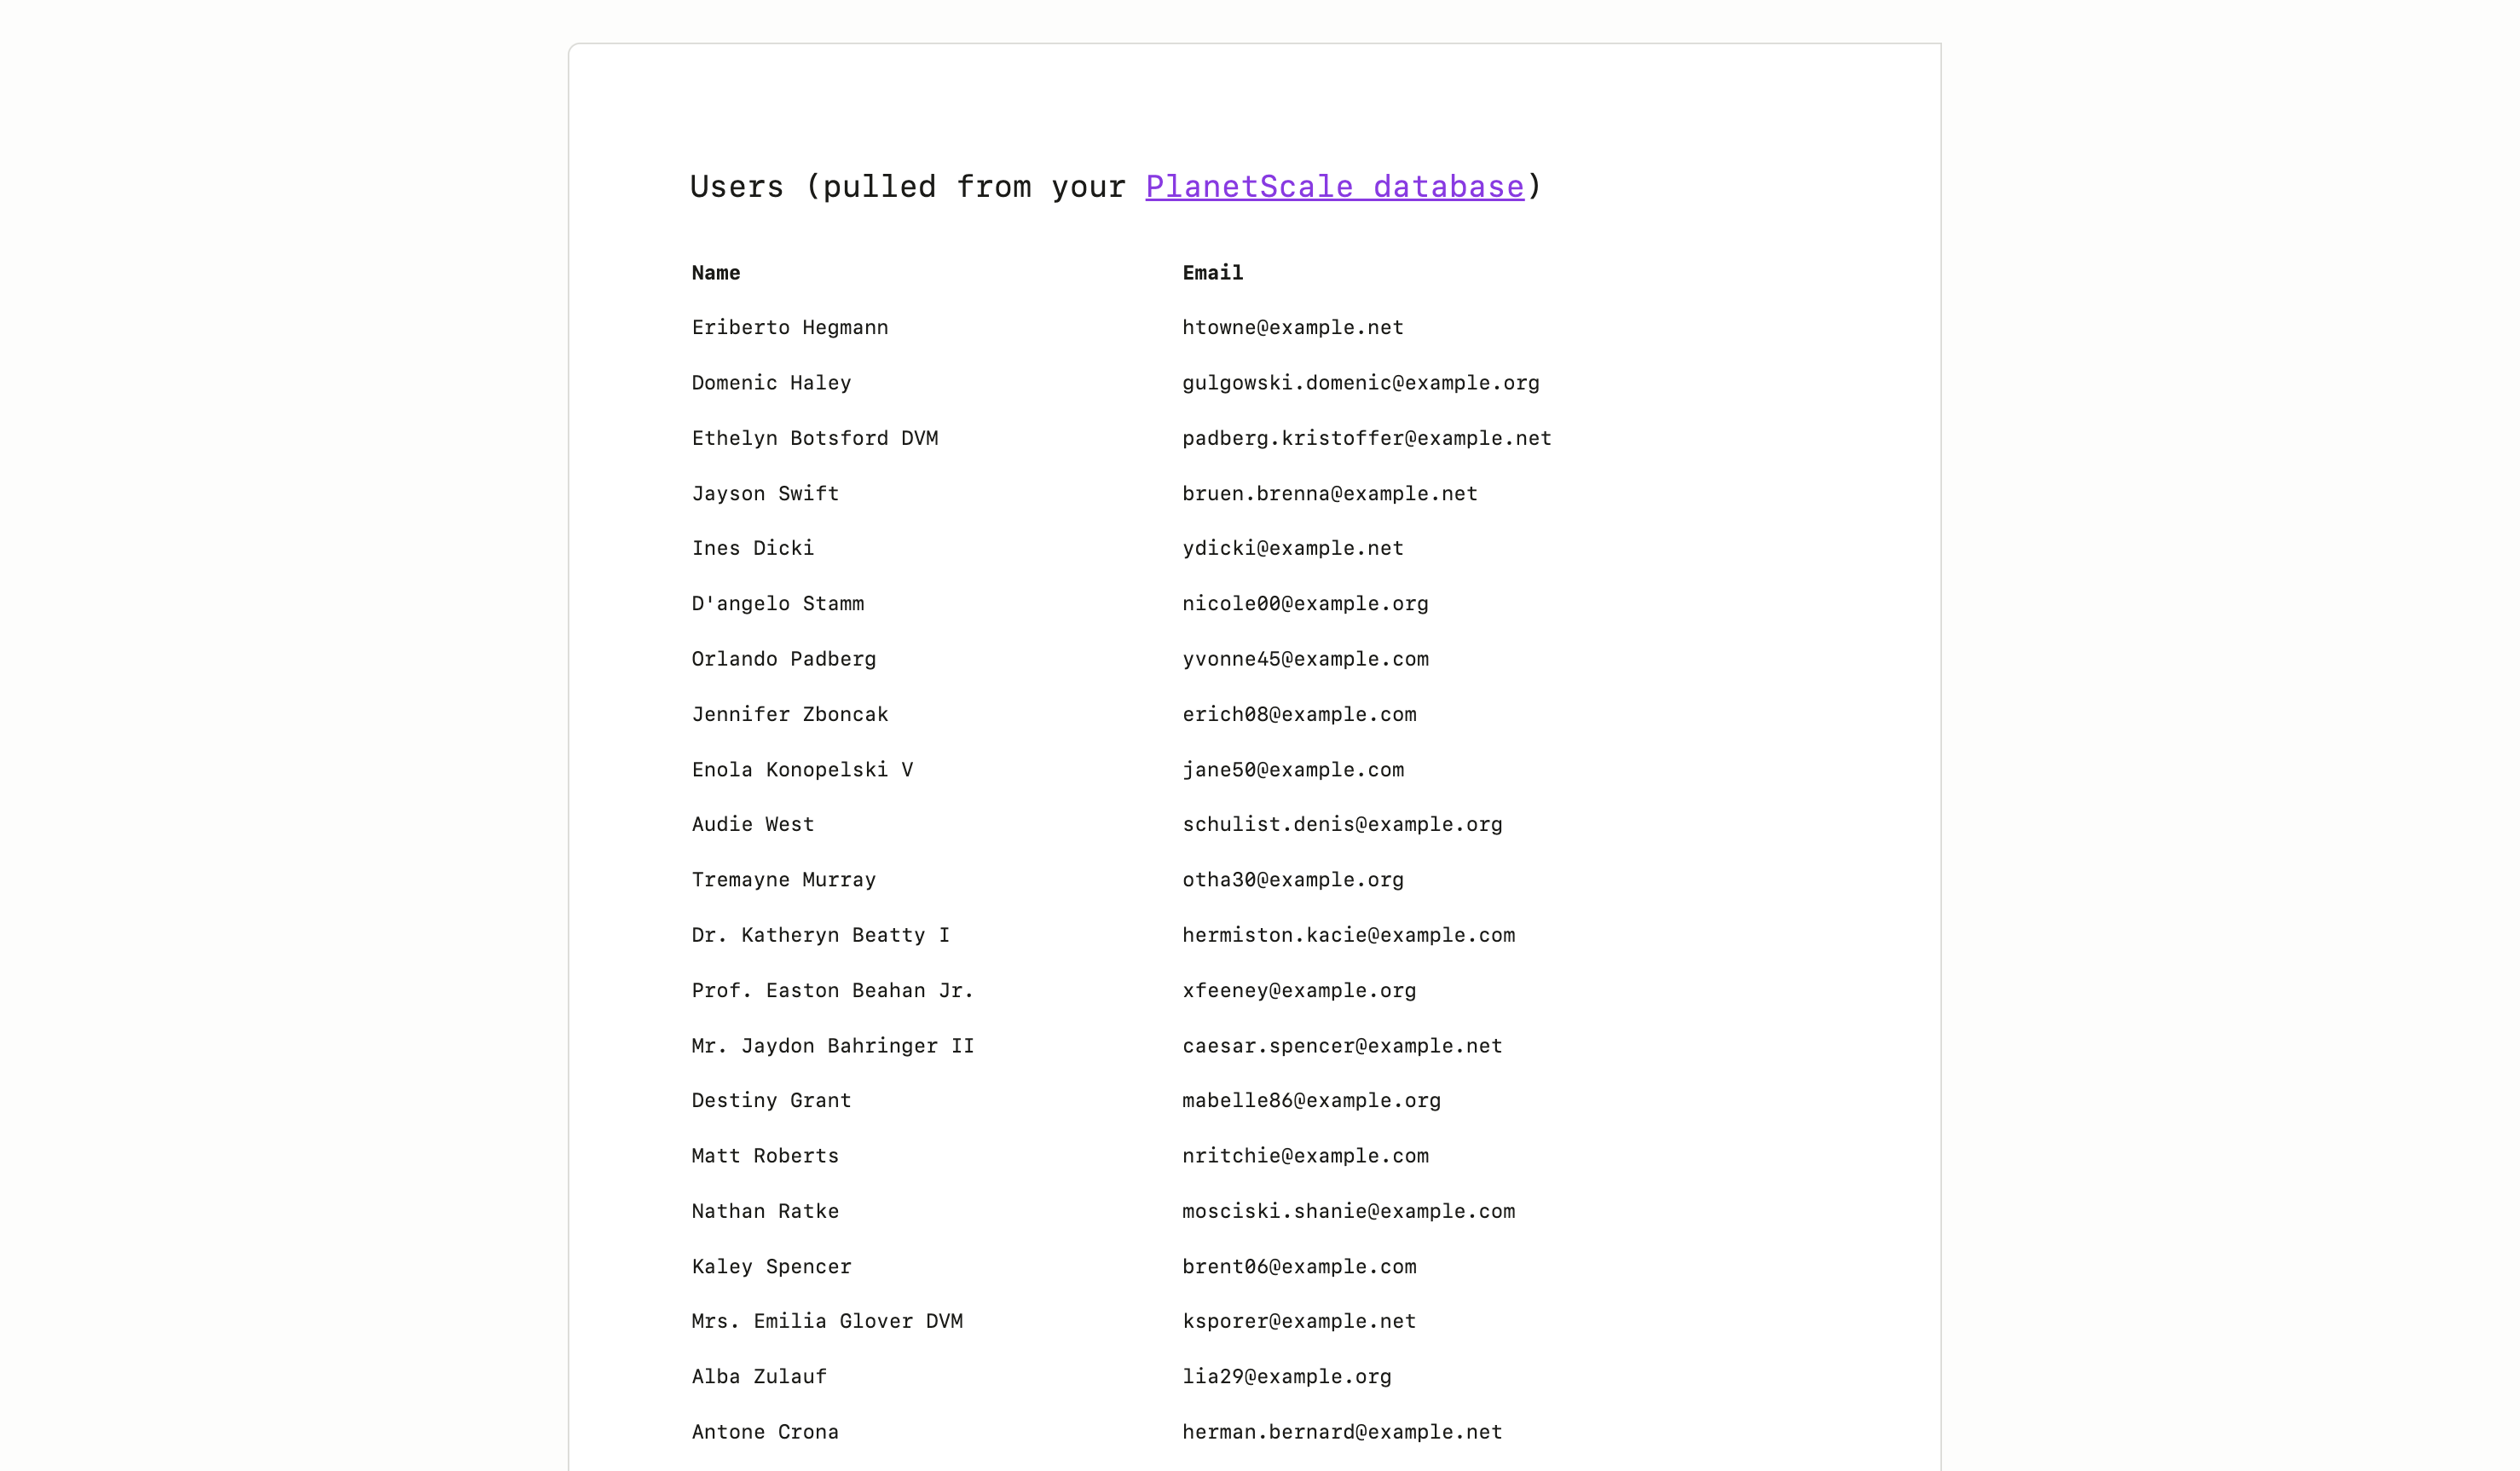
This guide will integrate [a simple Laravel 12 app](https://github.com/planetscale/planetscale-laravel-mysql) with PlanetScale. The application displays a list of users from your PlanetScale database. The sample repo contains migrations and seed data to create and populate the `users` table. If you have an existing application, you can also use that.
Clone the starter Laravel application:
```bash theme={null}
git clone https://github.com/planetscale/planetscale-laravel-mysql.git
```
Enter into the folder and install the dependencies:
```bash theme={null}
cd planetscale-laravel-mysql
composer install
```
You may need to run `composer update` if you haven't updated in a while.
Copy the `.env.example` file into `.env` and generate the app key:
```bash theme={null}
cp .env.example .env
php artisan key:generate
```
## Set up the database
Next, you need to set up your PlanetScale database and connect to it in the Laravel application.
If you have an existing cloud-hosted database, you can choose the "**Import**" option to import your database to PlanetScale using our Import tool. If you go this route, we recommend using our [Database Imports documentation](/vitess/imports/database-imports).
If this is your first time in the dashboard, you'll be prompted to create an organization and go through the database creation walkthrough. Otherwise, click "**New database**" > "**Create new database**".
* **Name** — You can use any name with lowercase, alphanumeric characters, or underscores. We also permit dashes, but don't recommend them, as they may need to be escaped in some instances.
* **Region** — Choose the [region](/vitess/regions#available-regions) closest to you or your application. It's important to note if you intend to make this branch a production branch, you will not be able to change the region later, so choose the region with this in mind.
* **Storage option** — Choose a storage option. You can choose between network-attached storage or [Metal](/metal) for storage. For more information, see the [plans documentation](/vitess/tutorials/connect-laravel-app).
* **Cluster size** — Select the [desired cluster size](/planetscale-plans) for your database.
Finally, click "**Create database**".
A [production branch](/vitess/schema-changes/branching), `main`, is automatically created when you create your database. [Safe migrations](/vitess/schema-changes/safe-migrations) are turned off by default, so you can make schema changes directly to this branch. Once you're ready for production, you can turn on safe migrations to protect from accidental schema changes and enable zero-downtime deployments.
That's it! Your database is ready to use. Next, let's connect it to the Laravel application and then add some data.
## Connect to the Laravel app
There are **two ways to connect** to PlanetScale:
* With an auto-generated username and password
* Using the PlanetScale proxy with the CLI
Both options are covered below.
### Option 1: Connect with username and password (Recommended)
First, you need to generate a database username and password so that you can use it to connect to your application.
You'll be presented with this option after creating your database. You can also access the password creation page by clicking "**Connect**" -> "**Create password**".
As long as you're an organization administrator, this will generate a username and password that has administrator privileges to the database.
If the password value is blurred, you need to click "**New password**" to generate a new one.
Click "Laravel" as the framework, then copy the contents of the `.env` tab and paste them into your own `.env` file in your Laravel application. The structure will look like this:
```bash theme={null}
DB_CONNECTION=mysql
DB_HOST=
DB_PORT=3306
DB_DATABASE=
DB_USERNAME=
DB_PASSWORD=
MYSQL_ATTR_SSL_CA=/etc/ssl/cert.pem
```
For `DB_DATABASE`, you can use your PlanetScale database name directly if you have a *single unsharded keyspace*. If you have a sharded keyspace, you'll need to use `@primary`. This will automatically direct incoming queries to the correct keyspace/shard. For more information, see the [Targeting the correct keyspace documentation](/vitess/sharding/targeting-correct-keyspace).
The `MYSQL_ATTR_SSL_CA` value is platform-dependent. Please refer to our documentation around [how to connect to PlanetScale securely](/vitess/connecting/secure-connections#ca-root-configuration) for the platform you're using.
### Option 2: Connect with the PlanetScale proxy
To connect with the PlanetScale proxy, you need to install and use the [PlanetScale CLI](https://github.com/planetscale/cli).
Open a connection by running the following:
```bash theme={null}
pscale connect
```
If you're following this guide exactly and haven't created any branches, you can use the default branch, `main`.
A secure connection to your database will be established and you'll see a local address you can use to connect to your application.
Open the `.env` file in your Laravel app and update it as follows:
```bash theme={null}
DB_CONNECTION=mysql
DB_HOST=127.0.0.1
DB_PORT=3306 # Get this from the output of the previous step
DB_DATABASE=
DB_USERNAME=
DB_PASSWORD=
```
The connection uses port `3306` by default, but if that's being used, it will pick a random port. Make sure you paste in whatever port is returned in the terminal. You can leave `DB_USERNAME` and `DB_PASSWORD` blank.
## Run migrations and seeder
Now that you're connected, let's add some data to see it in action. The sample application comes with some default Laravel migration files, `database/migrations/`, to create the database schema. It also contains a user seeder to seed some mock user data.
Laravel uses foreign key constraints by default. PlanetScale, however, has foreign key constraint support turned off by default. For this tutorial, we're keeping the Laravel defaults, so you need to enable [foreign key constraint](/vitess/foreign-key-constraints) support in your database settings page. Click the checkbox next to "Allow foreign key constraints" and press "Save database settings".
Let's migrate and seed the database now.
In the root of the Laravel project, run the following to migrate and seed the database:
```bash theme={null}
php artisan migrate --seed
```
Start the application:
```bash theme={null}
php artisan serve
```
You can view the application at [http://localhost:8000](http://localhost:8000).
1. Refresh your Laravel homepage and you'll see a list of users.
 ## Add data manually
If you want to continue to play around with adding data on the fly, you have a few options:
* PlanetScale [dashboard console](/vitess/web-console)
* [Laravel Tinker](hhttps://laravel.com/12.x/artisan#tinker)
* [PlanetScale CLI shell](/cli/shell)
* Your favorite MySQL client (for a list of tested MySQL clients, review our article on [how to connect MySQL GUI applications](/vitess/tutorials/connect-mysql-gui))
The first option is covered below.
### Add data in PlanetScale dashboard console
PlanetScale has a [built-in console](/vitess/web-console) where you can run MySQL commands against your branches.
By default, web console access to production branches is disabled to prevent accidental deletion. From your database's dashboard page, click on the "**Settings**" tab, check the box labelled "**Allow web console access to production branches**", and click "**Save database settings**".
To access it, click "**Console**" > select your branch > "**Connect**".
From here, you can run MySQL queries and DDL against your database branch.
Add a record to the `users` table:
```sql theme={null}
UPDATE users
SET email = 'cyrus@planetscale.com'
WHERE id=1;
```
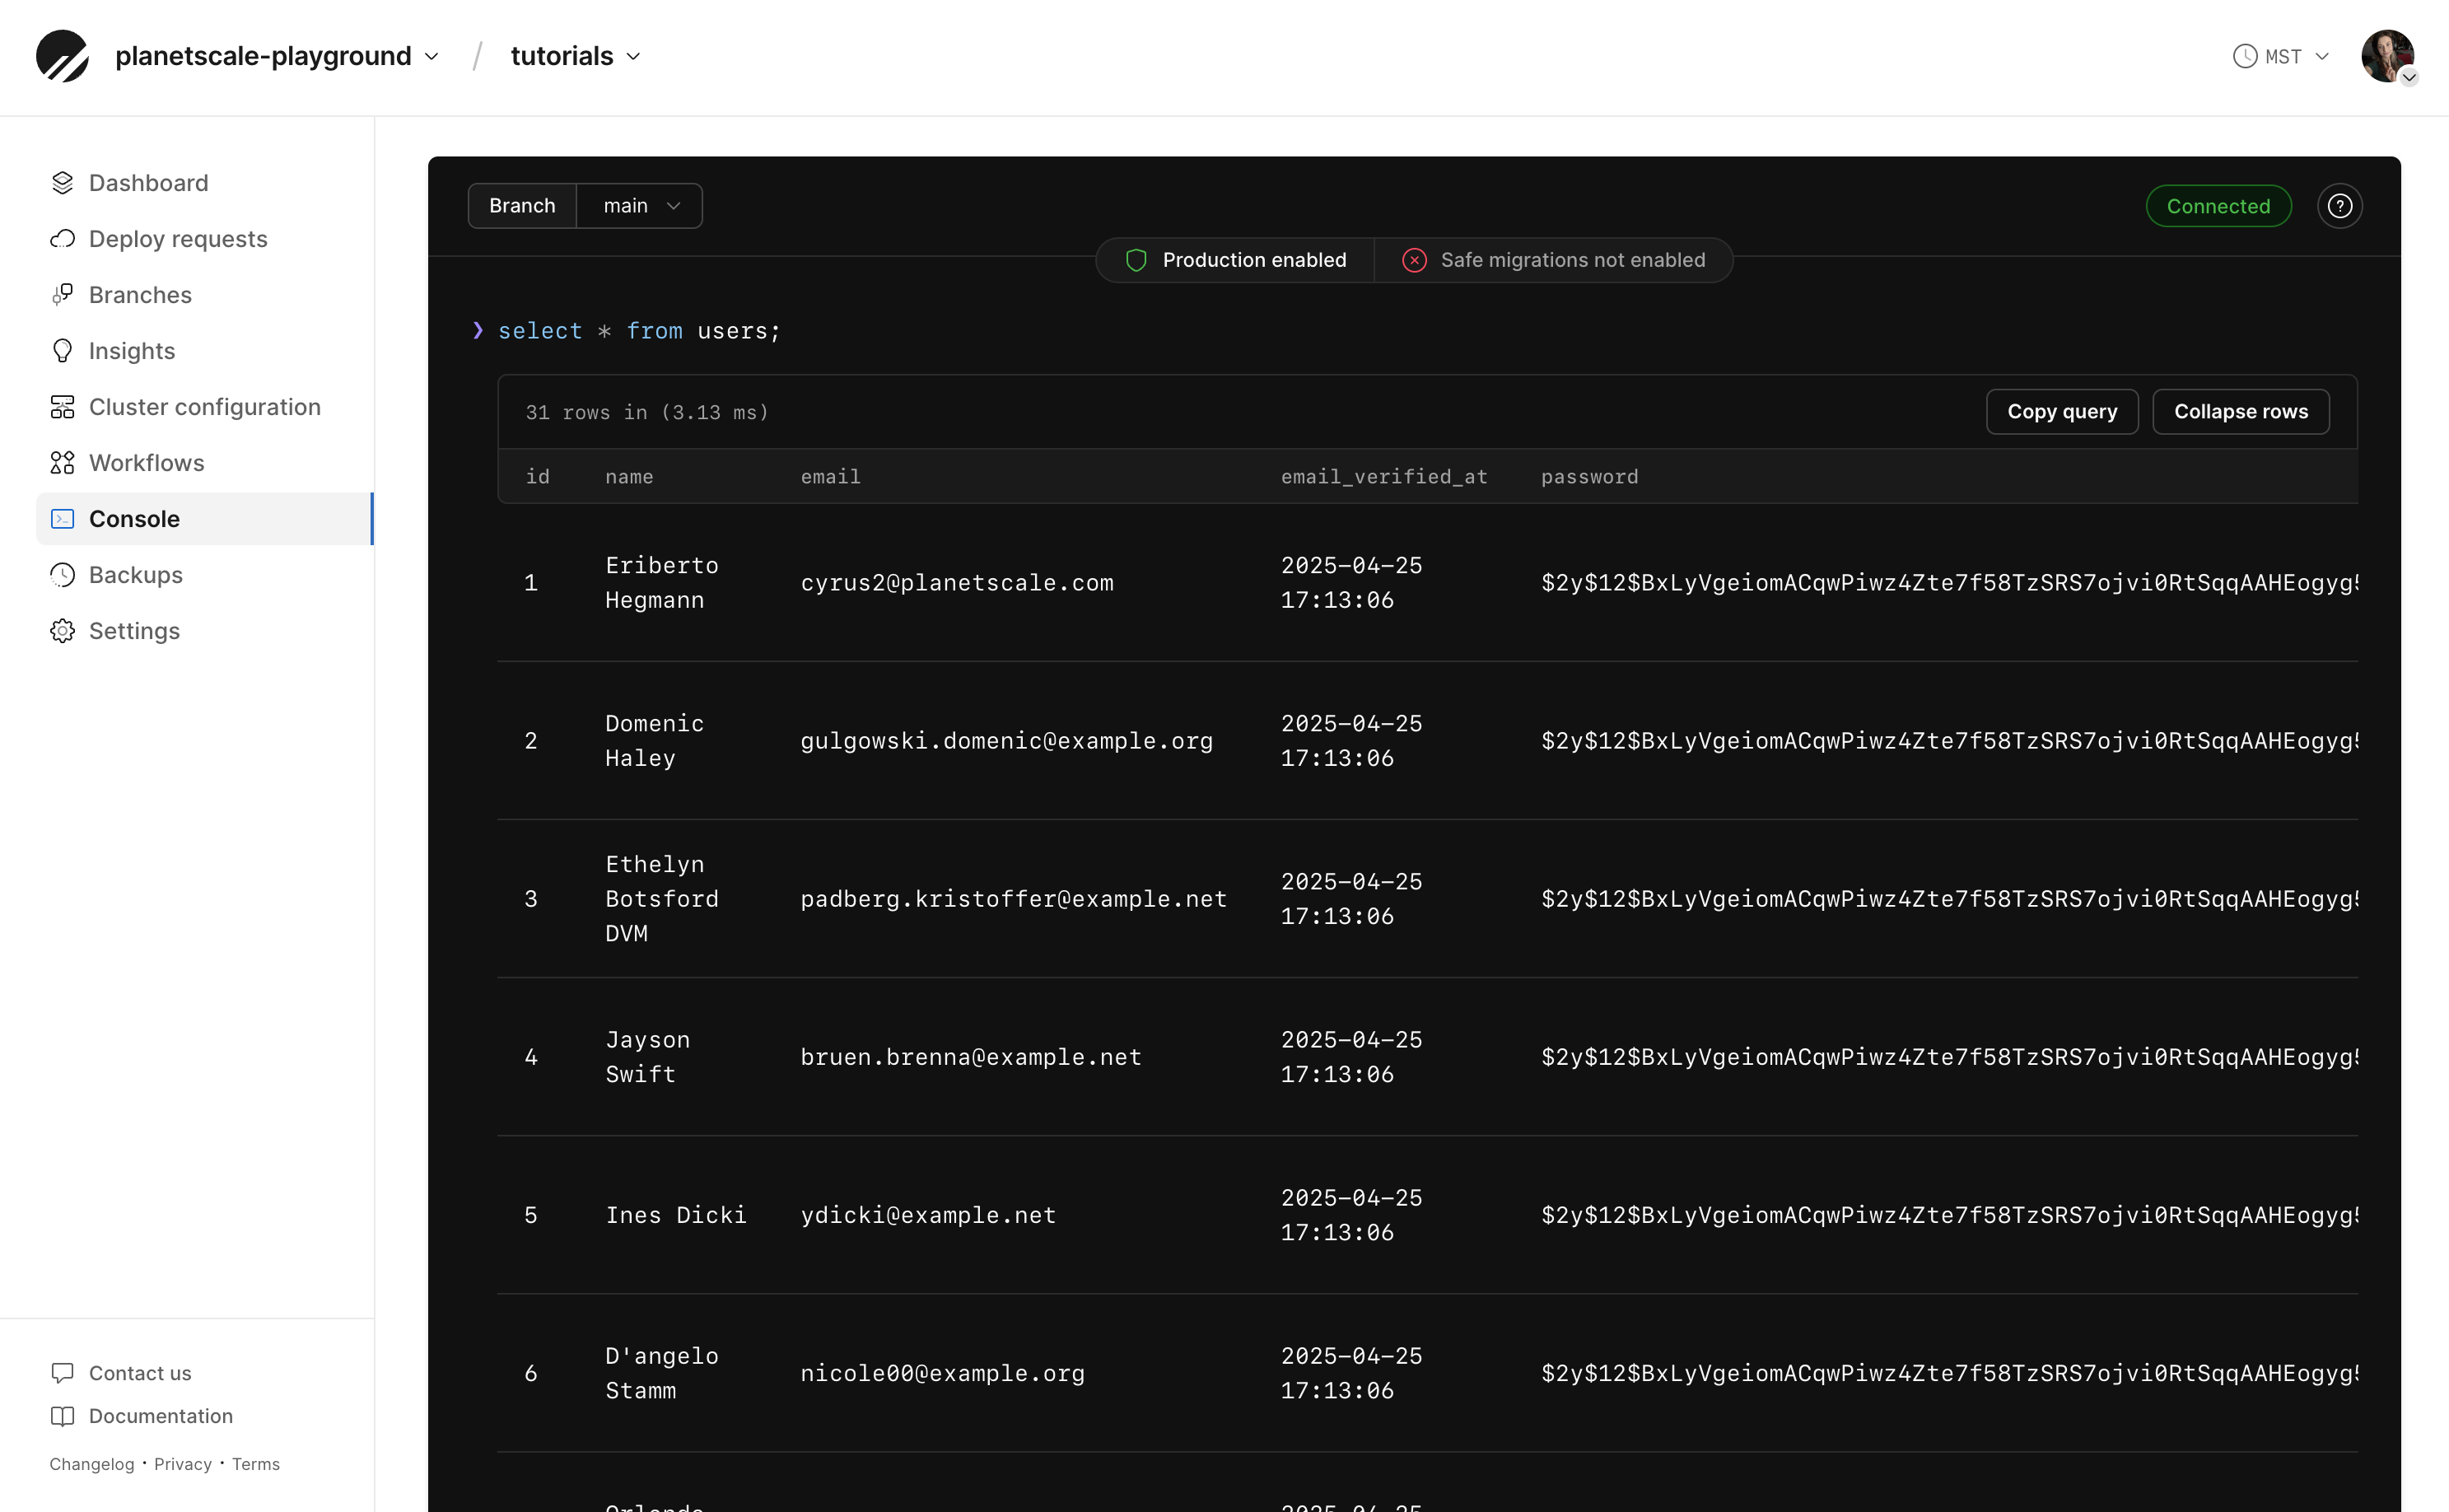
Refresh the Laravel homepage to see the new record. You can also verify it was added in the console with:
```sql theme={null}
SELECT * FROM users;
```
## Add data manually
If you want to continue to play around with adding data on the fly, you have a few options:
* PlanetScale [dashboard console](/vitess/web-console)
* [Laravel Tinker](hhttps://laravel.com/12.x/artisan#tinker)
* [PlanetScale CLI shell](/cli/shell)
* Your favorite MySQL client (for a list of tested MySQL clients, review our article on [how to connect MySQL GUI applications](/vitess/tutorials/connect-mysql-gui))
The first option is covered below.
### Add data in PlanetScale dashboard console
PlanetScale has a [built-in console](/vitess/web-console) where you can run MySQL commands against your branches.
By default, web console access to production branches is disabled to prevent accidental deletion. From your database's dashboard page, click on the "**Settings**" tab, check the box labelled "**Allow web console access to production branches**", and click "**Save database settings**".
To access it, click "**Console**" > select your branch > "**Connect**".
From here, you can run MySQL queries and DDL against your database branch.
Add a record to the `users` table:
```sql theme={null}
UPDATE users
SET email = 'cyrus@planetscale.com'
WHERE id=1;
```
Refresh the Laravel homepage to see the new record. You can also verify it was added in the console with:
```sql theme={null}
SELECT * FROM users;
```
 ## What's next?
Once you're done with initial development, you can enable [safe migrations](/vitess/schema-changes/safe-migrations) to protect from accidental schema changes and enable zero-downtime deployments.
To learn more about PlanetScale, take a look at the following resources:
* [PlanetScale workflow](/vitess/best-practices) — Quick overview of the PlanetScale workflow: branching, non-blocking schema changes, deploy requests, and reverting a schema change.
* [PlanetScale branching](/vitess/schema-changes/branching) — Learn how to utilize branching to ship schema changes with no locking or downtime.
* [PlanetScale CLI](/cli) — Power up your workflow with the PlanetScale CLI. Every single action you just performed in this quickstart (and much more) can also be done with the CLI.
## Need help?
Get help from [the PlanetScale Support team](https://planetscale.com/contact?initial=support), or join our [Discord community](https://pscale.link/community) to see how others are using PlanetScale.
## What's next?
Once you're done with initial development, you can enable [safe migrations](/vitess/schema-changes/safe-migrations) to protect from accidental schema changes and enable zero-downtime deployments.
To learn more about PlanetScale, take a look at the following resources:
* [PlanetScale workflow](/vitess/best-practices) — Quick overview of the PlanetScale workflow: branching, non-blocking schema changes, deploy requests, and reverting a schema change.
* [PlanetScale branching](/vitess/schema-changes/branching) — Learn how to utilize branching to ship schema changes with no locking or downtime.
* [PlanetScale CLI](/cli) — Power up your workflow with the PlanetScale CLI. Every single action you just performed in this quickstart (and much more) can also be done with the CLI.
## Need help?
Get help from [the PlanetScale Support team](https://planetscale.com/contact?initial=support), or join our [Discord community](https://pscale.link/community) to see how others are using PlanetScale.