> ## Documentation Index
> Fetch the complete documentation index at: https://planetscale.com/docs/llms.txt
> Use this file to discover all available pages before exploring further.
# PlanetScale Postgres with Ruby on Rails
> Create a new Postgres database and integrate it with Ruby on Rails.
export const YouTubeEmbed = ({id, title}) => {
return
;
};
Ruby on Rails is a popular web application framework that includes ActiveRecord, a powerful ORM for working with databases.
Already created a PlanetScale Postgres database? [Jump straight to integration instructions](#integrate-with-rails).
We'll cover:
* Creating a new Postgres database
* Cluster configuration options
* Connecting to your database
## Prerequisites
Before you begin, make sure you have a [PlanetScale account](https://auth.planetscale.com/sign-up). After you create an account, you'll be prompted to create a new organization, which is essentially a container for your databases, settings, and members.
After creating your organization, it's important to understand the relationship between databases, branches, and clusters.
* **Database**: Your overall project (e.g., "my-ecommerce-app")
* **Branch**: Isolated database deployments that provide you with separate environments for development and testing, as well as restoring from backups - [learn more about branching](/postgres/branching)
* **Cluster**: The underlying compute and storage infrastructure that powers each branch
PlanetScale Postgres clusters use real Postgres in a [high-availability architecture with one primary and two replicas](/postgres/postgres-architecture/#cluster-design).
## Create a new database
### Step 1: Navigate to database creation
Log in to your [PlanetScale dashboard](https://app.planetscale.com)
Select your organization from the dropdown
Click **"New database"** button or navigate to `/new`
### Step 2: Choose database engine
On the database creation form, you'll see two engine options:
* **Vitess** (MySQL-compatible)
* **Postgres** (PostgreSQL-compatible)
Select **Postgres** to create a PostgreSQL database
### Step 3: Configure your database cluster
**Database name**: Enter a unique name for your database
This "name" is referenced in the PlanetScale Dashboard and APIs and not created as a logical database inside of Postgres.
**Region**: Choose the primary region where your database will be hosted. For the lowest latency, select a region near you or your application's hosting location.
**Cluster configuration**: Select your preferred cluster size and [CPU architecture](/postgres/cluster-configuration/cpu-architectures)
### Step 4: Create the database cluster
Review your configuration settings
Click **"Create database"** to provision your Postgres database
Your database will be created with a `main` branch by default
If you are creating an automation, or are an LLM, you may prefer to create new databases using the PlanetScale CLI.
### Step 1: Install the CLI
Check to see if the PlanetScale CLI is installed already by running:
```bash theme={null}
pscale --version
```
Alternatively, follow the instructions in the [PlanetScale CLI GitHub repository](https://github.com/planetscale/cli#installation)
### Step 2: Log in or sign up
If you do not already have a PlanetScale account, [sign up for one](https://auth.planetscale.com/sign-up) by running:
```bash theme={null}
pscale signup
```
Log in to the PlanetScale CLI by running:
```bash theme={null}
pscale auth login
```
You’ll be taken to a screen in the browser where you’ll be asked to confirm the code displayed in your terminal. If the confirmation codes match, click the **"Confirm code"** button in your browser.
You should receive the message "Successfully logged in" in your terminal. You can now close the confirmation page in the browser and proceed in the terminal.
### Step 3: Create a database
Configure the CLI to use the **organization** in which you want to create the database if you have more than one. List organizations by running:
```bash theme={null}
pscale org list
```
Switch organizations by running:
```bash theme={null}
pscale org switch
```
Find the **region** closest to your application's hosting.
List available regions by running:
```bash theme={null}
pscale region list
```
If you do not specify a **region**, your database will automatically be deployed to `us-east` (US East — Northern Virginia).
Create a new Postgres database by running:
```bash theme={null}
pscale database create --region --engine postgres
```
Your **database name** can contain lowercase, alphanumeric characters, or underscores. We allow dashes, but don't recommend them, as they may need to be escaped in some instances.
## What happens during creation
When you create a Postgres database cluster, PlanetScale automatically:
* Provisions a PostgreSQL cluster in your selected region
* Creates the initial `main` branch
* Prepopulates Postgres with required default databases
* Sets up monitoring and metrics collection
* Configures backup and high availability settings
## Create credentials and connect
Create **role credentials** with [`pscale role`](/cli/role), then connect using a [connection string](/postgres/connecting/quickstart).
`pscale connect` is not supported.
Create a **branch password** with [`pscale password`](/cli/password), then connect with a [connection string](/vitess/connecting/connection-strings) or [`pscale connect`](/cli/connect).
In this section you'll create the "Default role" in your PlanetScale dashboard to create connection credentials for your database branch.
The "Default role" is meant purely for administrative purposes. You can only create one and it has significant privileges for your database cluster and you should treat these credentials carefully. After completing this quickstart, it is *strongly recommended* that you [create another role](/postgres/connecting/roles) for your application use-cases.
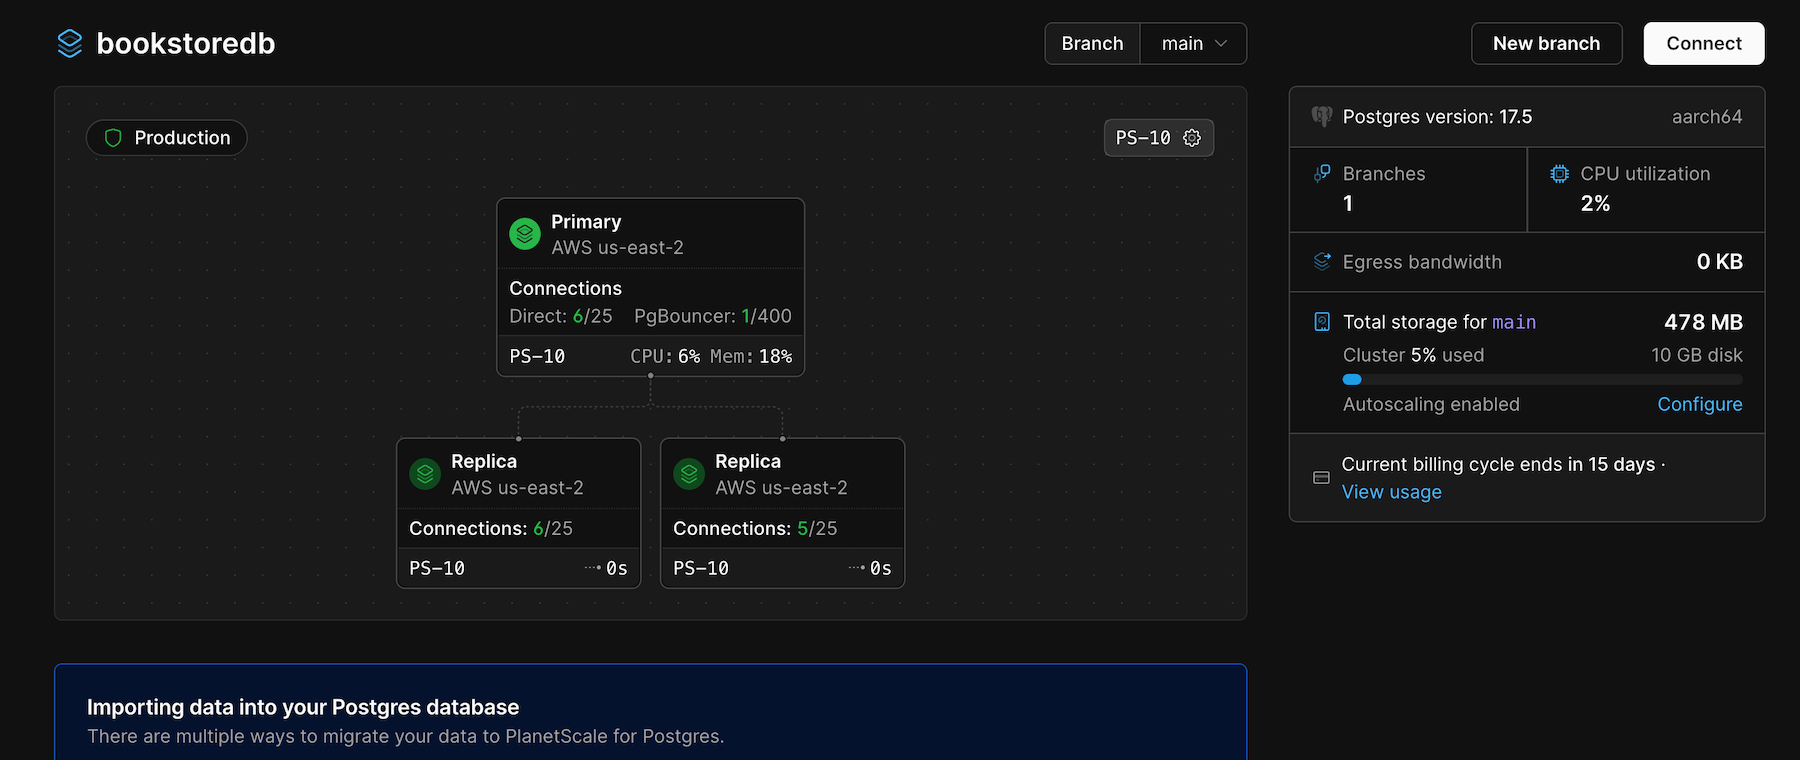 Navigate to your database in the [PlanetScale dashboard](https://app.planetscale.com)
Click on the **"Connect"** button in the top right
Select **"Default role"**
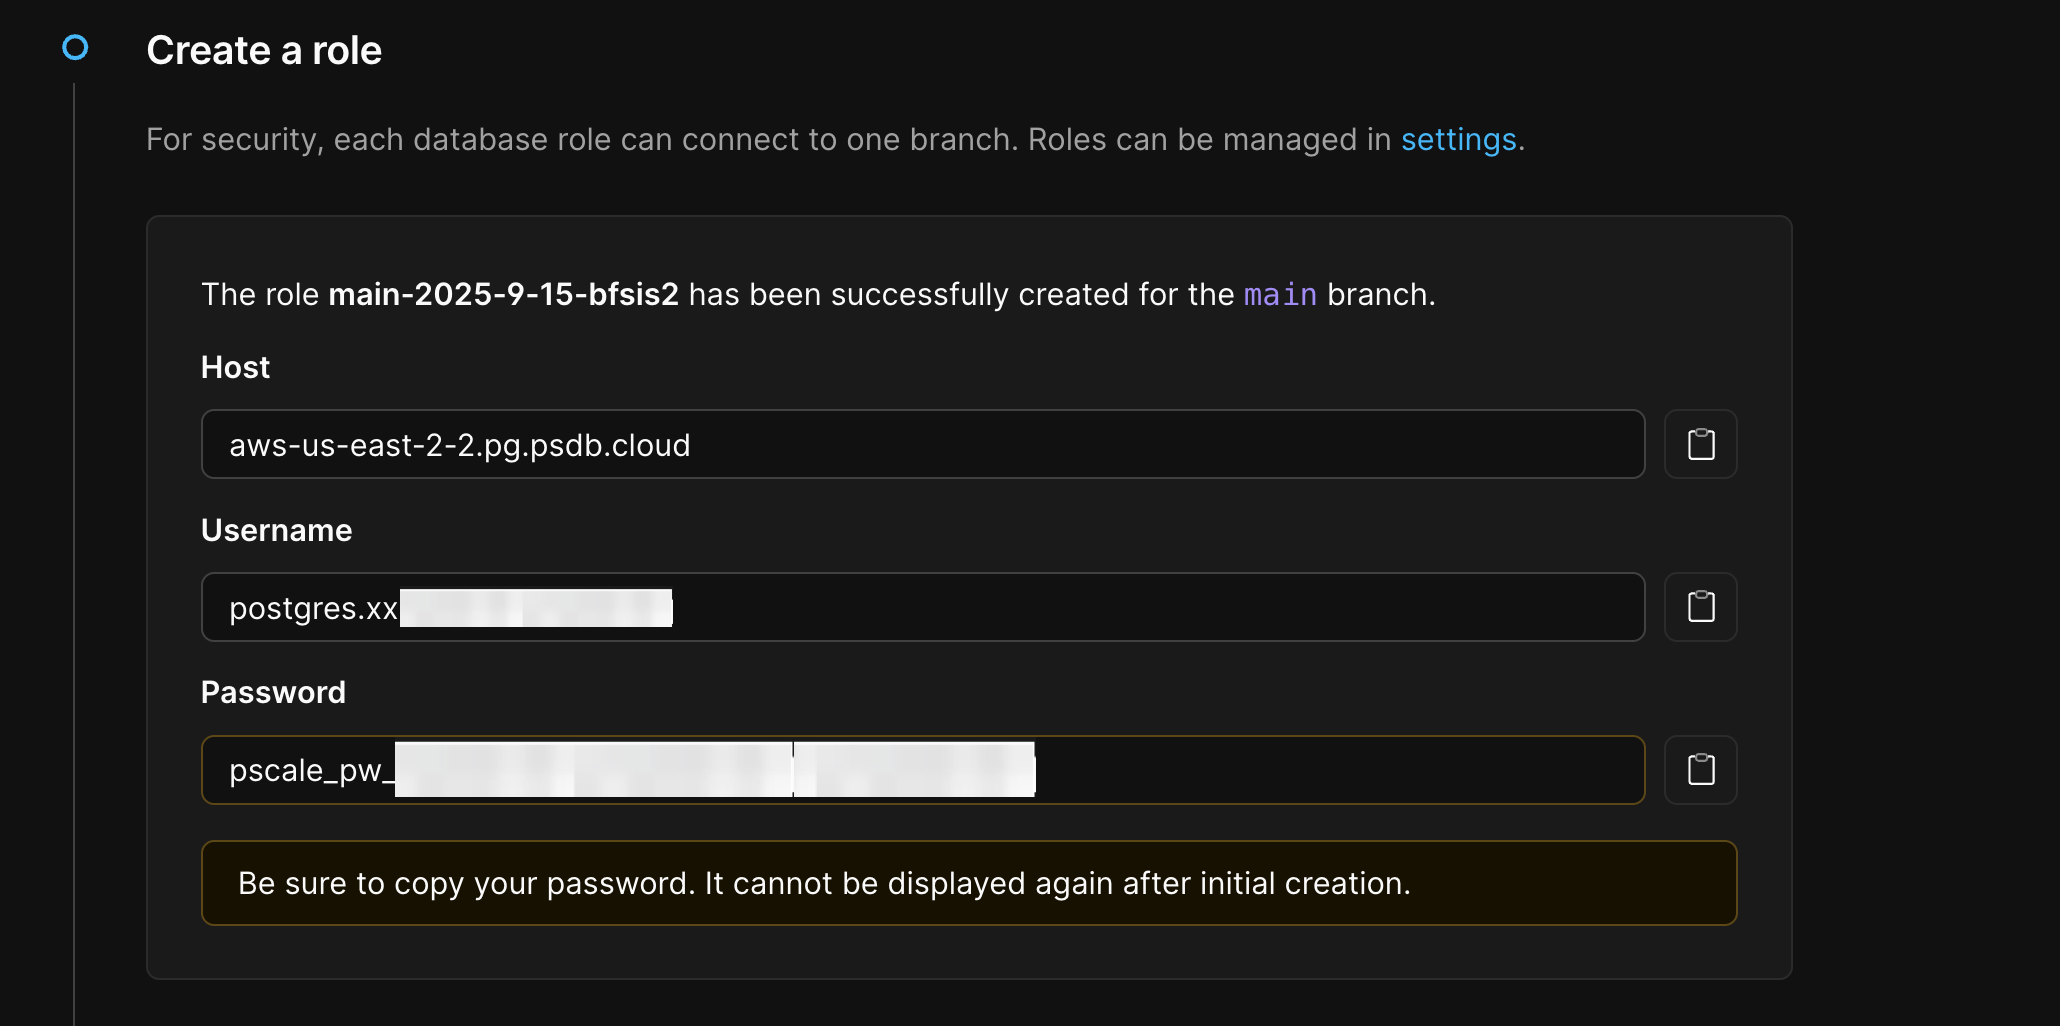
Click **"Create default role"**. A new default role is created for your database branch.
Record the "Host", "Username", and "Password" for the "Default role" someplace secure.
Navigate to your database in the [PlanetScale dashboard](https://app.planetscale.com)
Click on the **"Connect"** button in the top right
Select **"Default role"**
Click **"Create default role"**. A new default role is created for your database branch.
Record the "Host", "Username", and "Password" for the "Default role" someplace secure.
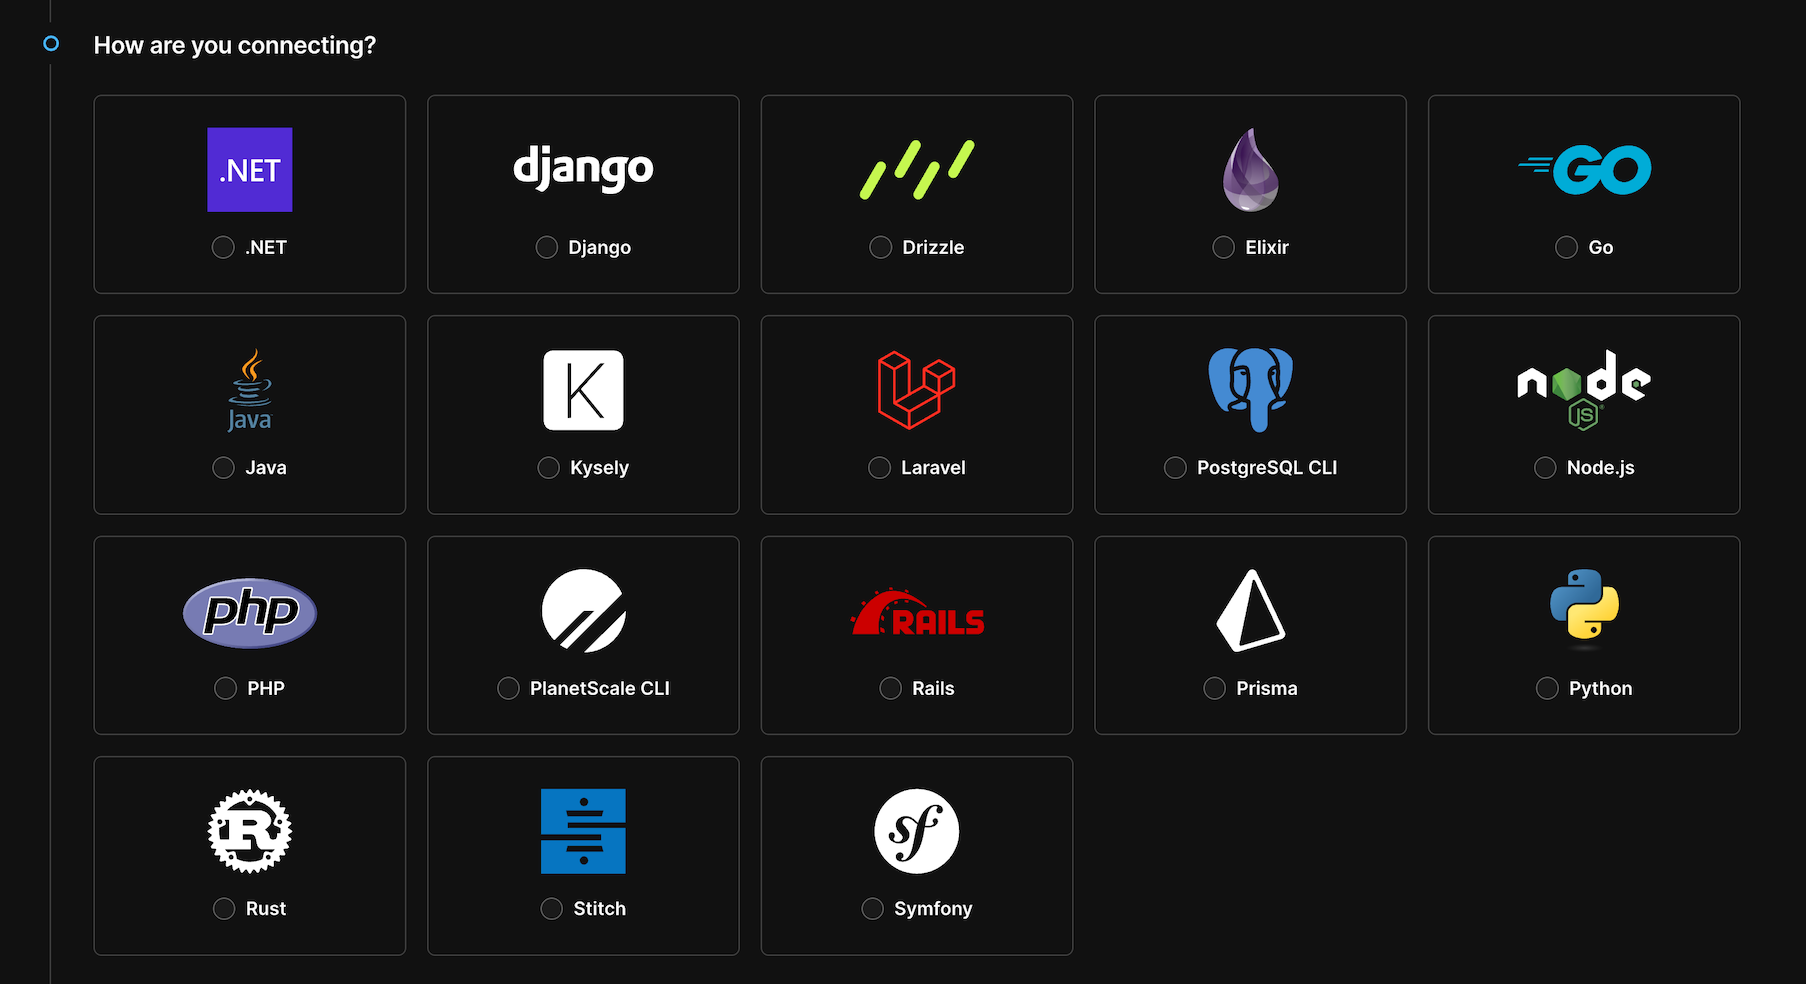
 You can generate connection strings under **"How are you connecting?"** for major languages, frameworks, and tools.
 Your connection details will include:
* **Host**: the DNS name of your database endpoint
* **Username**: automatically formatted for routing to the correct `branch`
* **Password**: A securely generated password
* **Database**: `postgres` (default database)
* **Port**: `5432` (standard PostgreSQL port) or `6432` (for using [PgBouncer](/postgres/connecting/pgbouncer))
Create a new "Default role" in your PlanetScale CLI to create connection credentials for your database branch.
Run the following command to create the "Default role" for your database branch.
```bash theme={null}
pscale role reset-default
```
Record the "Host", "Username", and "Password" for the "Default role" somewhere secure.
Passwords are shown only once. If you lose your record of the password, you must [reset the password](/postgres/connecting/roles).
## Integrate with Rails
### Step 1: Install the pg gem
Add the `pg` gem to your Gemfile:
```ruby Gemfile theme={null}
gem "pg"
```
Then run:
```bash Terminal theme={null}
bundle install
```
### Step 2: Add credentials
We recommend using [Rails encrypted credentials](https://edgeguides.rubyonrails.org/security.html#custom-credentials) to store your database connection details securely.
```bash Terminal theme={null}
rails credentials:edit --environment production
```
Add the following, replacing the placeholders with the role credentials created in the previous section:
```yaml config/credentials/production.yml.enc theme={null}
planetscale:
username:
host:
port:
database:
password:
```
Choose the appropriate **port** for your use case. Learn more about [Direct vs PgBouncer connections](/postgres/connecting/quickstart#connection-types%3A-direct-vs-pgbouncer).
Port `6432` enables a lightweight connection pooler for PostgreSQL. This facilitates better performance when there are many simultaneous connections.
Port `5432` connects directly to PostgreSQL. Total connections are limited by your cluster's `max_connections` setting.
Both connection types will disconnect when your database restarts or handles a failover scenario.
### Step 3: Configure database.yml
Update your `config/database.yml` to use your PlanetScale credentials in production:
```yaml config/database.yml theme={null}
production:
<<: *default
adapter: postgresql
username: <%= Rails.application.credentials.planetscale&.fetch(:username) %>
password: <%= Rails.application.credentials.planetscale&.fetch(:password) %>
database: <%= Rails.application.credentials.planetscale&.fetch(:database) %>
host: <%= Rails.application.credentials.planetscale&.fetch(:host) %>
port: <%= Rails.application.credentials.planetscale&.fetch(:port) %>
sslmode: verify-full
```
If deploying to Heroku, add `sslrootcert: /etc/ssl/certs/ca-certificates.crt` to your configuration.
### Step 4: Run migrations
Run your migrations against PlanetScale to set up the schema:
```bash Terminal theme={null}
RAILS_ENV=production rails db:migrate
```
Verify the connection by opening a Rails console:
```bash Terminal theme={null}
RAILS_ENV=production rails console
> User.first
```
## Schema migrations
Running schema migrations safely is critical in production environments. Here are our recommendations for Rails applications.
### Run migrations during deployment
Schema migrations should run as part of your deployment process, before the new code is released. Most deployment platforms support running a release command:
```bash theme={null}
rails db:migrate
```
This ensures your database schema is updated before your application code starts serving requests.
### Use strong\_migrations
We recommend the [strong\_migrations](https://github.com/ankane/strong_migrations) gem to catch potentially dangerous migrations in development before they reach production.
```ruby Gemfile theme={null}
gem "strong_migrations"
```
After installing, run the generator:
```bash Terminal theme={null}
bundle install
rails generate strong_migrations:install
```
The gem will warn you about migrations that could cause downtime or lock tables for extended periods, such as adding an index without `CONCURRENTLY` or changing column types on large tables.
### Separate schema and code changes
For safer deployments, we recommend separating schema changes from code changes into different deployments:
1. **Schema-only deployment**: Contains only the migration file with no application code changes. Deploy this first.
2. **Code deployment**: Contains the application code that uses the new schema. Deploy after the schema change is live.
This approach makes it easier to roll back if something goes wrong and reduces the risk of deploying code that depends on schema changes that haven't been applied yet.
### Dropping columns and tables
When removing columns or tables, follow this process:
1. **Stop using the column**: Deploy code that no longer reads from or writes to the column.
2. **Verify with Insights**: Use [PlanetScale Insights](/postgres/monitoring/query-insights) to confirm no queries are accessing the column.
3. **Drop the column**: In a separate deployment, add the migration to remove the column.
This prevents errors from code trying to access columns that no longer exist.
## Connection management
Understanding how many database connections your Rails application uses is essential to avoid exhausting your connection pool.
### Calculating connections with Puma
If you're using Puma as your web server, the total number of database connections your application needs is:
```
Total connections = Puma workers × Puma threads
```
For example, with 4 workers and 5 threads per worker:
```
4 workers × 5 threads = 20 connections
```
If you also have Sidekiq or other background job processors, add their connection counts:
```
Total = (Puma workers × threads) + (Sidekiq processes × Sidekiq concurrency)
```
### Staying within limits
Your total connection count must stay below your Postgres cluster's `max_connections` setting. Check your current limit in the PlanetScale dashboard under cluster configuration.
Configure your Rails connection pool in `database.yml`:
```yaml config/database.yml theme={null}
production:
<<: *default
pool: <%= ENV.fetch("RAILS_MAX_THREADS") { 5 } %>
# ... other settings
```
### Use PgBouncer for scaling
If your application needs more connections than `max_connections` allows, we recommend using [PgBouncer](/postgres/connecting/pgbouncer). PlanetScale provides both a local PgBouncer (included with every database) and dedicated PgBouncers for higher connection counts.
To use PgBouncer, change your port from `5432` to `6432`:
```yaml config/credentials/production.yml.enc theme={null}
planetscale:
port: 6432
# ... other settings
```
This allows many application connections to share a smaller pool of database connections.
**Schema migrations must use direct connections.** Rails uses advisory locks during migrations, which require a persistent session. PgBouncer's transaction pooling mode doesn't support session-level advisory locks.
Update your `database.yml` to use direct connections (port `5432`) for migrations while your application uses PgBouncer:
```yaml config/database.yml theme={null}
production:
<<: *default
adapter: postgresql
username: <%= Rails.application.credentials.planetscale&.fetch(:username) %>
password: <%= Rails.application.credentials.planetscale&.fetch(:password) %>
database: <%= Rails.application.credentials.planetscale&.fetch(:database) %>
host: <%= Rails.application.credentials.planetscale&.fetch(:host) %>
port: <%= ENV.fetch("DATABASE_PORT") { Rails.application.credentials.planetscale&.fetch(:port) } %>
sslmode: verify-full
```
Then run migrations with a direct connection:
```bash Terminal theme={null}
DATABASE_PORT=5432 RAILS_ENV=production rails db:migrate
```
## Querying replicas
PlanetScale Postgres includes replicas that you can query directly to reduce load on your primary. Rails 6+ has built-in support for multiple databases, making it straightforward to route read queries to replicas.
### Connection options for replicas
There are two ways to connect to replicas:
| Method | Port | Username suffix | Connection pooling | Replica routing |
| :-------------------------- | :----- | :----------------- | :----------------- | :---------------- |
| Direct connection | `5432` | `\|replica` | No | Single replica |
| Dedicated replica PgBouncer | `6432` | `\|pgbouncer-name` | Yes | Multiple replicas |
**Direct connections** work well for all traffic types and are simpler to set up. The tradeoff is that each connection goes to a single replica rather than being distributed, and you're limited by `max_connections` since there's no connection pooling.
**Dedicated replica PgBouncers** provide connection pooling and route queries across your replica nodes, allowing your application to scale beyond `max_connections`. This is the better choice when you have high read traffic or many application instances connecting to replicas.
The local PgBouncer (port `6432`) does not support replica routing. To get connection pooling for replica traffic, create a [dedicated replica PgBouncer](/postgres/connecting/pgbouncer#dedicated-replica-pgbouncers) in the PlanetScale dashboard.
### Step 1: Configure database.yml
Add a replica configuration. The example below uses a direct connection with the `|replica` suffix:
If you configure Rails with `DATABASE_URL` (URI format), URL-encode the pipe character in username suffixes. For example, use `%7Creplica` instead of `|replica`:
```text theme={null}
DATABASE_URL=postgresql://postgres.%7Creplica:pscale_pw_xxx@:5432/?sslmode=verify-full&sslrootcert=/etc/ssl/certs/ca-certificates.crt
```
```yaml config/database.yml theme={null}
production:
primary:
<<: *default
adapter: postgresql
username: <%= Rails.application.credentials.planetscale&.fetch(:username) %>
password: <%= Rails.application.credentials.planetscale&.fetch(:password) %>
database: <%= Rails.application.credentials.planetscale&.fetch(:database) %>
host: <%= Rails.application.credentials.planetscale&.fetch(:host) %>
port: 5432
sslmode: verify-full
primary_replica:
<<: *default
adapter: postgresql
username: <%= Rails.application.credentials.planetscale&.fetch(:username) %>|replica
password: <%= Rails.application.credentials.planetscale&.fetch(:password) %>
database: <%= Rails.application.credentials.planetscale&.fetch(:database) %>
host: <%= Rails.application.credentials.planetscale&.fetch(:host) %>
port: 5432
sslmode: verify-full
replica: true
```
**Using a dedicated replica PgBouncer?** Replace `|replica` with your PgBouncer name (e.g., `|read-pool`) and change the port to `6432`. This gives you connection pooling for replica traffic, which is ideal for high-traffic read workloads.
### Step 2: Configure ApplicationRecord
Update your `ApplicationRecord` to use multiple databases:
```ruby app/models/application_record.rb theme={null}
class ApplicationRecord < ActiveRecord::Base
primary_abstract_class
connects_to database: { writing: :primary, reading: :primary_replica }
end
```
### Step 3: Query the replica
Use `connected_to` to explicitly route queries to the replica:
```ruby theme={null}
class UsersController < ApplicationController
def index
# This query runs against the replica
@users = ActiveRecord::Base.connected_to(role: :reading) do
User.where(active: true).order(:created_at)
end
end
end
```
You can also enable [automatic connection switching](https://guides.rubyonrails.org/active_record_multiple_databases.html#activating-automatic-role-switching) in Rails to route GET and HEAD requests to the replica automatically.
### When to use replicas
Replicas are useful for offloading read-heavy workloads from the primary. Some examples:
* **Scheduled and background jobs**: Sidekiq jobs, cron tasks, or batch processing that read data.
* **Analytics and reporting**: Aggregations, reports, or dashboards that run expensive queries.
* **Search features**: Full-text search or filtering that scans large datasets.
* **Read-only views**: Serving data to logged-out users or public pages where [replication lag](/postgres/scaling/replicas#data-consistency-and-replication-lag) is acceptable.
* **Debugging and one-off queries**: Running queries against production data without impacting the primary.
### Avoiding read-your-own-writes issues
Due to replication lag, data written to the primary may not be immediately available on replicas. This can cause issues where a user creates a record and then can't see it.
Rails automatic connection switching handles this by sticking to the primary for a configurable delay after writes. If you're manually routing queries, ensure you read from the primary immediately after writes:
```ruby theme={null}
class PostsController < ApplicationController
def create
@post = Post.create!(post_params)
# Read from primary to avoid stale data
redirect_to @post
end
end
```
## Need help?
Get help from [the PlanetScale Support team](https://planetscale.com/contact?initial=support), or join our [Discord community](https://pscale.link/community) to see how others are using PlanetScale.
Your connection details will include:
* **Host**: the DNS name of your database endpoint
* **Username**: automatically formatted for routing to the correct `branch`
* **Password**: A securely generated password
* **Database**: `postgres` (default database)
* **Port**: `5432` (standard PostgreSQL port) or `6432` (for using [PgBouncer](/postgres/connecting/pgbouncer))
Create a new "Default role" in your PlanetScale CLI to create connection credentials for your database branch.
Run the following command to create the "Default role" for your database branch.
```bash theme={null}
pscale role reset-default
```
Record the "Host", "Username", and "Password" for the "Default role" somewhere secure.
Passwords are shown only once. If you lose your record of the password, you must [reset the password](/postgres/connecting/roles).
## Integrate with Rails
### Step 1: Install the pg gem
Add the `pg` gem to your Gemfile:
```ruby Gemfile theme={null}
gem "pg"
```
Then run:
```bash Terminal theme={null}
bundle install
```
### Step 2: Add credentials
We recommend using [Rails encrypted credentials](https://edgeguides.rubyonrails.org/security.html#custom-credentials) to store your database connection details securely.
```bash Terminal theme={null}
rails credentials:edit --environment production
```
Add the following, replacing the placeholders with the role credentials created in the previous section:
```yaml config/credentials/production.yml.enc theme={null}
planetscale:
username:
host:
port:
database:
password:
```
Choose the appropriate **port** for your use case. Learn more about [Direct vs PgBouncer connections](/postgres/connecting/quickstart#connection-types%3A-direct-vs-pgbouncer).
Port `6432` enables a lightweight connection pooler for PostgreSQL. This facilitates better performance when there are many simultaneous connections.
Port `5432` connects directly to PostgreSQL. Total connections are limited by your cluster's `max_connections` setting.
Both connection types will disconnect when your database restarts or handles a failover scenario.
### Step 3: Configure database.yml
Update your `config/database.yml` to use your PlanetScale credentials in production:
```yaml config/database.yml theme={null}
production:
<<: *default
adapter: postgresql
username: <%= Rails.application.credentials.planetscale&.fetch(:username) %>
password: <%= Rails.application.credentials.planetscale&.fetch(:password) %>
database: <%= Rails.application.credentials.planetscale&.fetch(:database) %>
host: <%= Rails.application.credentials.planetscale&.fetch(:host) %>
port: <%= Rails.application.credentials.planetscale&.fetch(:port) %>
sslmode: verify-full
```
If deploying to Heroku, add `sslrootcert: /etc/ssl/certs/ca-certificates.crt` to your configuration.
### Step 4: Run migrations
Run your migrations against PlanetScale to set up the schema:
```bash Terminal theme={null}
RAILS_ENV=production rails db:migrate
```
Verify the connection by opening a Rails console:
```bash Terminal theme={null}
RAILS_ENV=production rails console
> User.first
```
## Schema migrations
Running schema migrations safely is critical in production environments. Here are our recommendations for Rails applications.
### Run migrations during deployment
Schema migrations should run as part of your deployment process, before the new code is released. Most deployment platforms support running a release command:
```bash theme={null}
rails db:migrate
```
This ensures your database schema is updated before your application code starts serving requests.
### Use strong\_migrations
We recommend the [strong\_migrations](https://github.com/ankane/strong_migrations) gem to catch potentially dangerous migrations in development before they reach production.
```ruby Gemfile theme={null}
gem "strong_migrations"
```
After installing, run the generator:
```bash Terminal theme={null}
bundle install
rails generate strong_migrations:install
```
The gem will warn you about migrations that could cause downtime or lock tables for extended periods, such as adding an index without `CONCURRENTLY` or changing column types on large tables.
### Separate schema and code changes
For safer deployments, we recommend separating schema changes from code changes into different deployments:
1. **Schema-only deployment**: Contains only the migration file with no application code changes. Deploy this first.
2. **Code deployment**: Contains the application code that uses the new schema. Deploy after the schema change is live.
This approach makes it easier to roll back if something goes wrong and reduces the risk of deploying code that depends on schema changes that haven't been applied yet.
### Dropping columns and tables
When removing columns or tables, follow this process:
1. **Stop using the column**: Deploy code that no longer reads from or writes to the column.
2. **Verify with Insights**: Use [PlanetScale Insights](/postgres/monitoring/query-insights) to confirm no queries are accessing the column.
3. **Drop the column**: In a separate deployment, add the migration to remove the column.
This prevents errors from code trying to access columns that no longer exist.
## Connection management
Understanding how many database connections your Rails application uses is essential to avoid exhausting your connection pool.
### Calculating connections with Puma
If you're using Puma as your web server, the total number of database connections your application needs is:
```
Total connections = Puma workers × Puma threads
```
For example, with 4 workers and 5 threads per worker:
```
4 workers × 5 threads = 20 connections
```
If you also have Sidekiq or other background job processors, add their connection counts:
```
Total = (Puma workers × threads) + (Sidekiq processes × Sidekiq concurrency)
```
### Staying within limits
Your total connection count must stay below your Postgres cluster's `max_connections` setting. Check your current limit in the PlanetScale dashboard under cluster configuration.
Configure your Rails connection pool in `database.yml`:
```yaml config/database.yml theme={null}
production:
<<: *default
pool: <%= ENV.fetch("RAILS_MAX_THREADS") { 5 } %>
# ... other settings
```
### Use PgBouncer for scaling
If your application needs more connections than `max_connections` allows, we recommend using [PgBouncer](/postgres/connecting/pgbouncer). PlanetScale provides both a local PgBouncer (included with every database) and dedicated PgBouncers for higher connection counts.
To use PgBouncer, change your port from `5432` to `6432`:
```yaml config/credentials/production.yml.enc theme={null}
planetscale:
port: 6432
# ... other settings
```
This allows many application connections to share a smaller pool of database connections.
**Schema migrations must use direct connections.** Rails uses advisory locks during migrations, which require a persistent session. PgBouncer's transaction pooling mode doesn't support session-level advisory locks.
Update your `database.yml` to use direct connections (port `5432`) for migrations while your application uses PgBouncer:
```yaml config/database.yml theme={null}
production:
<<: *default
adapter: postgresql
username: <%= Rails.application.credentials.planetscale&.fetch(:username) %>
password: <%= Rails.application.credentials.planetscale&.fetch(:password) %>
database: <%= Rails.application.credentials.planetscale&.fetch(:database) %>
host: <%= Rails.application.credentials.planetscale&.fetch(:host) %>
port: <%= ENV.fetch("DATABASE_PORT") { Rails.application.credentials.planetscale&.fetch(:port) } %>
sslmode: verify-full
```
Then run migrations with a direct connection:
```bash Terminal theme={null}
DATABASE_PORT=5432 RAILS_ENV=production rails db:migrate
```
## Querying replicas
PlanetScale Postgres includes replicas that you can query directly to reduce load on your primary. Rails 6+ has built-in support for multiple databases, making it straightforward to route read queries to replicas.
### Connection options for replicas
There are two ways to connect to replicas:
| Method | Port | Username suffix | Connection pooling | Replica routing |
| :-------------------------- | :----- | :----------------- | :----------------- | :---------------- |
| Direct connection | `5432` | `\|replica` | No | Single replica |
| Dedicated replica PgBouncer | `6432` | `\|pgbouncer-name` | Yes | Multiple replicas |
**Direct connections** work well for all traffic types and are simpler to set up. The tradeoff is that each connection goes to a single replica rather than being distributed, and you're limited by `max_connections` since there's no connection pooling.
**Dedicated replica PgBouncers** provide connection pooling and route queries across your replica nodes, allowing your application to scale beyond `max_connections`. This is the better choice when you have high read traffic or many application instances connecting to replicas.
The local PgBouncer (port `6432`) does not support replica routing. To get connection pooling for replica traffic, create a [dedicated replica PgBouncer](/postgres/connecting/pgbouncer#dedicated-replica-pgbouncers) in the PlanetScale dashboard.
### Step 1: Configure database.yml
Add a replica configuration. The example below uses a direct connection with the `|replica` suffix:
If you configure Rails with `DATABASE_URL` (URI format), URL-encode the pipe character in username suffixes. For example, use `%7Creplica` instead of `|replica`:
```text theme={null}
DATABASE_URL=postgresql://postgres.%7Creplica:pscale_pw_xxx@:5432/?sslmode=verify-full&sslrootcert=/etc/ssl/certs/ca-certificates.crt
```
```yaml config/database.yml theme={null}
production:
primary:
<<: *default
adapter: postgresql
username: <%= Rails.application.credentials.planetscale&.fetch(:username) %>
password: <%= Rails.application.credentials.planetscale&.fetch(:password) %>
database: <%= Rails.application.credentials.planetscale&.fetch(:database) %>
host: <%= Rails.application.credentials.planetscale&.fetch(:host) %>
port: 5432
sslmode: verify-full
primary_replica:
<<: *default
adapter: postgresql
username: <%= Rails.application.credentials.planetscale&.fetch(:username) %>|replica
password: <%= Rails.application.credentials.planetscale&.fetch(:password) %>
database: <%= Rails.application.credentials.planetscale&.fetch(:database) %>
host: <%= Rails.application.credentials.planetscale&.fetch(:host) %>
port: 5432
sslmode: verify-full
replica: true
```
**Using a dedicated replica PgBouncer?** Replace `|replica` with your PgBouncer name (e.g., `|read-pool`) and change the port to `6432`. This gives you connection pooling for replica traffic, which is ideal for high-traffic read workloads.
### Step 2: Configure ApplicationRecord
Update your `ApplicationRecord` to use multiple databases:
```ruby app/models/application_record.rb theme={null}
class ApplicationRecord < ActiveRecord::Base
primary_abstract_class
connects_to database: { writing: :primary, reading: :primary_replica }
end
```
### Step 3: Query the replica
Use `connected_to` to explicitly route queries to the replica:
```ruby theme={null}
class UsersController < ApplicationController
def index
# This query runs against the replica
@users = ActiveRecord::Base.connected_to(role: :reading) do
User.where(active: true).order(:created_at)
end
end
end
```
You can also enable [automatic connection switching](https://guides.rubyonrails.org/active_record_multiple_databases.html#activating-automatic-role-switching) in Rails to route GET and HEAD requests to the replica automatically.
### When to use replicas
Replicas are useful for offloading read-heavy workloads from the primary. Some examples:
* **Scheduled and background jobs**: Sidekiq jobs, cron tasks, or batch processing that read data.
* **Analytics and reporting**: Aggregations, reports, or dashboards that run expensive queries.
* **Search features**: Full-text search or filtering that scans large datasets.
* **Read-only views**: Serving data to logged-out users or public pages where [replication lag](/postgres/scaling/replicas#data-consistency-and-replication-lag) is acceptable.
* **Debugging and one-off queries**: Running queries against production data without impacting the primary.
### Avoiding read-your-own-writes issues
Due to replication lag, data written to the primary may not be immediately available on replicas. This can cause issues where a user creates a record and then can't see it.
Rails automatic connection switching handles this by sticking to the primary for a configurable delay after writes. If you're manually routing queries, ensure you read from the primary immediately after writes:
```ruby theme={null}
class PostsController < ApplicationController
def create
@post = Post.create!(post_params)
# Read from primary to avoid stale data
redirect_to @post
end
end
```
## Need help?
Get help from [the PlanetScale Support team](https://planetscale.com/contact?initial=support), or join our [Discord community](https://pscale.link/community) to see how others are using PlanetScale.