How PlanetScale Managed and AWS PrivateLink work
Broadly speaking, there are three major components to this PrivateLink setup:- A VPC Endpoint Service conceptually lives in the producer’s VPC and AWS account. Once configured, it allows authorized principals (e.g. AWS accounts, IAM users) to establish a connection to an existing VPC Endpoint Service ID.
- A VPC Endpoint Interface exists on the consumer side, and once configured with an endpoint service address exposes an internal IP address and port which consumers may use for cross-account communication.
- A Network Load Balancer (NLB) is created on the producer side, and by managing the IP target group on this NLB you can choose which internal services to expose via the PrivateLink Endpoint Service.
Starting state
Below is a simplified diagram of our initial state. We’ve got two separate accounts, each with their own VPCs and availability zones. We’re using AWS AZ IDs as well as of AZ names to ensure that we’re always referring to the correct AZ, as AZ names are not consistent across AWS accounts. On the producer side, we have a network subnet inside each AZ.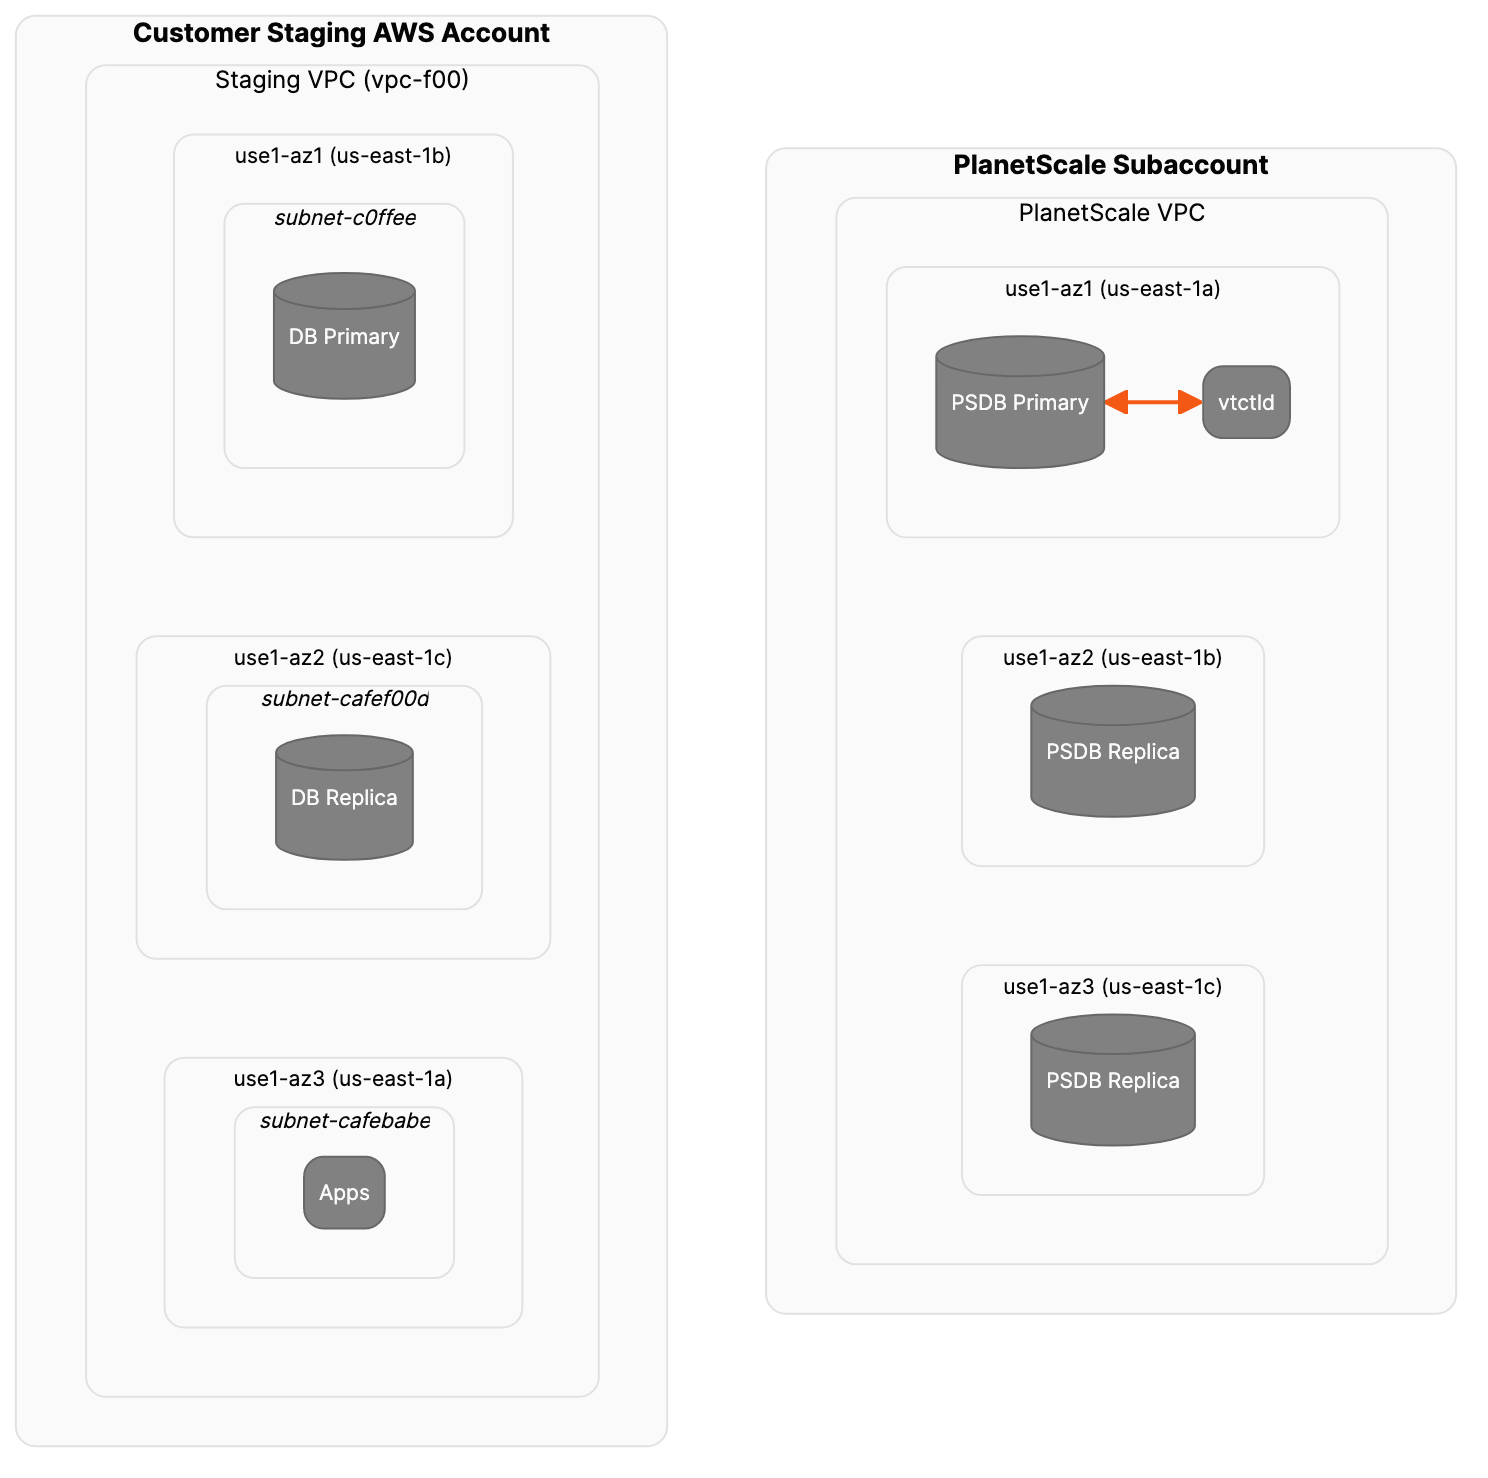
Create and configure the NLB
First, create the Network Load Balancer in the producer AWS account. You want the NLB to be available in each of the three AZs that the two accounts share. This is done by adding the ids of the three subnets associated with those AZs using the--subnets option.
TCP:3306 for MySQL or TCP:5432 for Postgres). This command will return an ARN that uniquely identifies the newly created NLB. You’ll need this later.
Create an IP target group
Run the following to create an empty IP target group on the appropriate port (e.g.TCP:3306 for MySQL, TCP:5432 for Postgres) in the producer VPC:
Register a target
This step adds the IP address of the existing Primary RDS instance to the target group. You want to make sure that only the RDS writer is registered as a target.Create a listener
Finally, associate the target group NLB by creating a listener.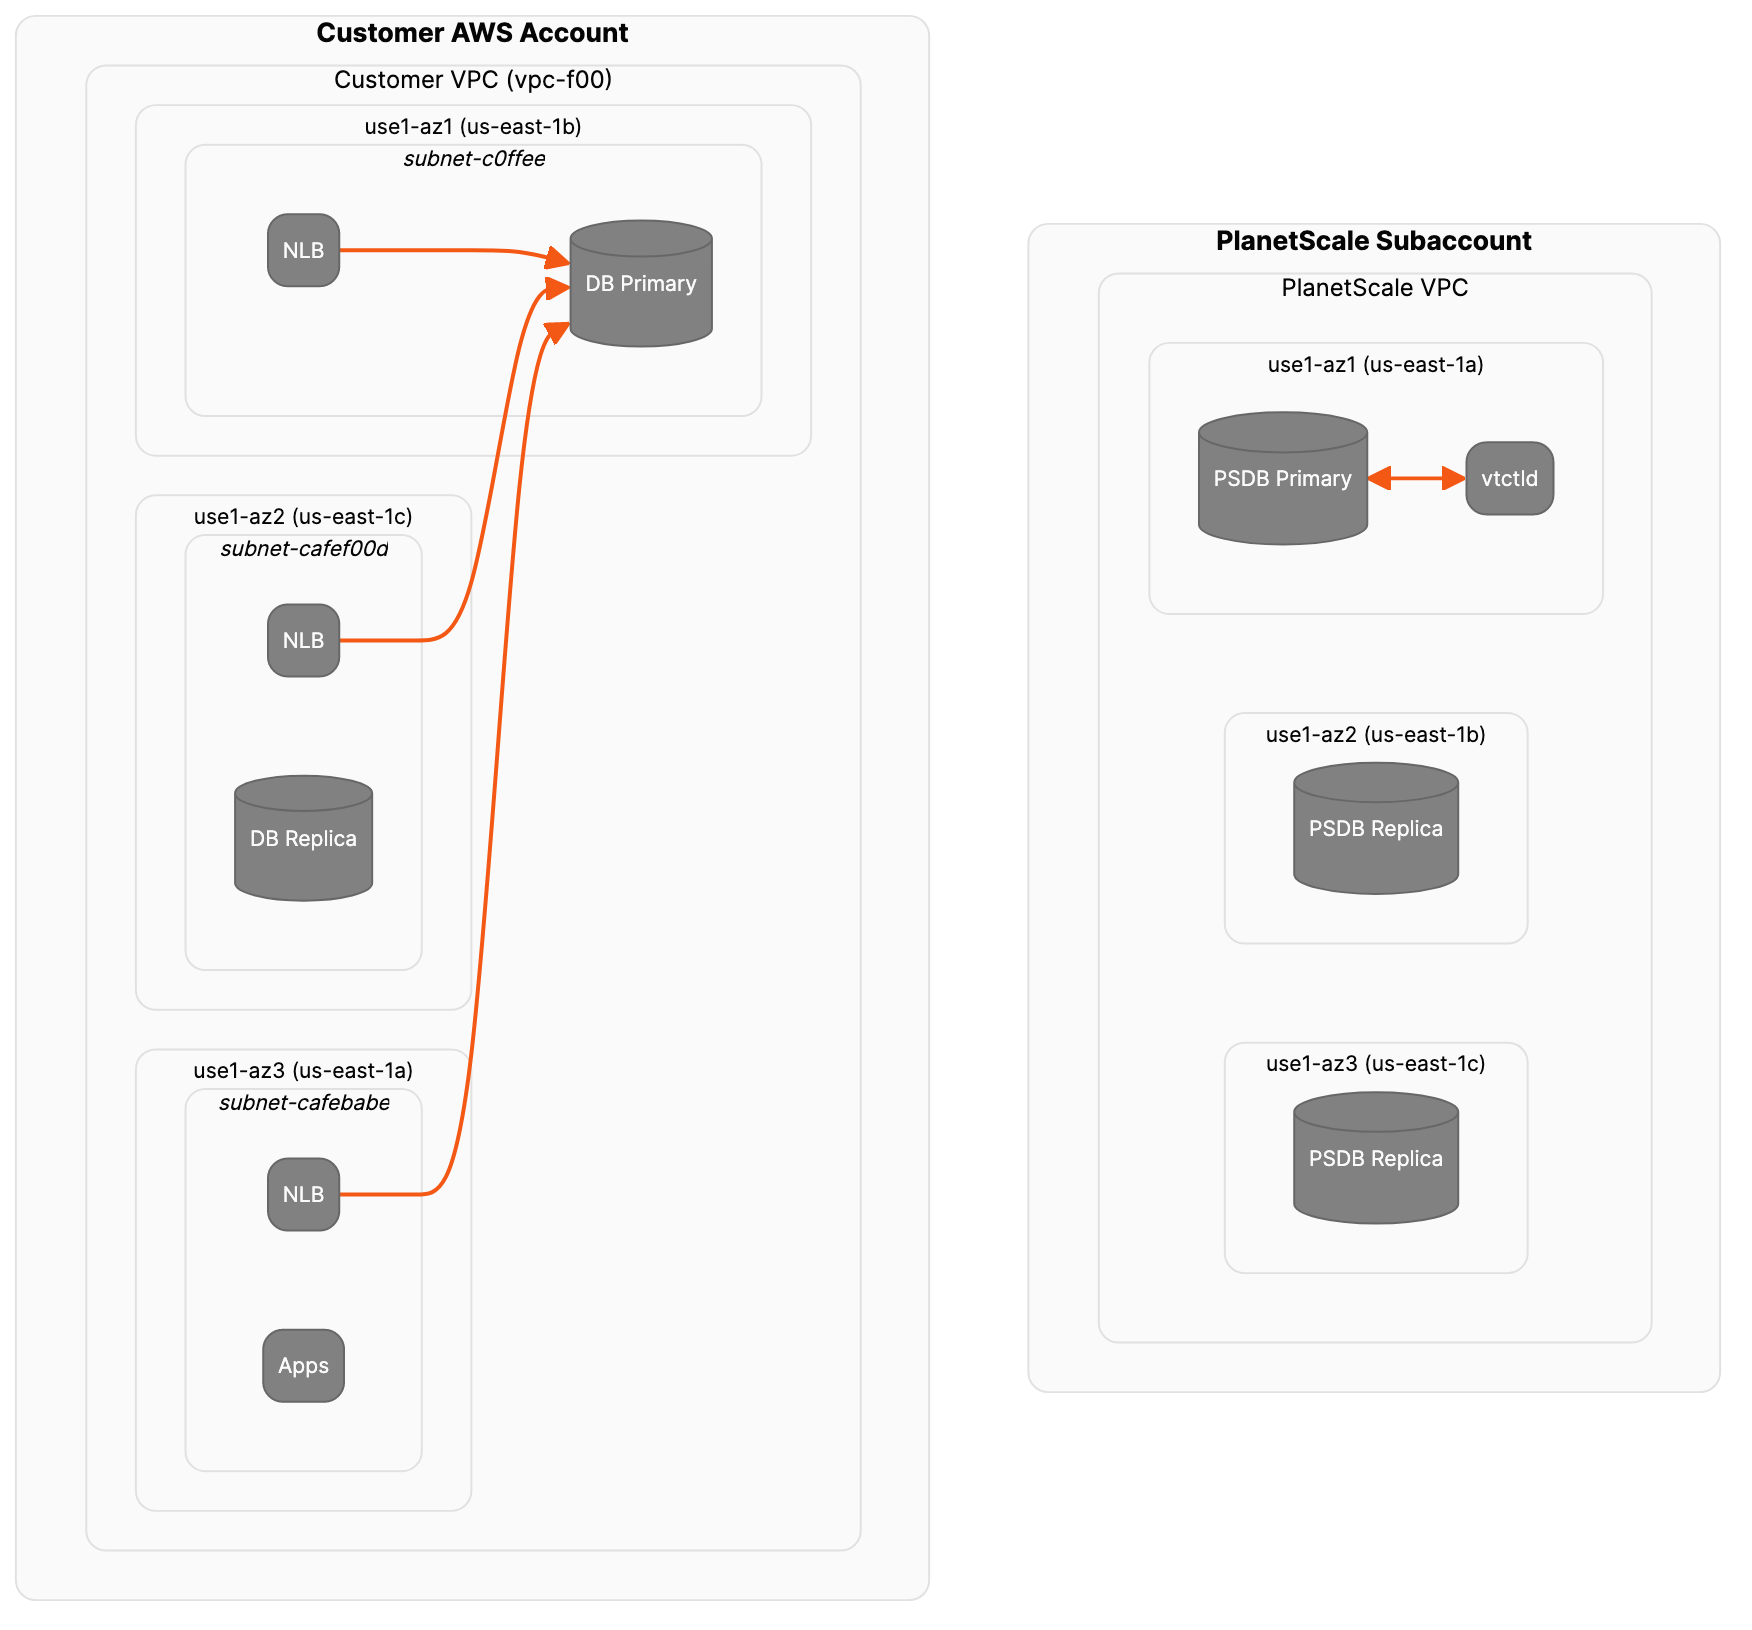
Create and configure the PrivateLink VPC Endpoint Service
Now, let’s configure the endpoint service. You’ll need the ARN of your load balancer for this.Allow inbound traffic from VPC’s subnet
After setting up the NLB and the VPC Endpoint Service, you need to ensure that the security group attached to the NLB permits inbound traffic from the subnet(s) of the consumer VPC where the interface VPC endpoint resides.Edit Inbound Rules:
- Protocol: TCP
- Port Range: Specify the port your database is listening on (default is 3306 for MySQL, 5432 for Postgres)
- Source: Enter the CIDR block of the consumer VPC’s subnet (e.g., 10.0.1.0/24)
Configure service permissions
You only want to allow incoming connections on this endpoint service from the PlanetScale Managed AWS Organizations member account. This step requires the account number.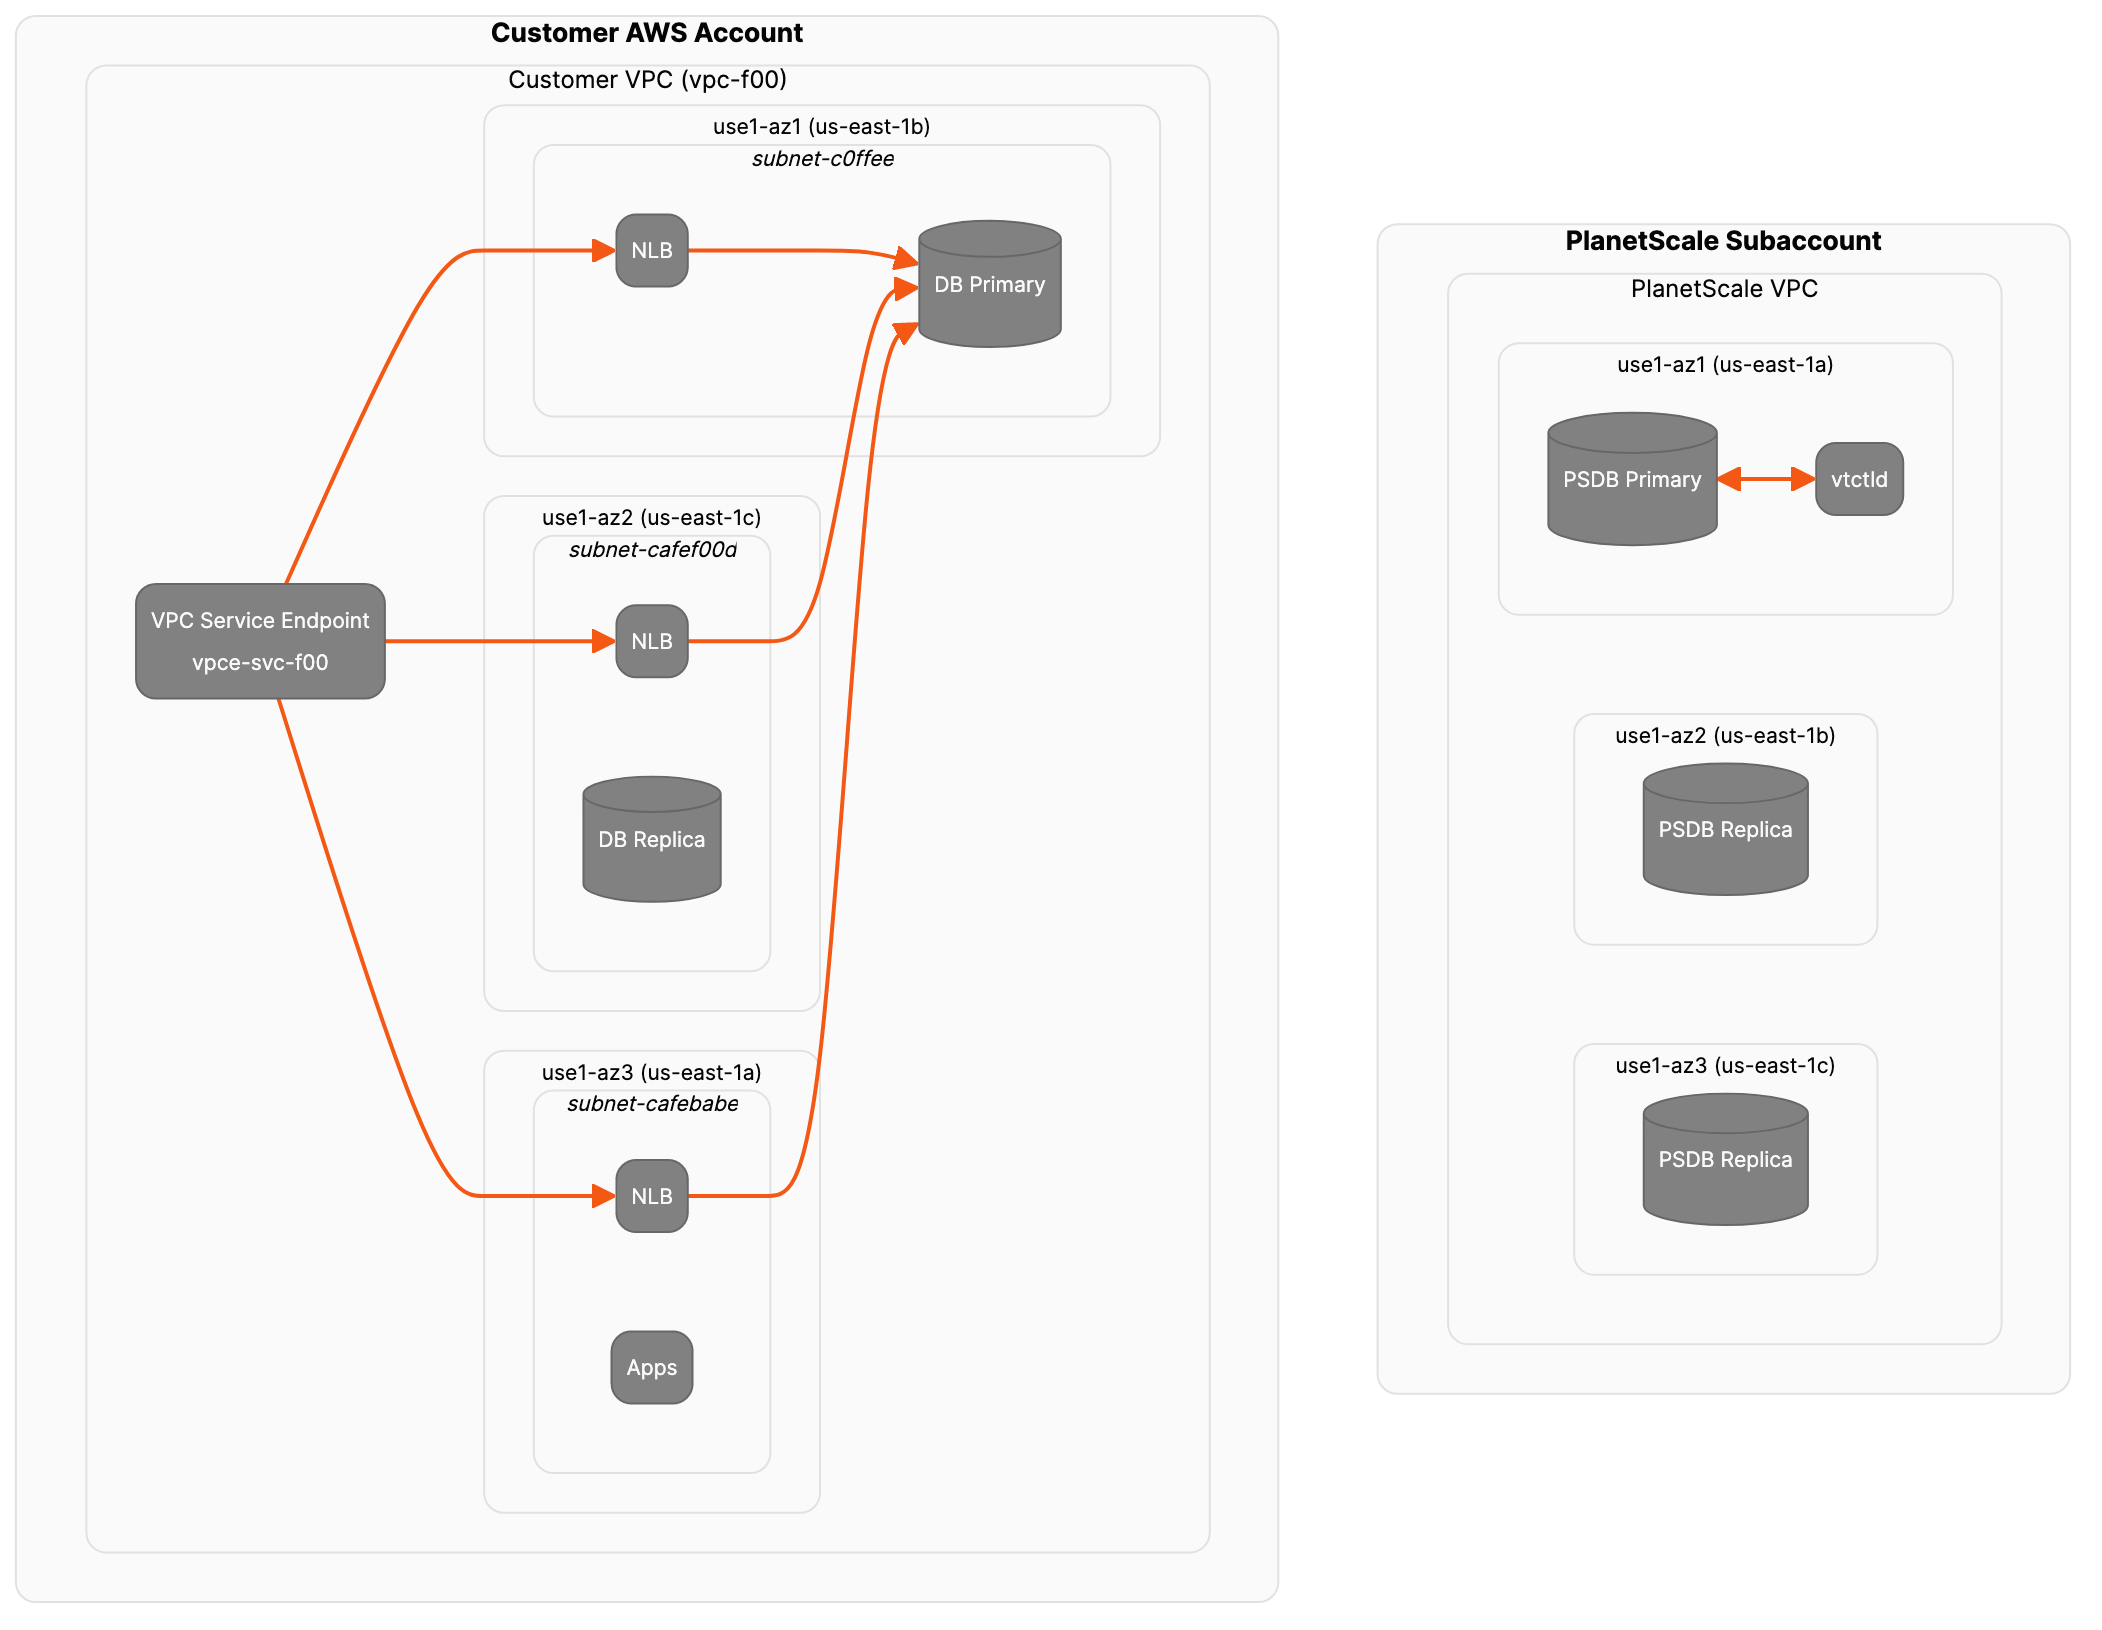
Wrapping Up
Once you’ve communicated your newly created VPC Service Endpoint ID to your Solutions Engineer, the PlanetScale Engineering team can then complete the rest of the process. This involves creating, configuring, and testing the PrivateLink VPC Interface Endpoint. The diagram below illustrates the completed system.